
Gittorr
A total amateur noob builds a rather advanced guitar
Foreword:
I originally wrote this in 2023 or early 2024 and published it on a forum (where I no longer have an account), then modified it at the request of a friend who wanted to publish it in his magazine, though I don’t think it ever was. So it’s sat for a while, but in the interests of being able to share it freely I have reproduced it here.
Introduction
I started writing this essay with the intent of documenting a brand new, one-time experience: building a guitar. But within this experience I’d also begun to notice other things that seemed worth writing down, and over time it became about something bigger than just my foray into luthiery. So although building a guitar is the object-level focus of this piece and I won’t shy away from dragging readers through the technical details, this is really about creativity, problem- solving, learning, discipline, and introspection, not necessarily in that order. I hope it will on some level be of interest to just about anyone regardless whether they are into music and/or building things.
That said, I know much of this will be dense with strange nouns and esoteric logic. If your eyes start to glaze over, it’s alright: you’re probably safe to just skip to the next paragraph or wherever it seems to turn back into English, where I’ve tried to make sure I confined the most important bits. Also, it might help to glance over this diagram of a guitar’s basic anatomy:
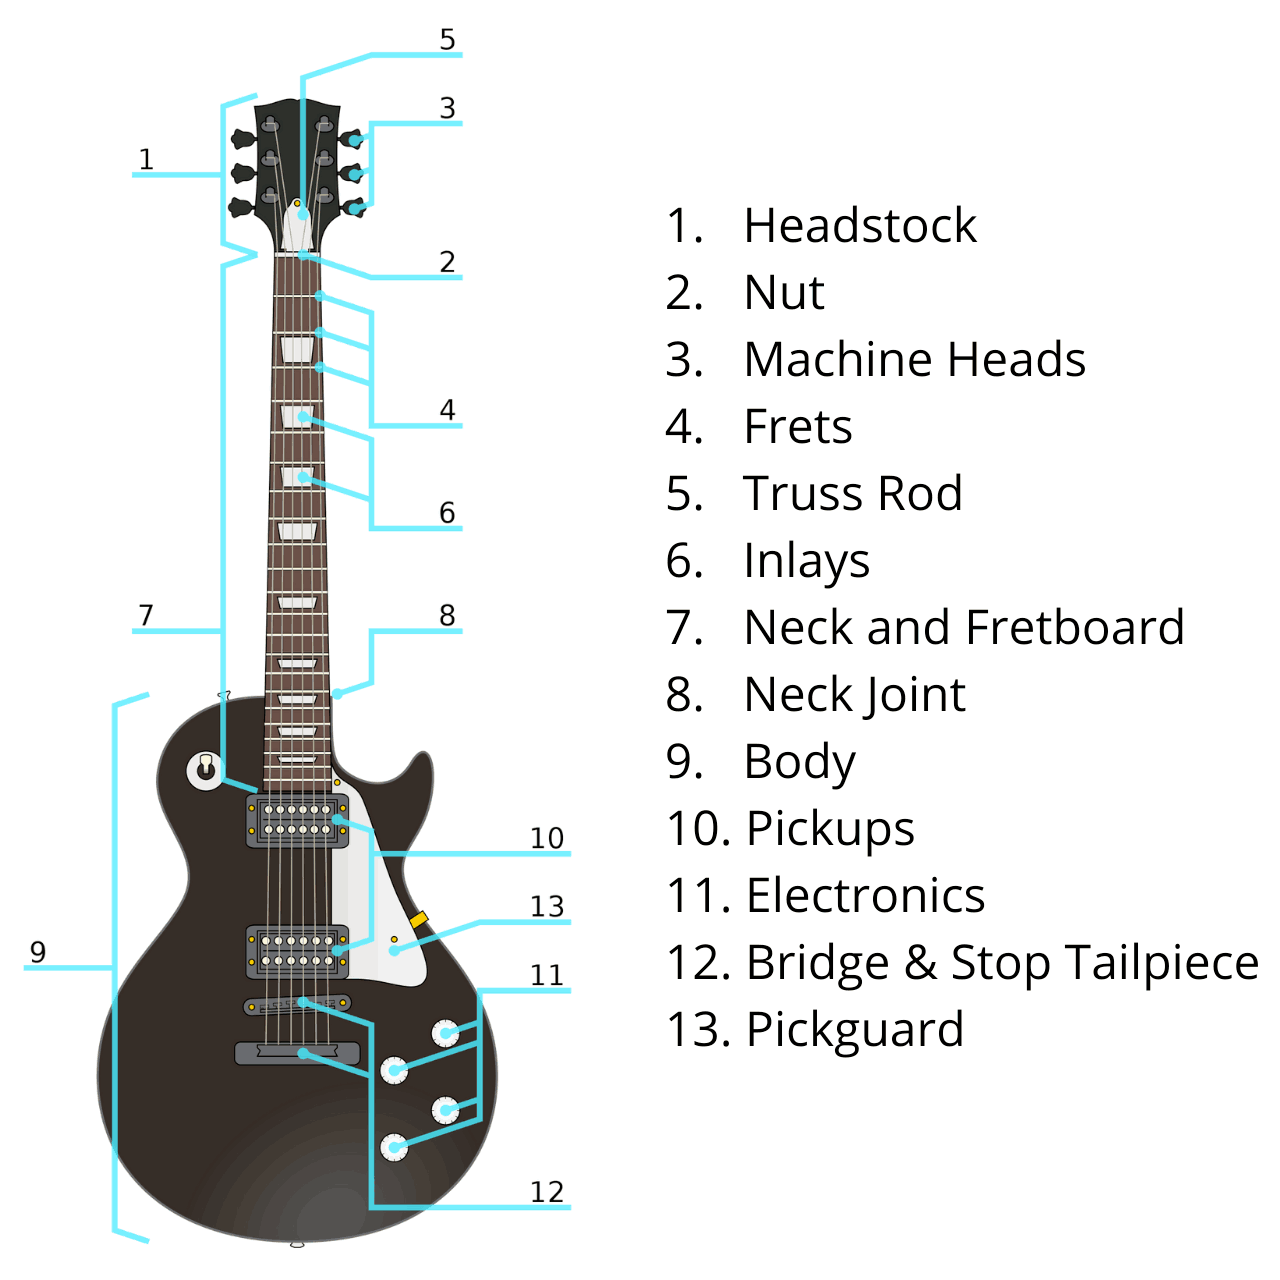
Credit: https://www.allstringed.com/wp-content/uploads/Parts-Electric-Guitar.png
What the diagram calls “machine heads” (3) are also sometimes called tuners or tuning machines. In this essay I call them tuners. What the diagram points to as “electronics” (11) are the electronic controls; the electrical components themselves are hidden inside a cavity directly behind the controls.
Chapter zero: Setting the stage
It being 2020, laid off and locked down, I was in the middle of going back through old songs I’d written over the years and, on a simple portable home setup, recording them as two albums of “demos” to share with friends and family.
Songs I’d written from age 16 to my early 20s I collected on the first album. Most of those songs featured clean (undistorted) guitar, melodic vocals, and understated bass, drums, and percussion. My songwriting during those years was eclectic and psychedelic. The second album consisted of songs I composed from my mid 20s through my early 30s. They mostly featured simpler arrangements of distorted guitar, aggressive vocals, bass, and drums. The songwriting still had plenty of eccentricity but it was pointier than before, the earnest start of my pursuit of musical “heaviness”.
Recording and producing put me in a songwriting mood so I was doing a lot of that too. As I wrote and recorded and mixed, I found that I yearned for access to wider extremes of guitar sounds, both softer and harsher than what I could readily emit at the time, and I wanted to be able to access those sounds without having to buy either an acoustic guitar or a different electric guitar, and certainly without having to buy both.
As for the guitars I had, I was frustrated with & sick of the first one, a cheap Ibanez GAX-70 I’d bought brand new back in 1999. It felt great in my hands (after all, it was my first guitar–I’d learned to play on it; it was literally my first guitar) but it didn’t sound great and I didn’t like the way it looked anymore either. I intuited an axiom that I didn’t hear elsewhere until much later: part of getting better at guitar is having a guitar you want to play.
This axiom was essentially the intention behind my other guitar, nicknamed Ship of Theseus (SoT). It started as a cheap thing from China, into which I was gradually swapping better parts one at a time. But it used to have a different nickname: Problem Child. It only became playable and decent-sounding partway through recording the second album.
Once the new pickups and bridge were in the SoT guitar and I’d filed the frets a bit I was quite happy with it, but by then I’d optimized it for the distorted drop-tuned riffs and swooping wails of my second album and some of my newer material; it was too overspecialized to give me the flexibility I wanted next. (Which is fine; specializing it the way I did was the right call at the time, and it still comes in handy.)
So, the thought formed in my head, I would replace my beginner guitar, which I was thoroughly out of love with, with a new one that I would build from scratch exactly the way I wanted.
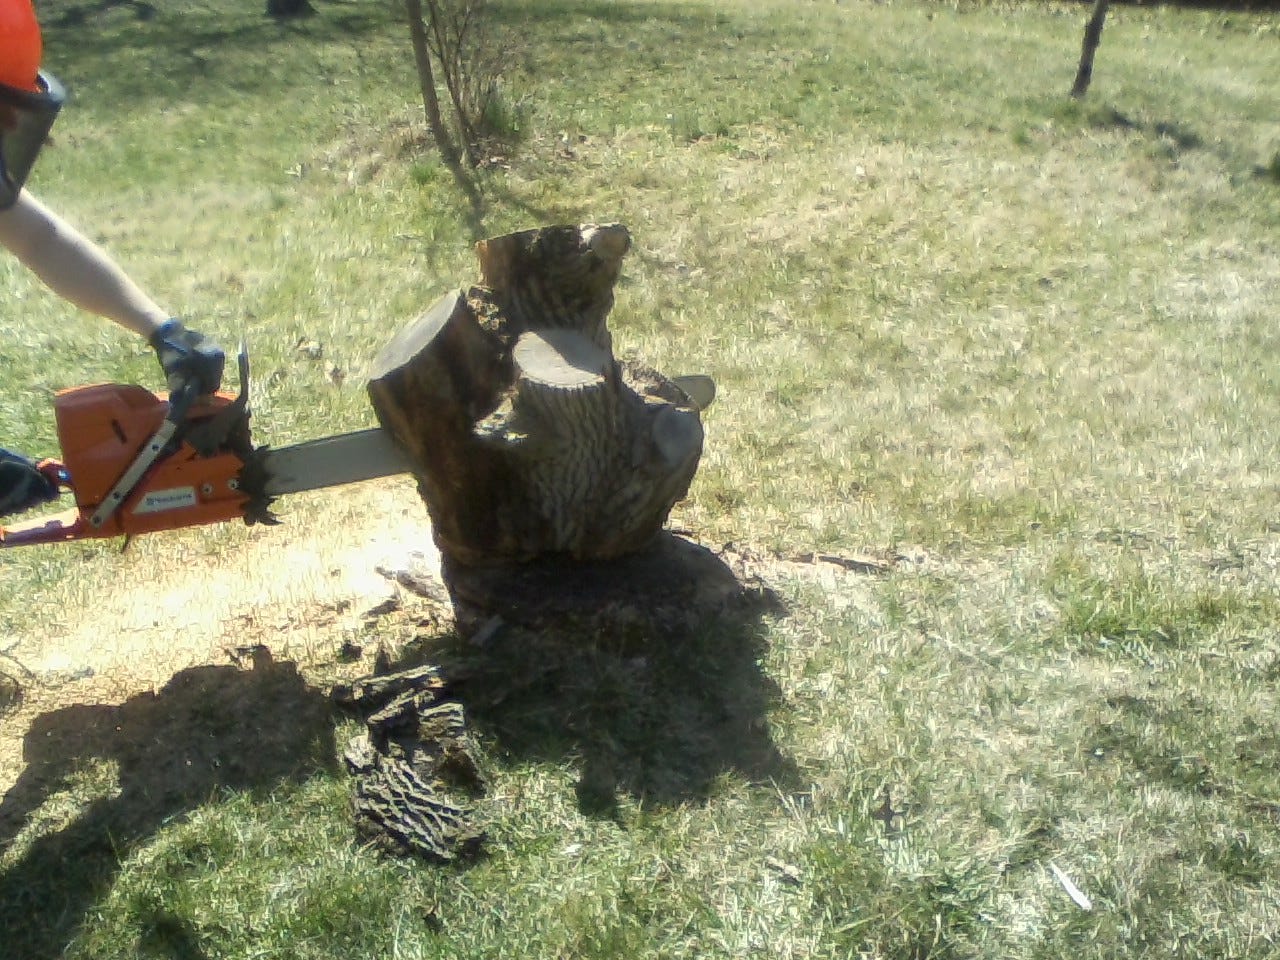
That happened around the same time an ailing silver maple in my back yard departed this world, leaving behind a 30-foot tall corpse.
It had been struck by lightning sometime before I bought the house in 2017, and I guess it finally succumbed to its injuries the year of the pandemic. Not wanting it to fall on my bedroom, I cut it down branch by branch using a handsaw, an 8’ ladder, and a length of rope.
Over the preceding years I had started getting interested in woodworking, and imagined there’d be some pretty cool grain patterns in the big joint where the trunk split off into the main branches. I turned the whole tree into firewood except for that joint, which I retained on a paver outside my window. It sat there the rest of summer and through fall.
Chapter one: A big idea borne of even bigger
ignorance
Making my own guitar was only a thought, and stayed that way for a long time. Its one physical manifestation was that when we moved to our current house at the end of 2020, I brought the hunk of maple with me.
Our new back yard bordered that of neighbor, Ed. (That’s not even close to his real name.) I met Ed on my third or fourth visit to the house, after we’d gotten the keys but before we’d moved in. Ed’s and my shared interests were providential, and included, among other things, music and woodworking. We became friends immediately.
He’s a much more skilled & experienced woodworker than I am, with a well-outfitted shop in his basement he was happy to let me use, as well as a garage full of lumber he’d milled himself from trees that had fallen in the area. He even had some guitar tech experience from a previous career working in music stores. Best of all was his endless patience. He was supportive of my idea to build the guitar; he cut my hunk of maple into slabs for me and showed me how to set them out to dry.
As I started dreaming in more detail about this new guitar I increasingly realized how little I knew about those details. In most cases the details themselves had their own details I didn’t even know existed. I was also ignorant about about what made guitars sound and feel the way they do. For instance, why did different guitars look and sound and play so differently? It turns out their differences aren’t entirely just aesthetic. With the help of Youtube and online forums I started gathering information and learning possibilities.
While learning about and considering the ergonomics and practicalities of different body and headstock shapes and electronics configurations, I became aware of my own tastes too. I realized I didn’t like the look of inlays on a fretboard. Nor did I like pickguards. I was particular about headstock and body shapes, though I became less picky about the way pickups themselves looked. I discovered that I generally don’t like many visual aspects of conventional- looking guitars, including conventionally unconventional ones like the “Explorer” shape (top left below).
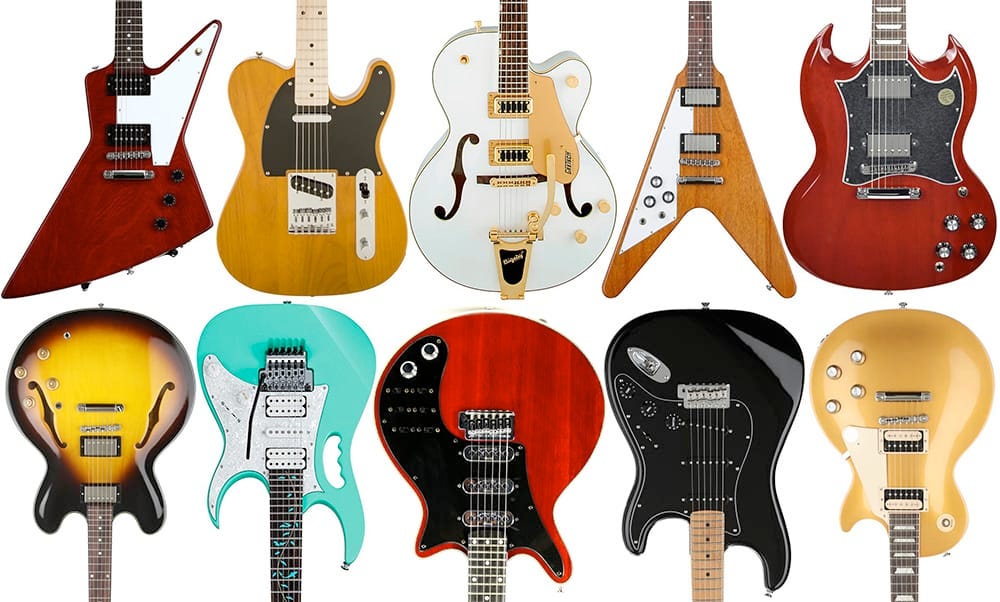
Credit: https://secureservercdn.net/160.153.137.170/72n.390.myftpupload.com/wp-content/uploads/ 2019/09/Guitar-Shapes-1.jpg?time=1598107355
I mean, they’re fine, I don’t wince when I see them or anything, and many of them are quite lovely really, but none of them fit me.
Chapter two: That body tho
These kinds of stray thoughts regularly wandered into my consciousness for about one and a half years, and actually started tormenting me until the summer of 2022, when I peeked under the tarp at my maple slab to discover it had been aggressively colonized by ants, and was still not dry enough to work with anyway.
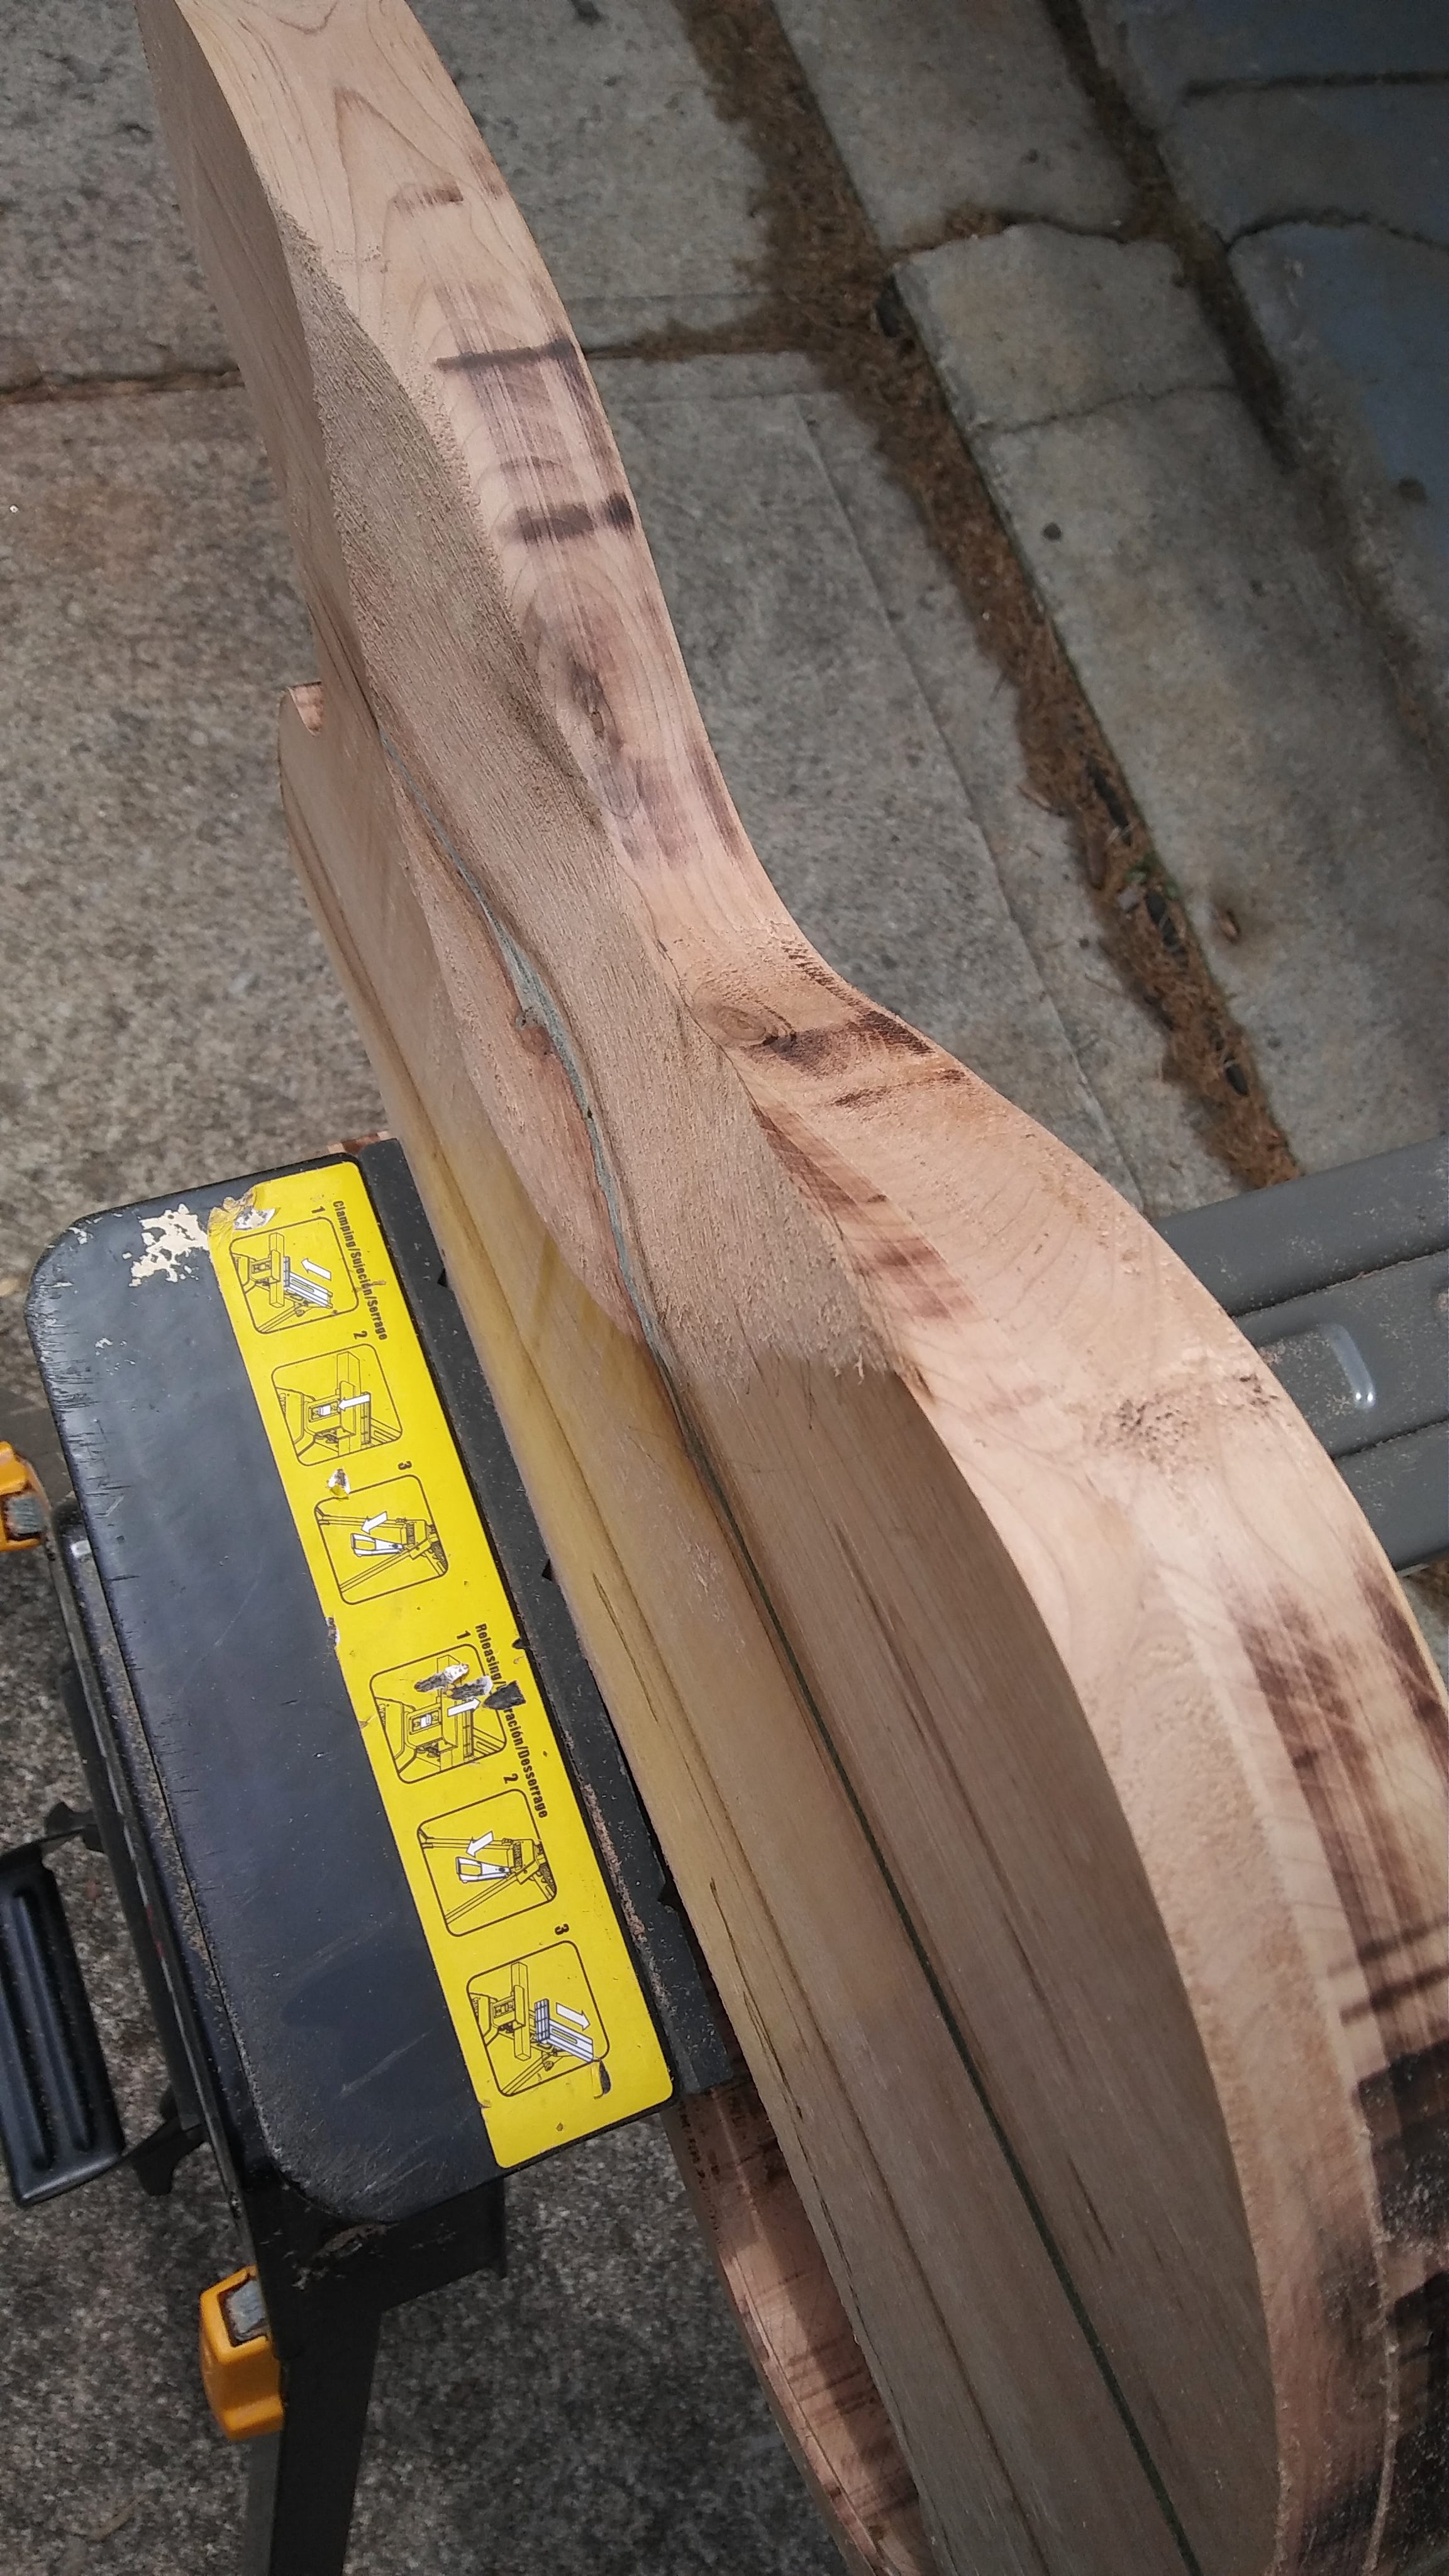
But by then I was set on building a guitar, and I was ready to start Now. Ed said he’d give me a great price on a slab of the same species from his garage. I mulled it over for a little while. Eventually, my eagerness defeated my inner purist, and I picked out a slab and wrote him a check for it.
The particular slab I chose came from a tree that had fallen in the yard of someone in Ed’s family. I don’t remember what I liked about it...maybe it just struck me as looking like it wasn’t going to give me a lot of problems.
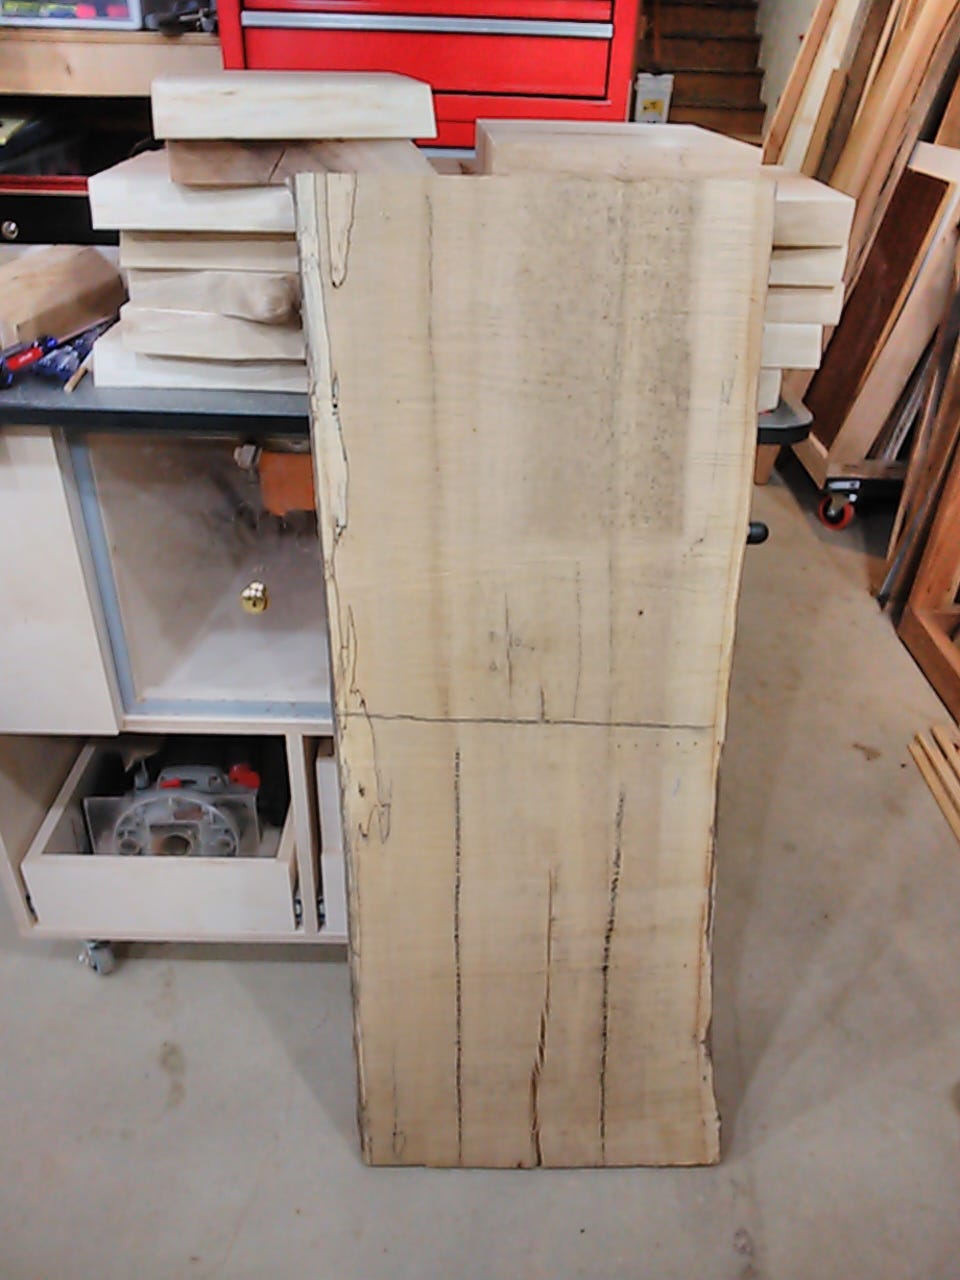
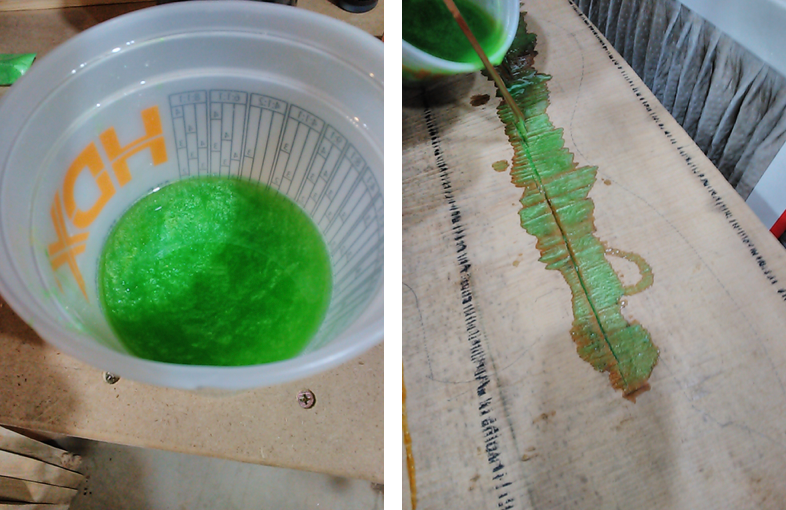
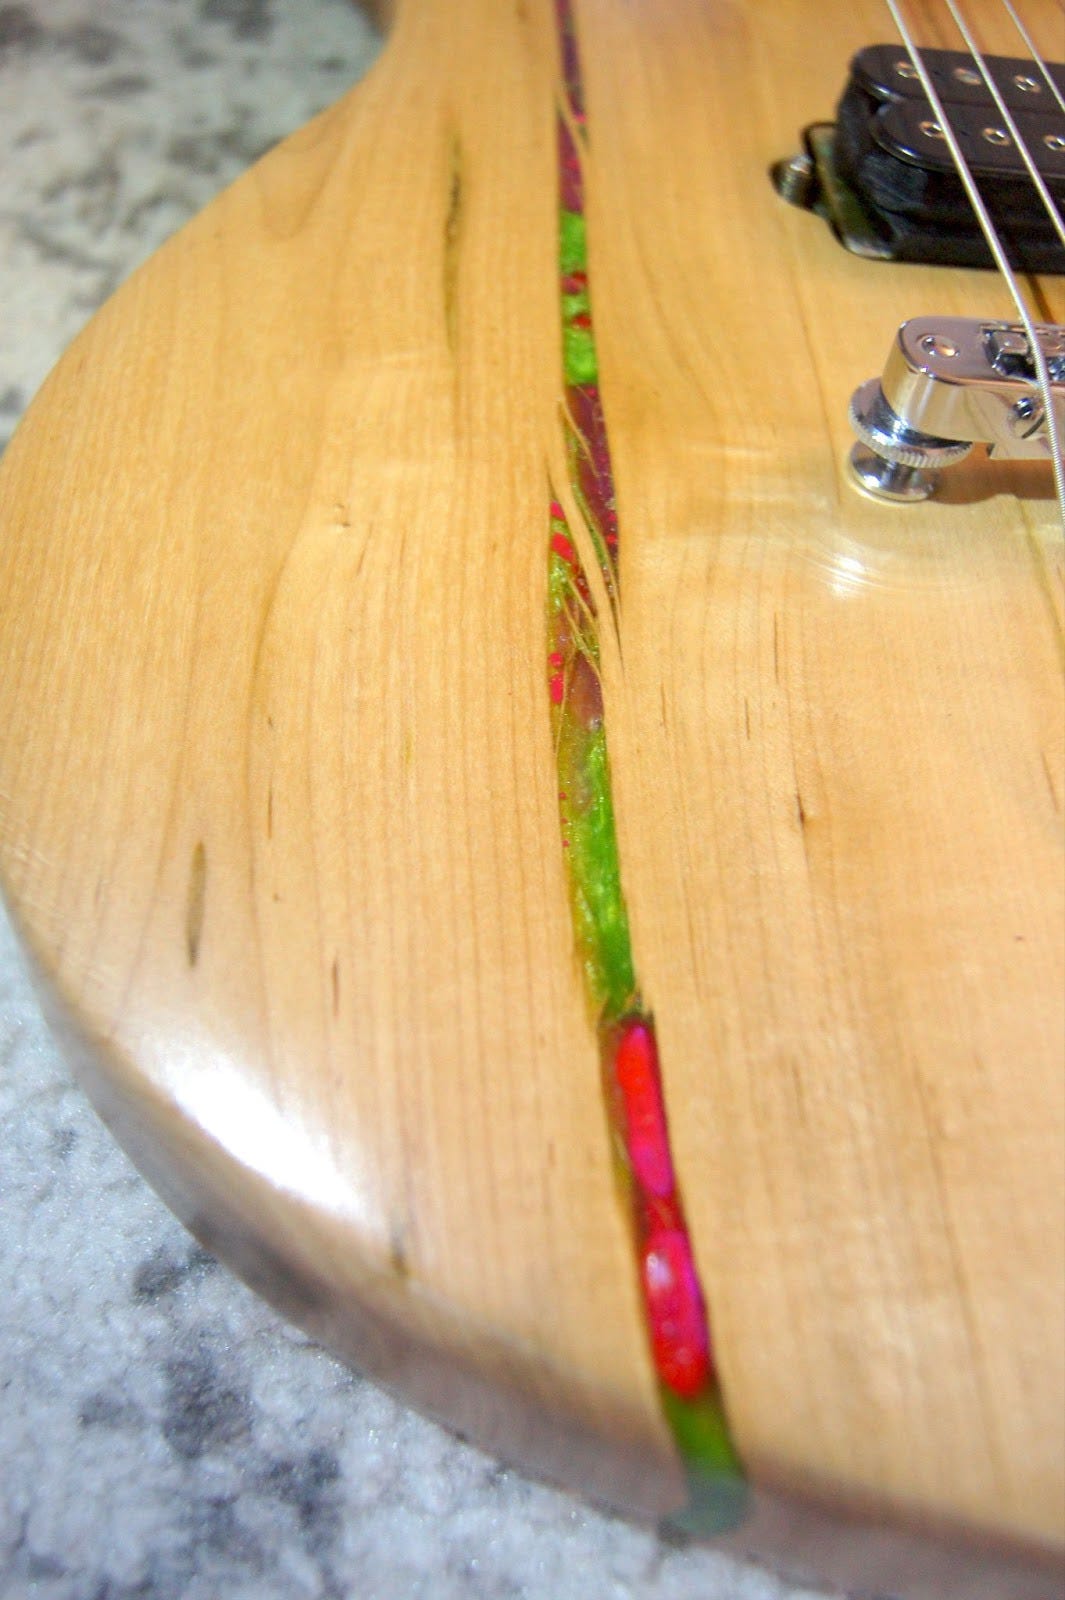
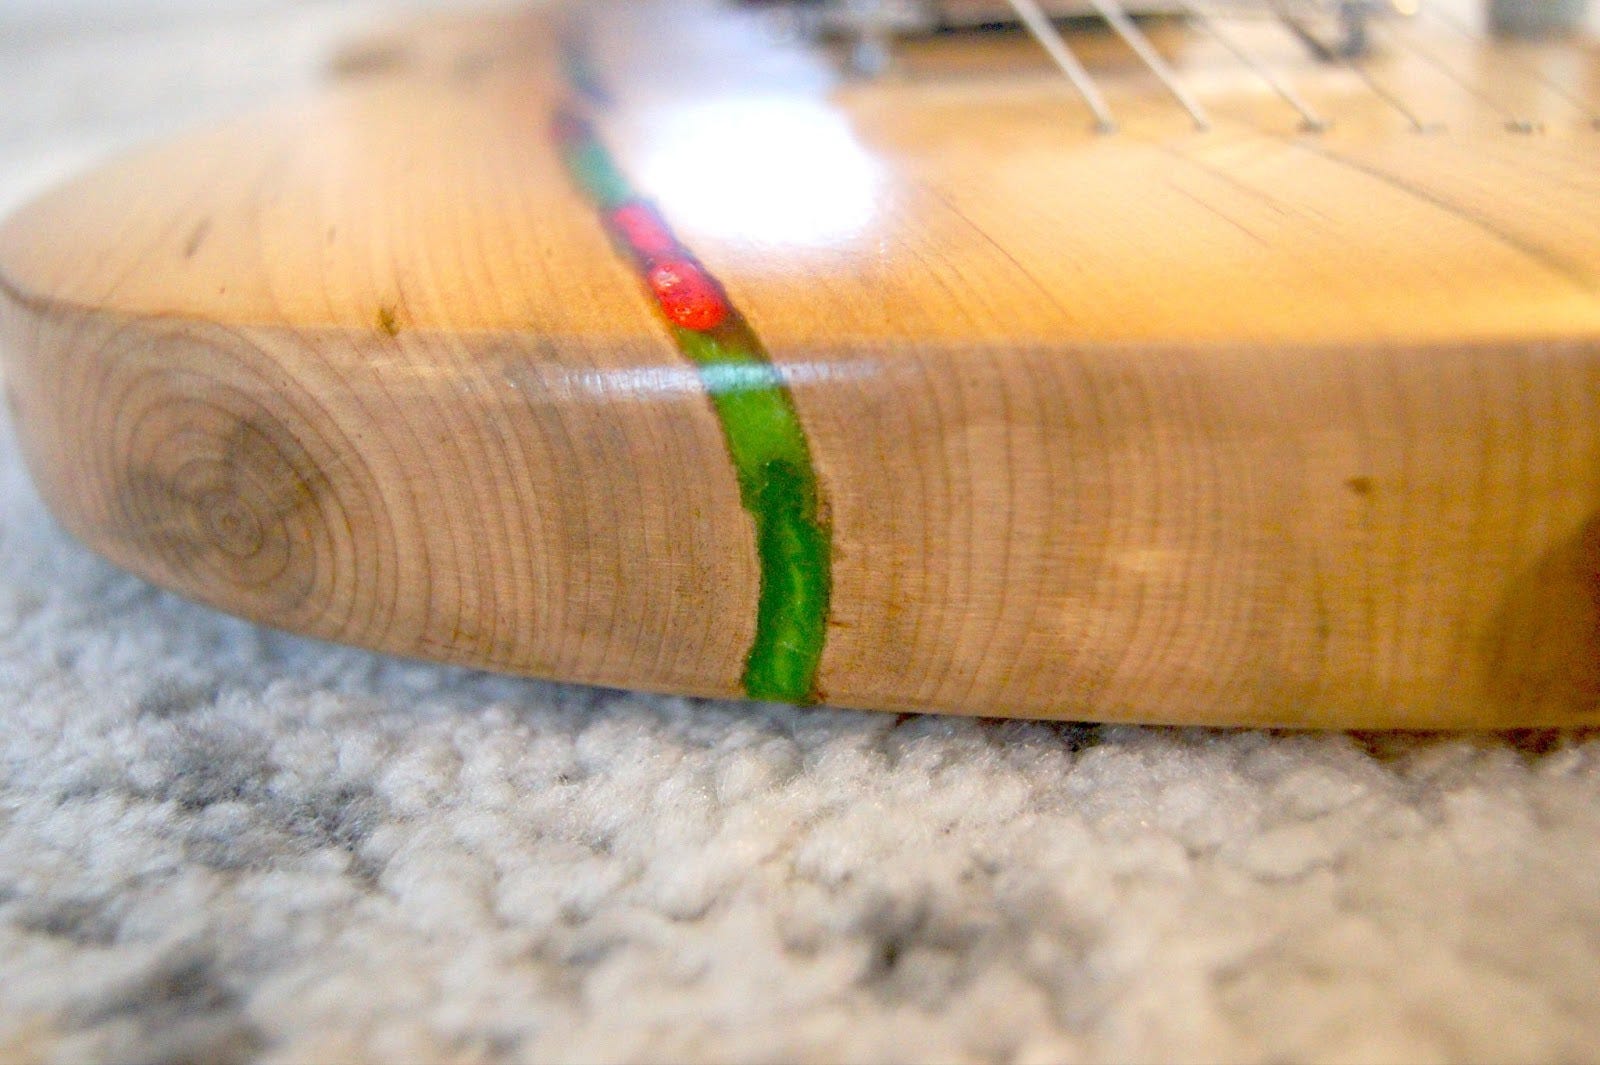
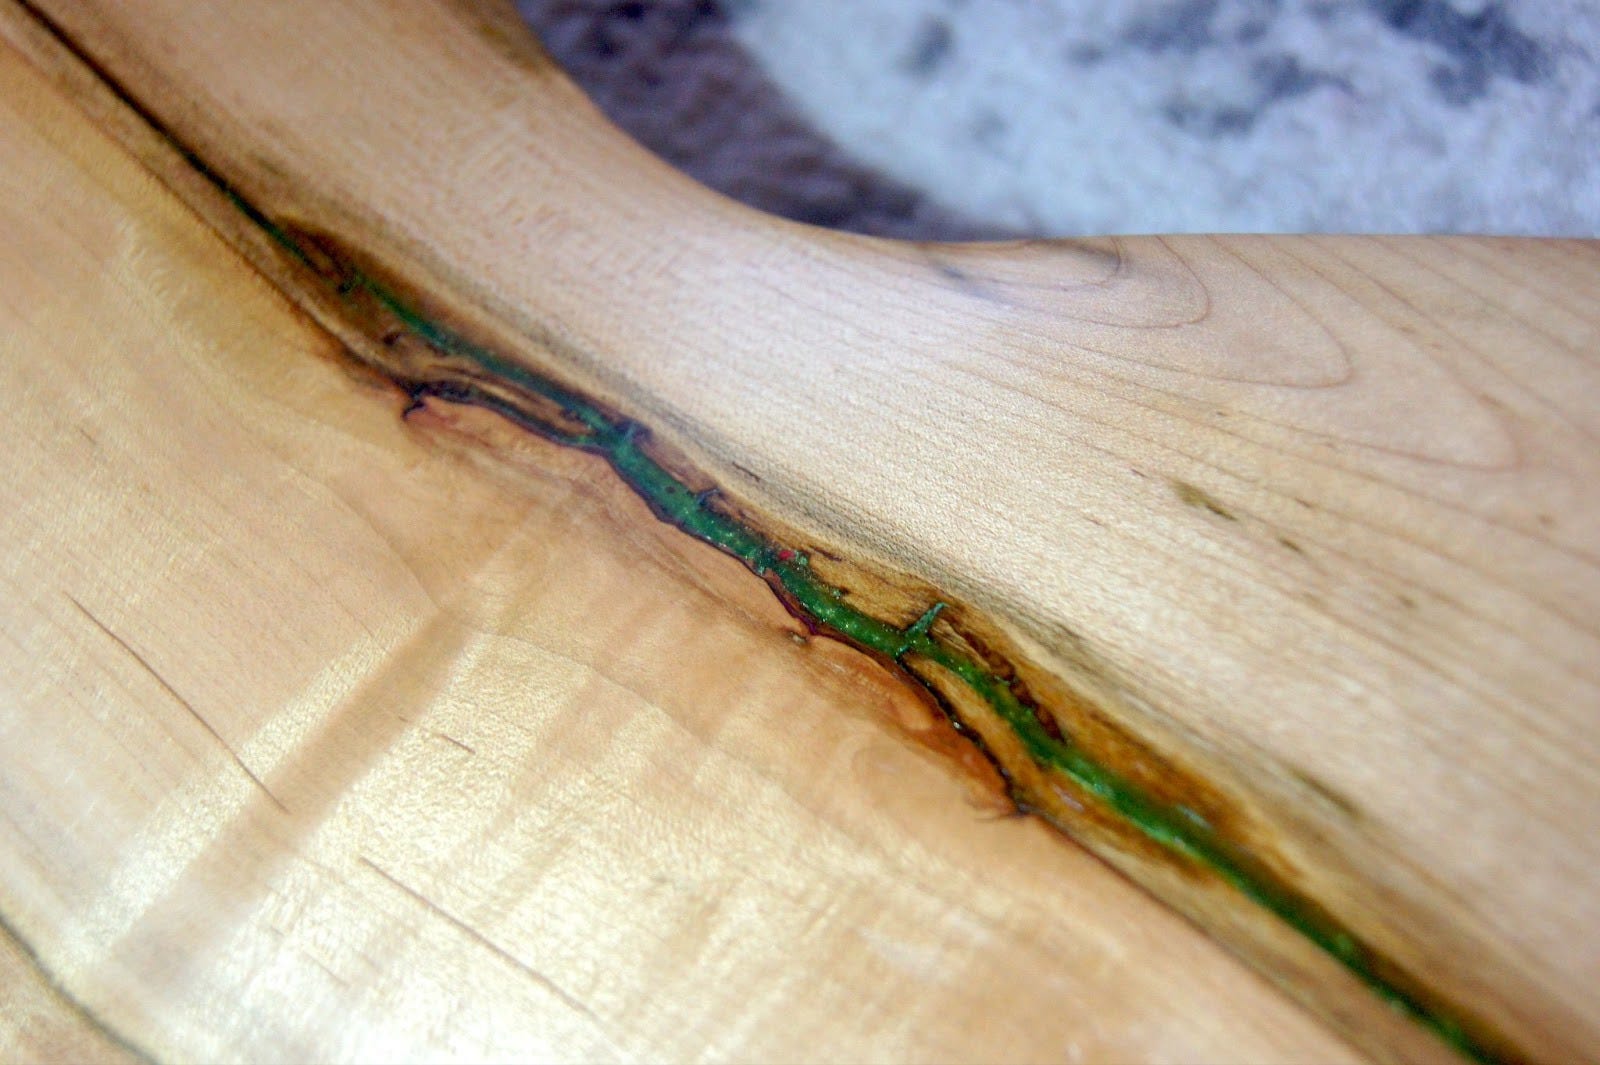
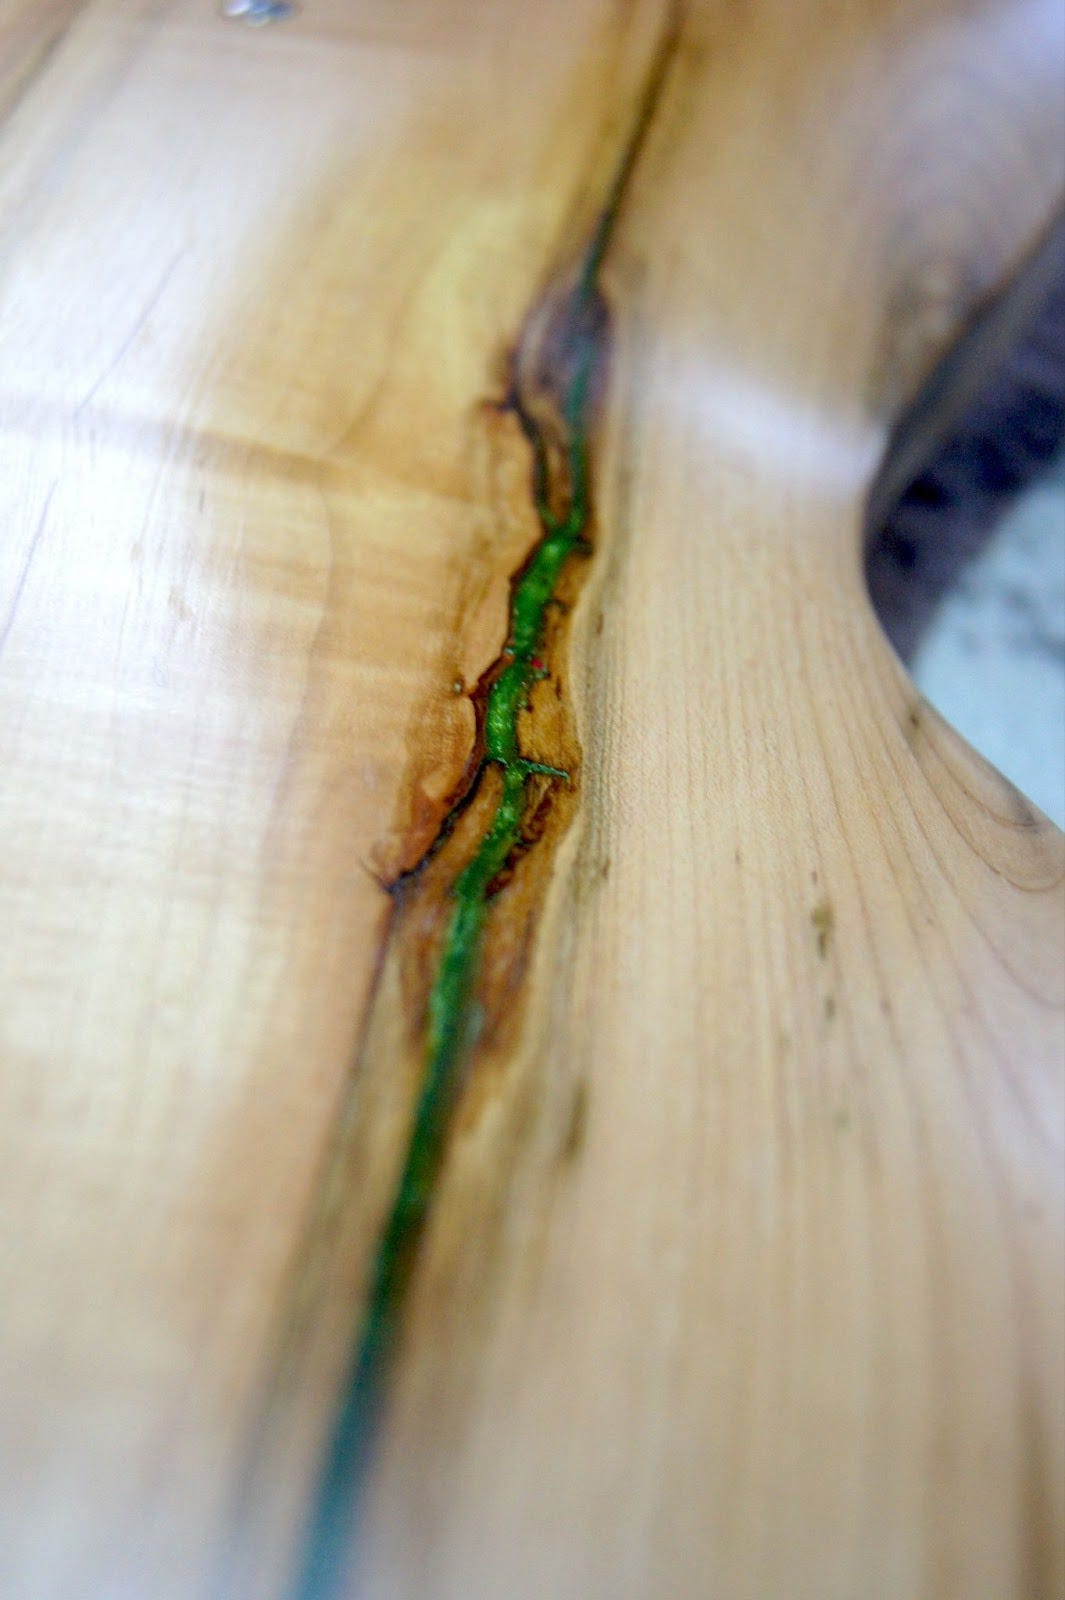
We ripped it, planed it, and filled the cracks with neon green and pink epoxy.
Why neon green pink and green, you ask? In the back of my mind I knew I was trying to approximate the toxic goo from “Who Framed Roger Rabbit”. Loud colors were fitting because my guitar, designed to emanate pleasant natural tones, would also harbor in its veins something to wake the neighbors.

Credit: https://img1.wikia.nocookie.net/__cb20130727170712/villains/images/thumb/2/26/Who-framed-roger-rabbit-disneyscreencaps.com-10944.jpg/1024px-Who-framed-roger-rabbit-disneyscreencaps.com-10944.jpg
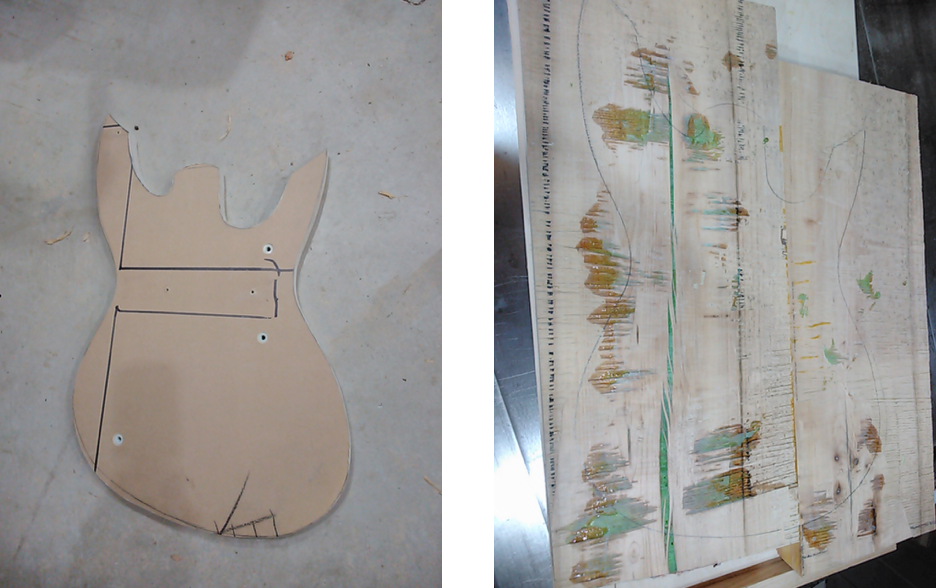
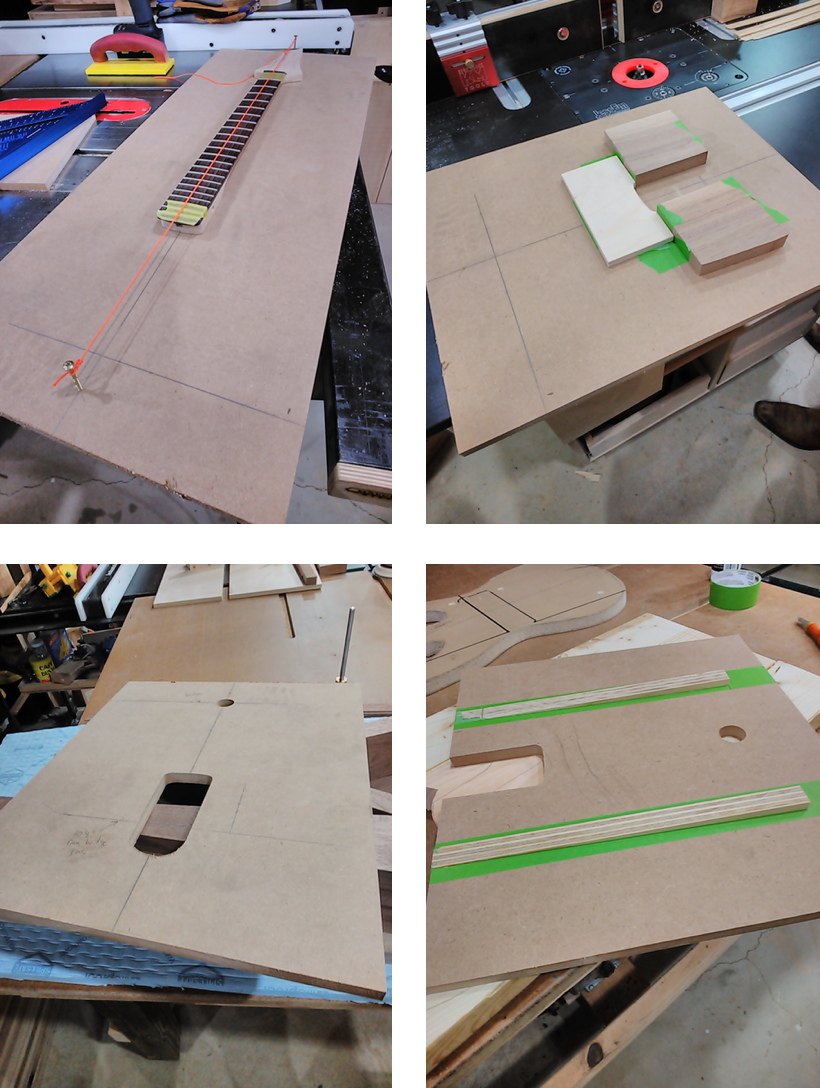
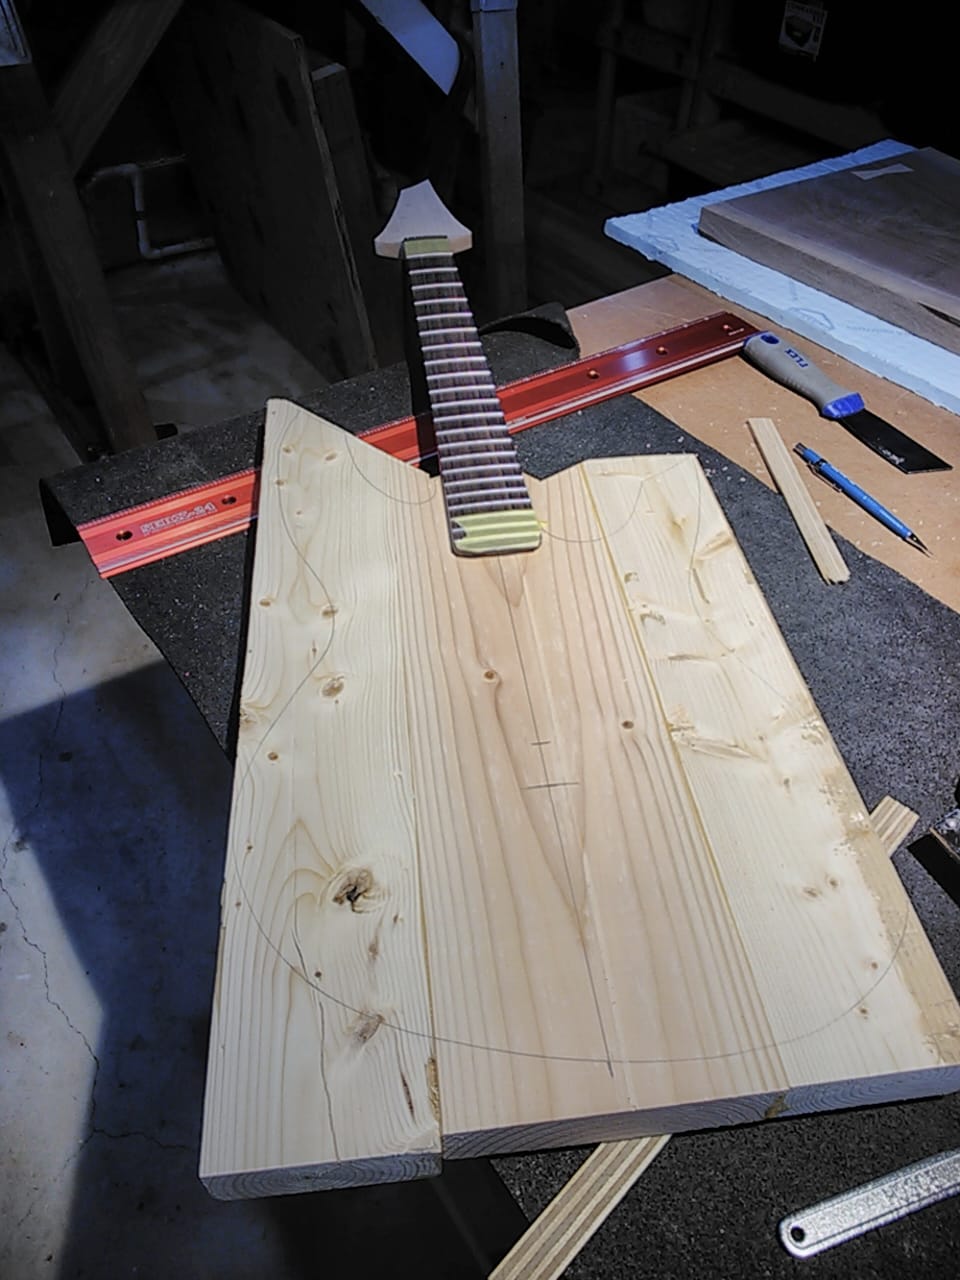
On a large piece of paper, I drew a body shape based loosely on a Jackson Dinky but with a slight forward cant. I elongated the upper horn and gave both horns a sort of cut-off-at-an- angled-curve tip. It’s a shape both graceful and aggressive, with aspects that are familiar but also some I haven’t seen anywhere else. Like the new music I was imagining.
Using Ed’s scroll saw and spindle sander, I translated the shape to a sheet of scrap MDF, and after a bit of sanding it became my body template. By tracing it on the maple slab I could get a hazy view of what the finished body would look like.
Chapter three: Neckin’
Guitar necks are finicky and surprisingly complicated (they’re more than just a long piece of wood anyway), so it was an easy decision to buy a neck rather than try to make one myself. But I went through a ton of deliberation and intrusive thoughts about which neck to buy. There were a lot of “too good to be true” deals out there. Eventually I decided to spend the money to ensure quality by purchasing my neck from Warmoth, a reputable manufacturer of guitar parts.
Around this time I reckoned that although I would be unlikely to greatly multiply the value of a homemade guitar while spending less than $100-200 in parts and materials, I might be able to do so by spending only $400-600 in parts and materials. Not that I planned to sell this guitar, but it would be nice to know that I wouldn’t have been better off just using my money to buy a guitar rather than build one.
Still, I went with the cheapest Warmoth neck I could get. I am happy with what I got but if I could do it again I’d spend $20 more and get an angled headstock; my non-angled one required a string tree–a somewhat ugly piece of hardware I hadn’t realized would therefore be necessary for tone and tuning stability. This was a typical example of my mistakes early in the build when I was still stumbling over unknown unknowns. Still, when it finally arrived from Warmoth I had my neck, a real finished part of my actual guitar that I could pick up and hold! It was exciting.
A near miss during this phase had to do with scale length: the distance from the nut to the bridge, which affects the distance between each fret. When I ordered my neck I was offered the choice of two different scale lengths. I didn’t know anything about scale lengths and figured 25.5” must be “standard size” and that 24.75” must be “short scale”, like those guitars for little kids you see in Guitar Center, so I ordered my neck 25.5” scale length.
When it eventually arrived, I held my nonrefundable neck up next to my cheap Ibanez that felt so great in my hands (actually, the two objects had cost about the same amount of money) and discovered to my horror that they were not the same scale length.
Would I need to adjust and learn to play a guitar that was slightly “too big” for me? I feared I’d be unable to play certain chords or licks, that it would be like trying to play guitar on a bass. (It’s worth mentioning here that I have small hands.) I could only pose my fingers on the neck as it was – there were no strings or body yet – so I had no way of knowing how it would feel to play it for real.
My fears were allayed once I learned that 25.5” was merely the most common scale length used by Fender. Adding to this relief was a recollection that I’d played friends’ Fender guitars and hadn’t noticed much difference. Any remaining fears about scale length evaporated when I discovered that my SoT guitar, which I’d grown quite comfortable on, was also a 25.5” scale.
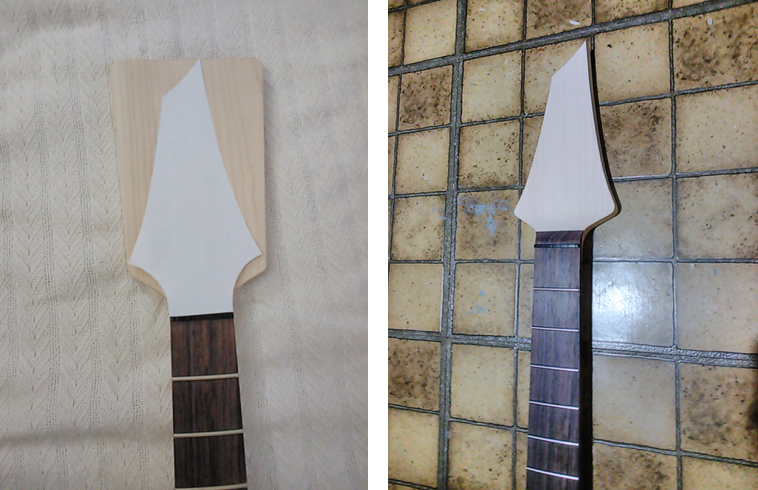
One of the ways I saved money was by cutting the headstock myself; Warmoth sent me an uncut “paddle”. Within that paddle I could design whatever headstock shape I wanted, and all I needed was the nerve to cut it.
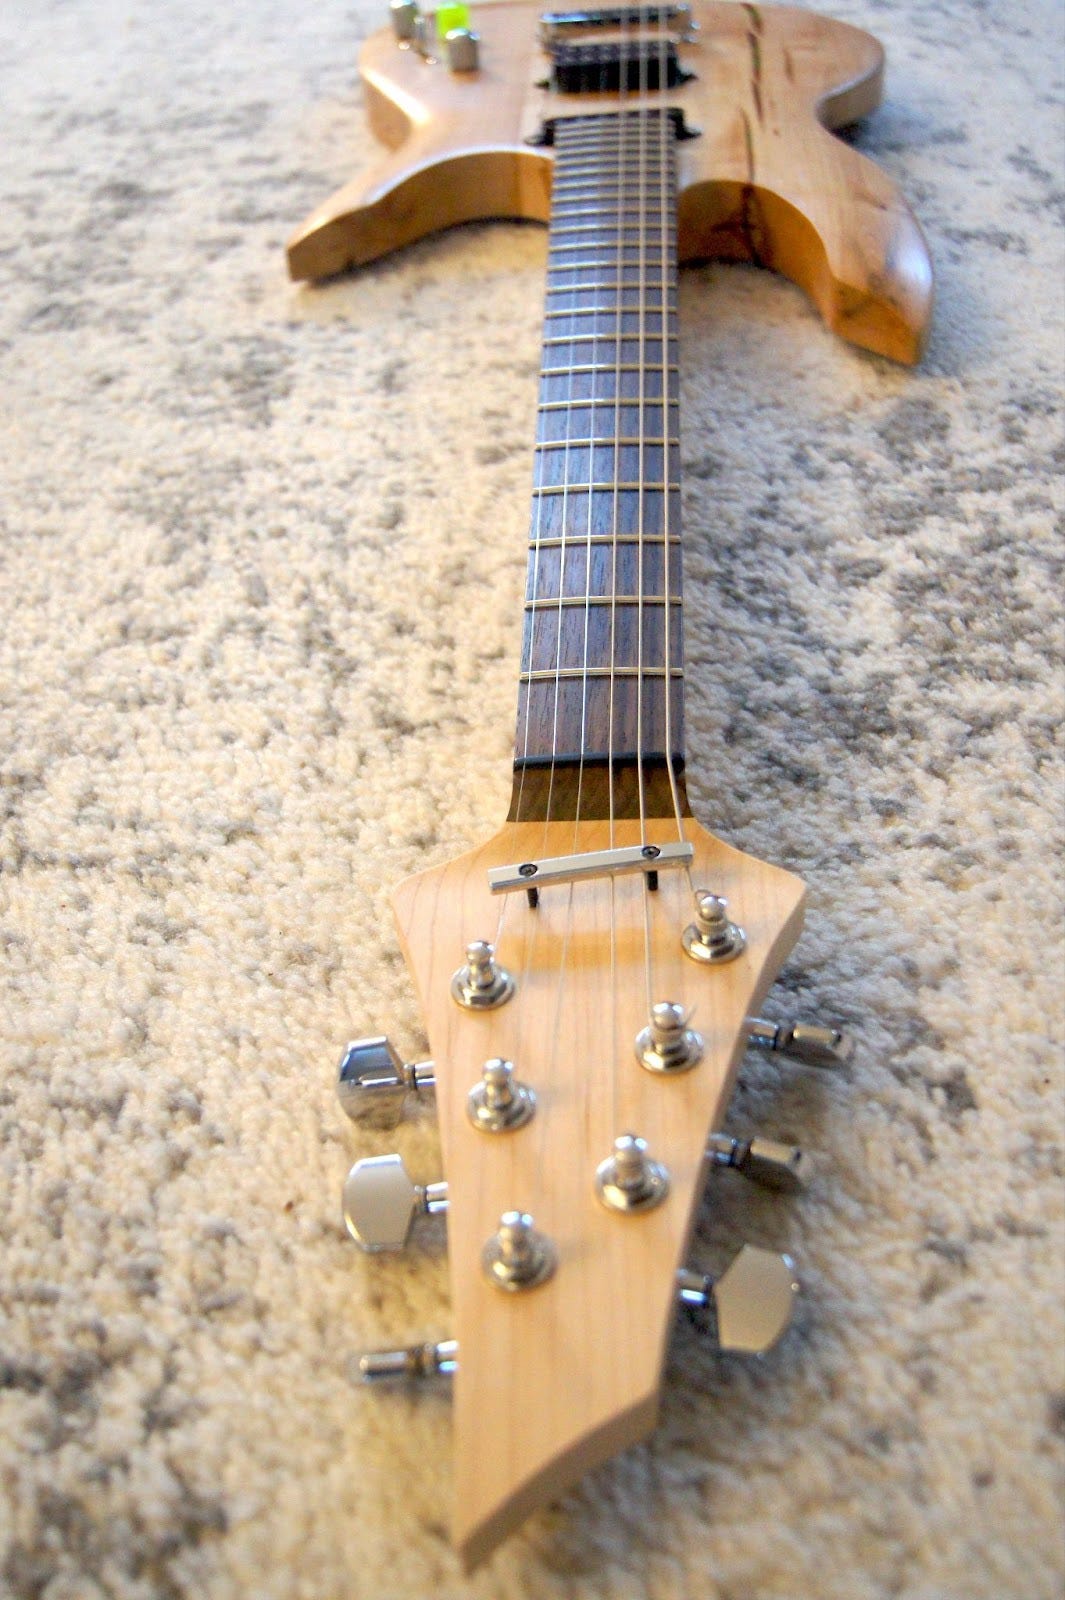
My SoT has six inline tuners, so for aesthetic variety I wanted this guitar’s tuners to be laid out with three on each side. I curated photos of headstocks I liked and let them just kind of sink in for a while. Then one day I traced the outline of my Warmoth paddle headstock on a sheet of paper and drew a pleasing shape inside the tracing. From there it didn’t get modified much; I cut out the shape, taped it onto the actual headstock, and cut it on Ed’s scroll saw. As I watched the sawblade bite into my >$220 workpiece I winced, and not with my eyes. After the kids were in bed, I spent that evening refining the edges with a piece of sandpaper.
By putting my neck together with the paper mockup, I could sneak a peek at what the finished guitar shape would be, and I liked what I saw:
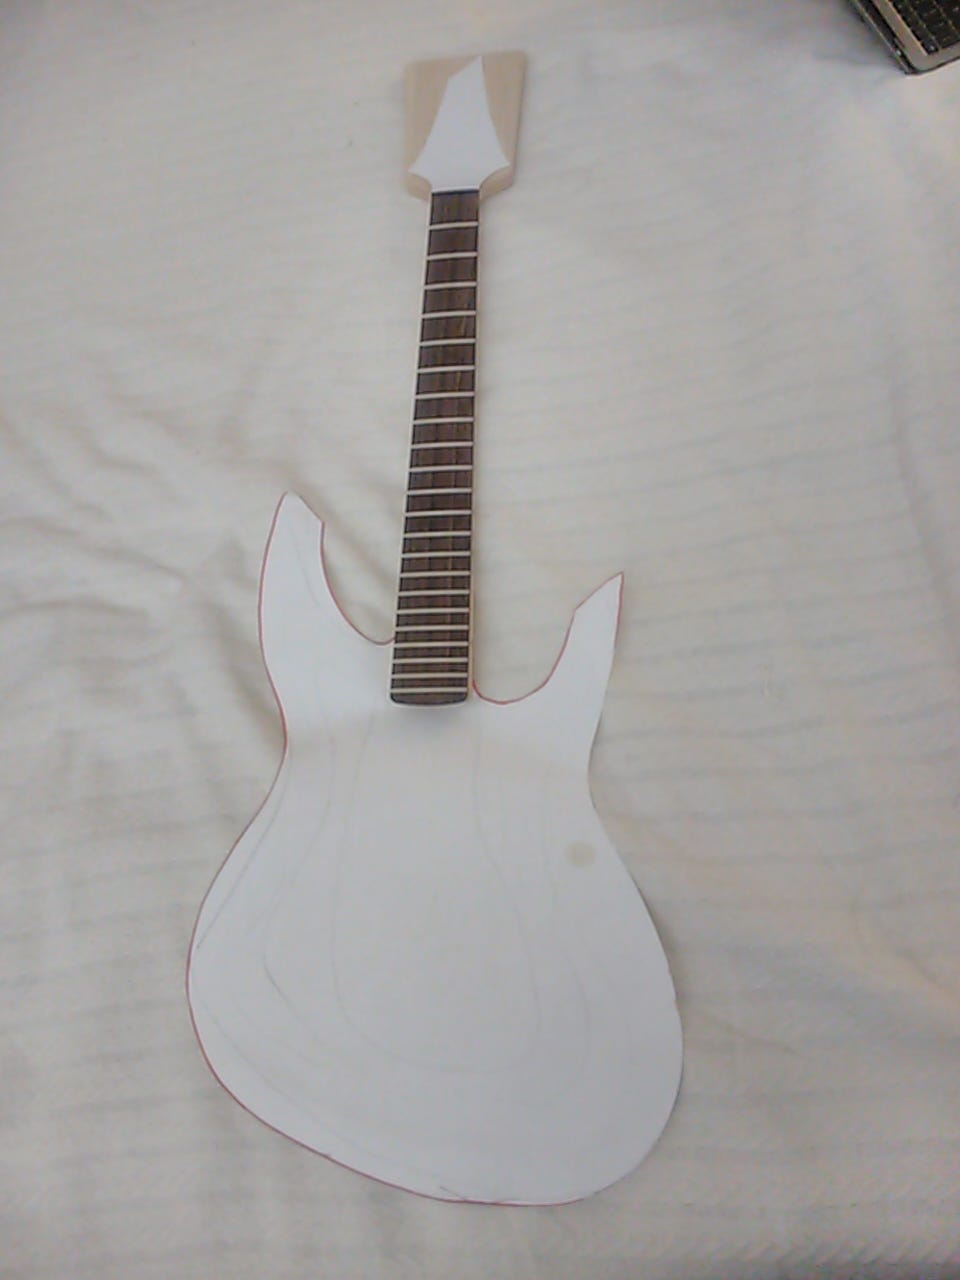
With its cut-off-at-an-angle curves, the headstock shape also echoed the shape of the horns.
Chapter four: From the bridge to the pocket
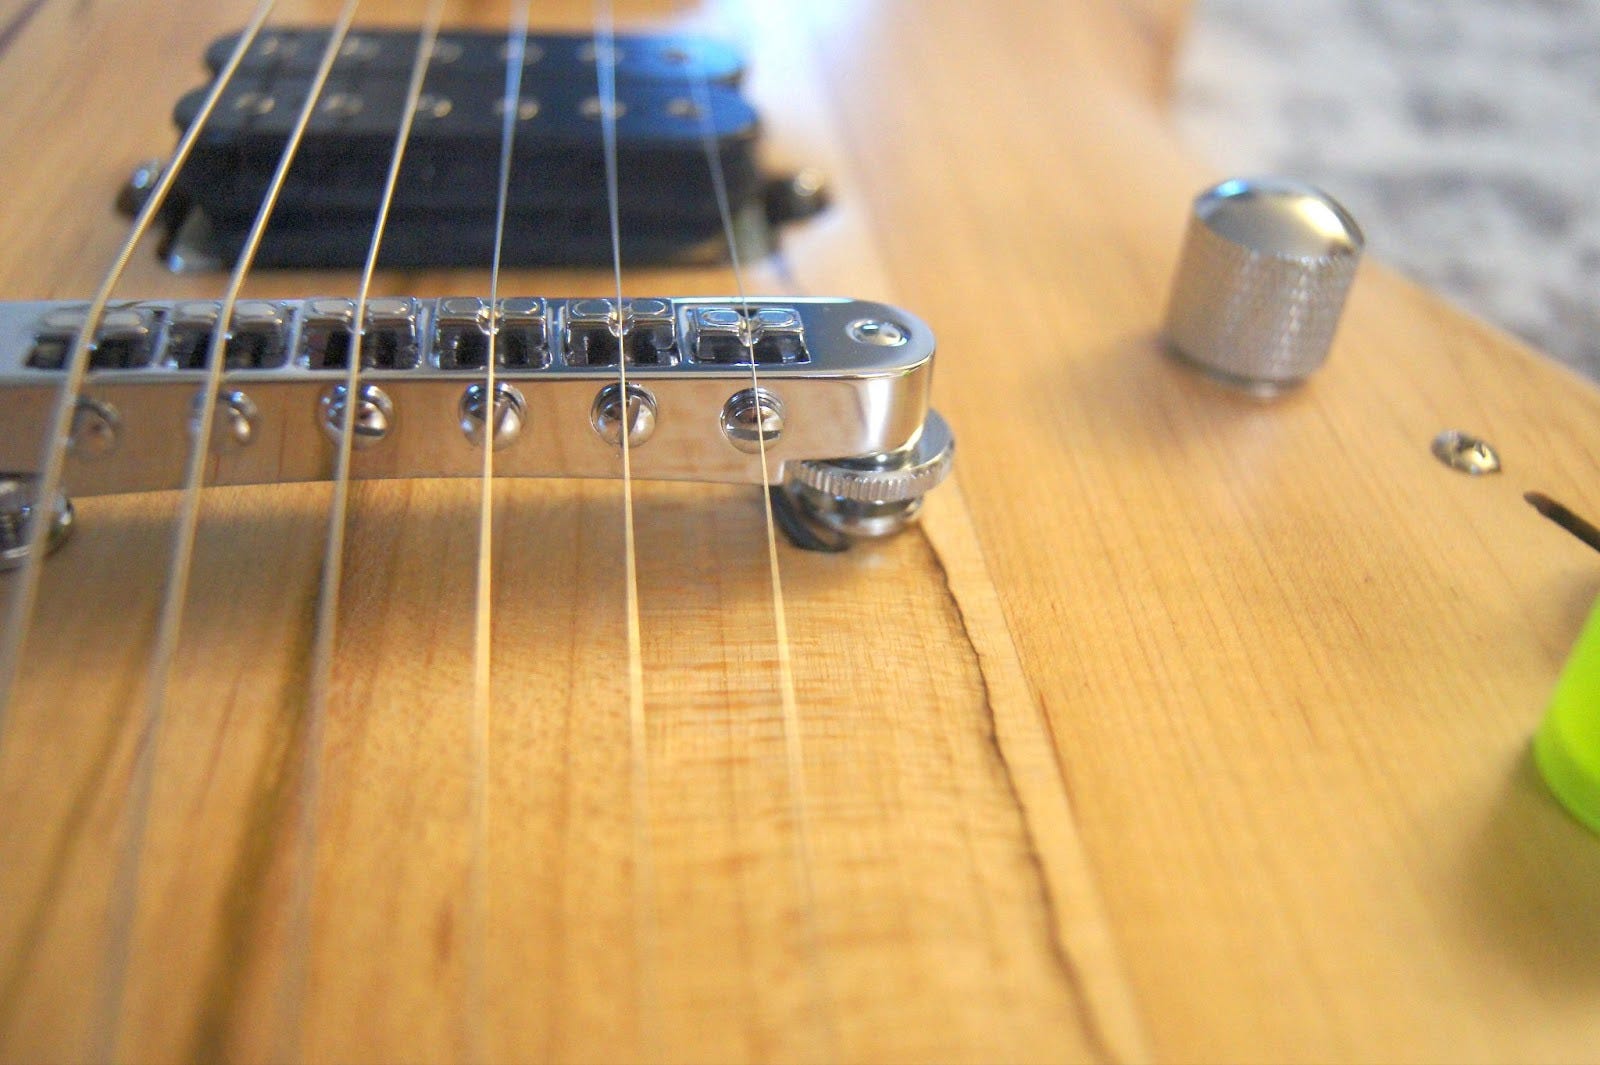
Probably the first sound-related decision I made while building the guitar was my choice to put in a piezoelectric bridge, capable of allowing my solid electric instrument to emulate the tone of a hollow acoustic.
The particular piezo bridge I chose to buy was the Fishman Powerbridge Tune-O-Matic. I chose the Fishman Powerbridge after listening to a “shootout” video where a guitarist played the same set of songs on guitars with three different piezo bridges. Fishman’s sounded the best to me so I bought it.
To sound decent, the Powerbridge requires a second piece of equipment, an onboard preamp called the Powerchip. So I bought one of those too. I’d now spent about $400 on parts, so I was starting to really feel the pressure to make this an actual quality instrument and not one of my normal slapdash jobs, like the table holding the plants behind the chair in the sunroom. (I hobbled that table together in about 10 minutes out of rough scrap wood. My wife still complains about it, even though it is reasonably level and doesn’t teeter much.)

Credit: https://cdn11.bigcommerce.com/s-j5mno/images/stencil/1280x1280/products/1810/6263/PRO-TOM-101__07253.1594118289.jpg?c=2
Tune-O-Matic (“TOM”) refers to one of the types of guitar bridges that sit on vertically adjustable posts. Fishman also makes a different style of piezo bridge, similar to that of a Fender Telecaster, that sits flush against the body. At that time I still didn’t know much of anything about guitar bridges, but I knew what a TOM was because my cheap Ibanez had one. I like the TOM for its ease of adjustment, plus it was something familiar, an old friend waving to me from a strange new land.
Of course, only after my bridge was purchased and delivered did I realize there are more differences between bridges than just how easy they are to adjust and whether they sit on posts. I’d been playing guitar for nearly 25 years and never really thought about the height of the strings above the body. But as I learned, the height varies a lot from guitar to guitar depending on what style of bridge the guitar is outfitted with. TOM bridges tend to mean greater string height.
To accommodate the greater string height at the bridge, the neck on a guitar with a TOM bridge typically has to be angled backward or given “relief” by a few degrees. (I won’t get into the technical reasons here.) There is an alternative option of routing a cavity for the TOM bridge posts to sit down inside of, so the strings are closer to the body and the neck can be attached without relief, and it looks kinda cool (see for example this image of the Godin Flat Five for an attractive guitar that uses this configuration: to accommodate the reduced bridge height, the Flat Five also has these amazing-looking channels for the strings to descend into as they pass through the body to be anchored in the back). But putting the bridge down in a cavity also makes the TOM more difficult to adjust. So I decided to bite the bullet and angle my neck pocket, which I figured would be difficult.

Credit: https://www.tundraman.com/Guitars/NeckAngle/NeckAngle.JPG
(Around this time, Ed started giving me looks when I told him my plans, and he’d shake his head and say things like “You really want to make your first guitar complicated, don’t you.” It would become something of a refrain.)
In luthiery, necks can be affixed to bodies in one of several ways: they can be through necks, meaning the neck and body (or typically, a middle slice of the body) are a single piece of wood; they can be set necks—glued in place like a mortise and tenon; or they can be bolted on, which is exactly what it sounds like.
My first instinct had actually been to do a through neck (better sustain, they say, plus they look cool) but I decided it didn’t leave enough margin of error for an absolute first-timer like me. Neither would a set neck. A bolt-on would give me a chance at a do-over in case I made a mistake, and allow me to make (relatively) easy adjustments if I didn’t get something perfect the first time. Conveniently, bolt-on was also the simplest option from a parts-buying perspective, as through- and set-necks of verifiable quality are not easy to find, especially not with uncut headstocks.
So I went with a bolt-on neck. (Warmoth actually charges more money if you opt not to buy your custom neck with pre-drilled holes for the screws. I don’t know why.) This meant I had to rout a pocket (a shallow hole, open on one side) into which my neck would fit tightly, to ensure the best transfer of vibration once it was bolted (well, actually screwed) in place from behind. Many respectable guitars are built this way, and it didn’t feel like a compromise.
But because of my TOM bridge, I needed to angle the neck back from the body. That meant either using a shim inside the neck pocket, or routing the pocket itself at an angle. I chose to do the latter. It turned out to be fairly straightforward, I just needed to make the template and shims.

At first, to get the template to the correct angle, I thought I’d set it on rectangular wooden blocks of differnet heights (“A” and “B” as seen in my hand-drawn diagram above) but in the end I made shims—long right-triangles, which required no math: I simply used the height of the bridge at the middle of its adjustment range as the length of the vertical side, and the distance from the center of the foot of the bridge to where the neck meets the guitar as the length of the base. I placed the shims under my neck pocket template, so that as the router glided on the template, it would cut a pocket parallel to the top of the (shimmed) template rather than the top of the (flat) body.
Templates for Warmoth’s neck heels (which share the physical specs of Fender Strat neck heels) can be bought, but I decided to make mine using a method I found on Youtube. Ed served as sort of a supervisor through much of this. It was his first time making a guitar too, but he had a lot of experience with many of the individual techniques, such as creating routing templates. He’d show me how to do some particular thing, then supervise me doing it, and by the third or fourth time I was doing it completely on my own.
Best of all, this template could be reused for any Strat or Warmoth neck, so I told Ed that when the guitar was done I’d sell the template on Craigslist and split the profits with him so we could both retire early. (There were also alternative jokes about this being the sunk cost that justified starting a guitar-making company.)
Chapter five: Ya big dummy
Independently of each other, a couple of people recommended that I practice routing my neck pocket on a piece of cheap scrap wood before I cut into my actual maple body slab. I decided to do them one better: I’d make a whole functioning dummy guitar–not only to practice routing my neck pocket but also to practice cutting my body shape and various holes and cavities, to experiment with placement of magnetic pickups and controls, and generally to make mistakes and learn on.
I didn’t wait for Ed and his basement shop. I used my portable tablesaw to joint and edge-glue a few pieces of tuba (“two-by”) construction lumber I’d found by the side of the road. Then Ed and I routed the neck pocket in one end.
I pushed my neck into the pocket. The test was, if I picked up this assemblage by the neck, would the whole thing raise as one piece? I tried, and it did, perfectly snug. Success.
So far the construction pine body had a shape like something from a Devo music video, but after a routing session with my body template, my dummy guitar emerged, and proved its value even before completion by absorbing a slip I made with the router during a tricky part of the cut.
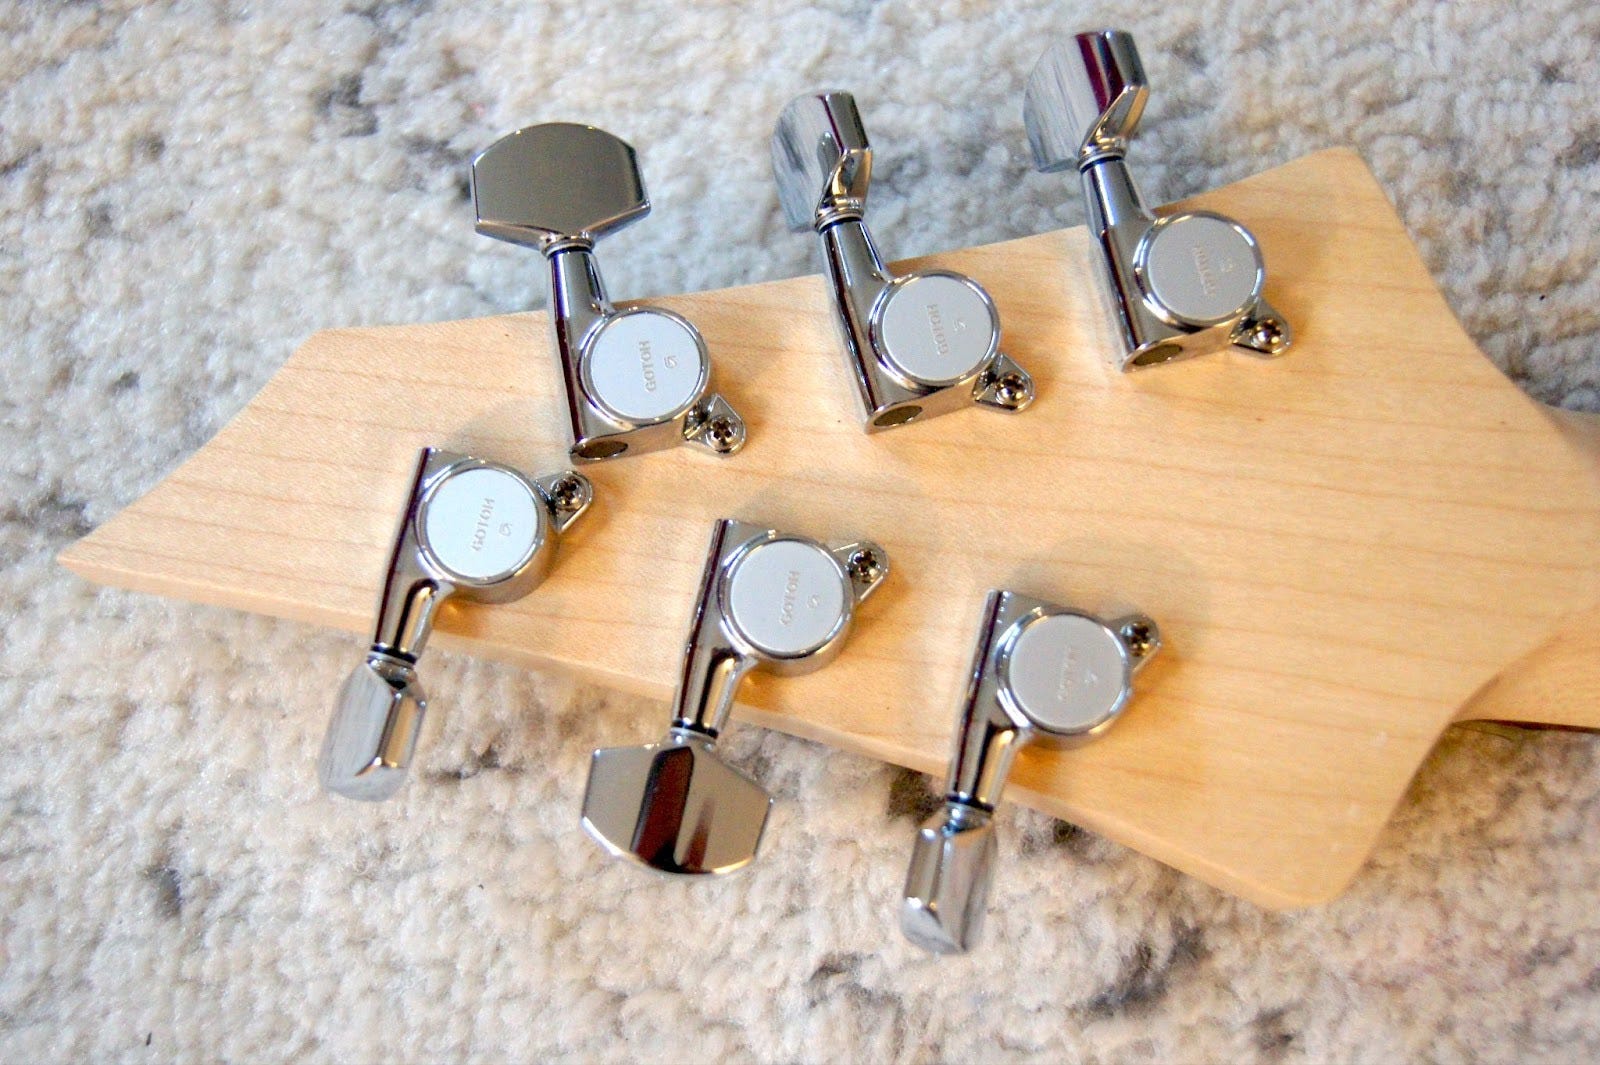
I won’t lie, I played a little air guitar that night with my new prop But man cannot survive on air guitar alone, so I designed an offset pattern for the tuners, minimizing the lateral change in direction as strings went through the nut. (This ensures more stable tuning.) Then I drilled out the holes and installed my tuners, which I’d purchased even before the Powerbridge.
(A note about the tuners: quality does in fact matter. These tuners were the second set I’d bought. The first set were very cheap and although I never installed them, I did try turning them, and they felt like they had an inconsistent amount of resistance, as if the viscosity of the lubricant around the gears was thicker in some places and thinner in others. I returned them and bought a set of more reputable tuners by Gotoh, which despite being brand new, were steeply discounted on Ebay.)
I used the still-shimmed neck pocket template to angle the body under Ed’s drill press so the holes for the neck screws would align with the holes Warmoth had pre-drilled in the neck. I’d routed the pocket slightly too deep so I added a thin offcut slice of walnut from one of Ed’s projects, sandwiched between the neck and pocket, and that got the neck to the perfect height. Then I used a blank Fender neck plate and screws to fasten the neck to the dummy body.
Since I forgot to take my own photo, here is a similar neck plate, for illustration purposes:
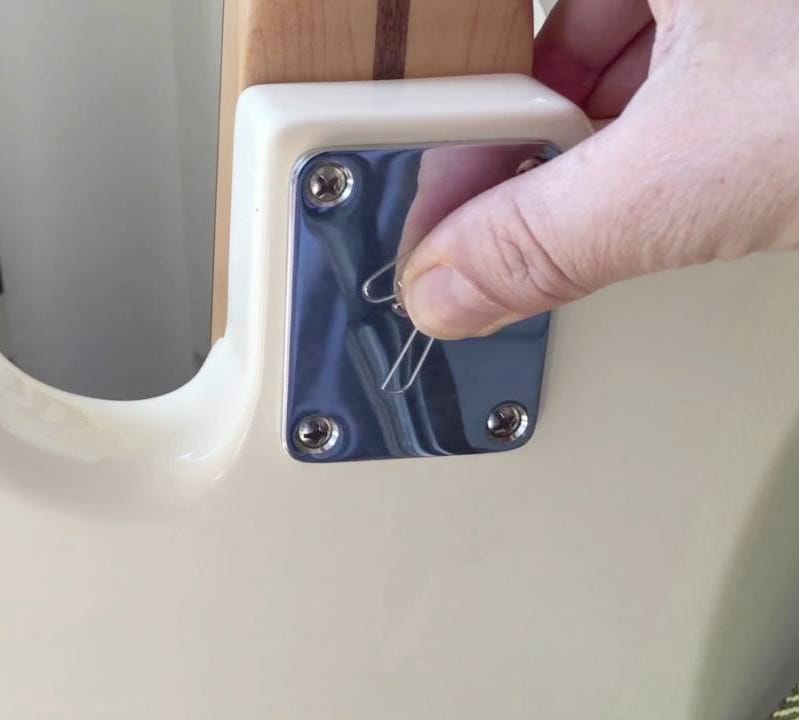
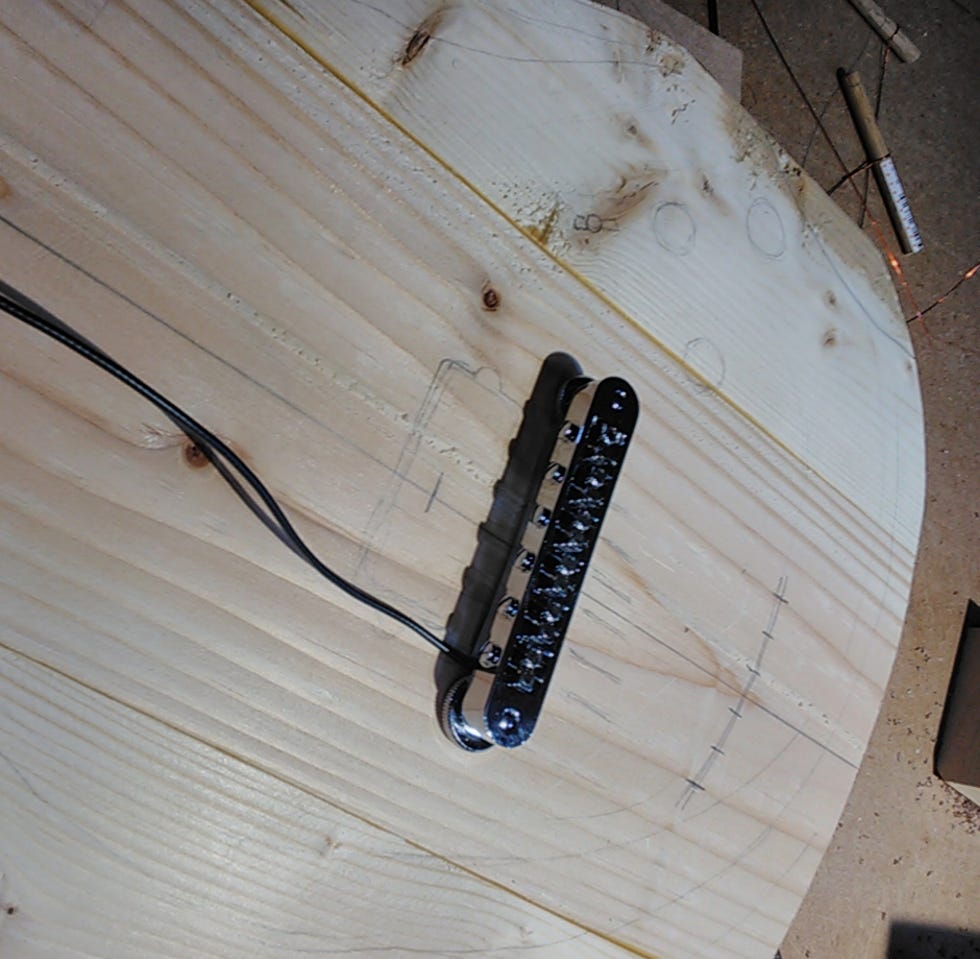
Attaching the bridge was as simple as drilling a couple of holes for the bridge posts using a template provided in the Powerbridge packaging. Having the bridge actually mounted on the body made it much easier to figure out where my string-through holes needed to go. I had to make sure the strings would clear the edge of the bridge on their way down to the body. I figured out minimum distances from bridge saddle to body using a piece of thin wire.
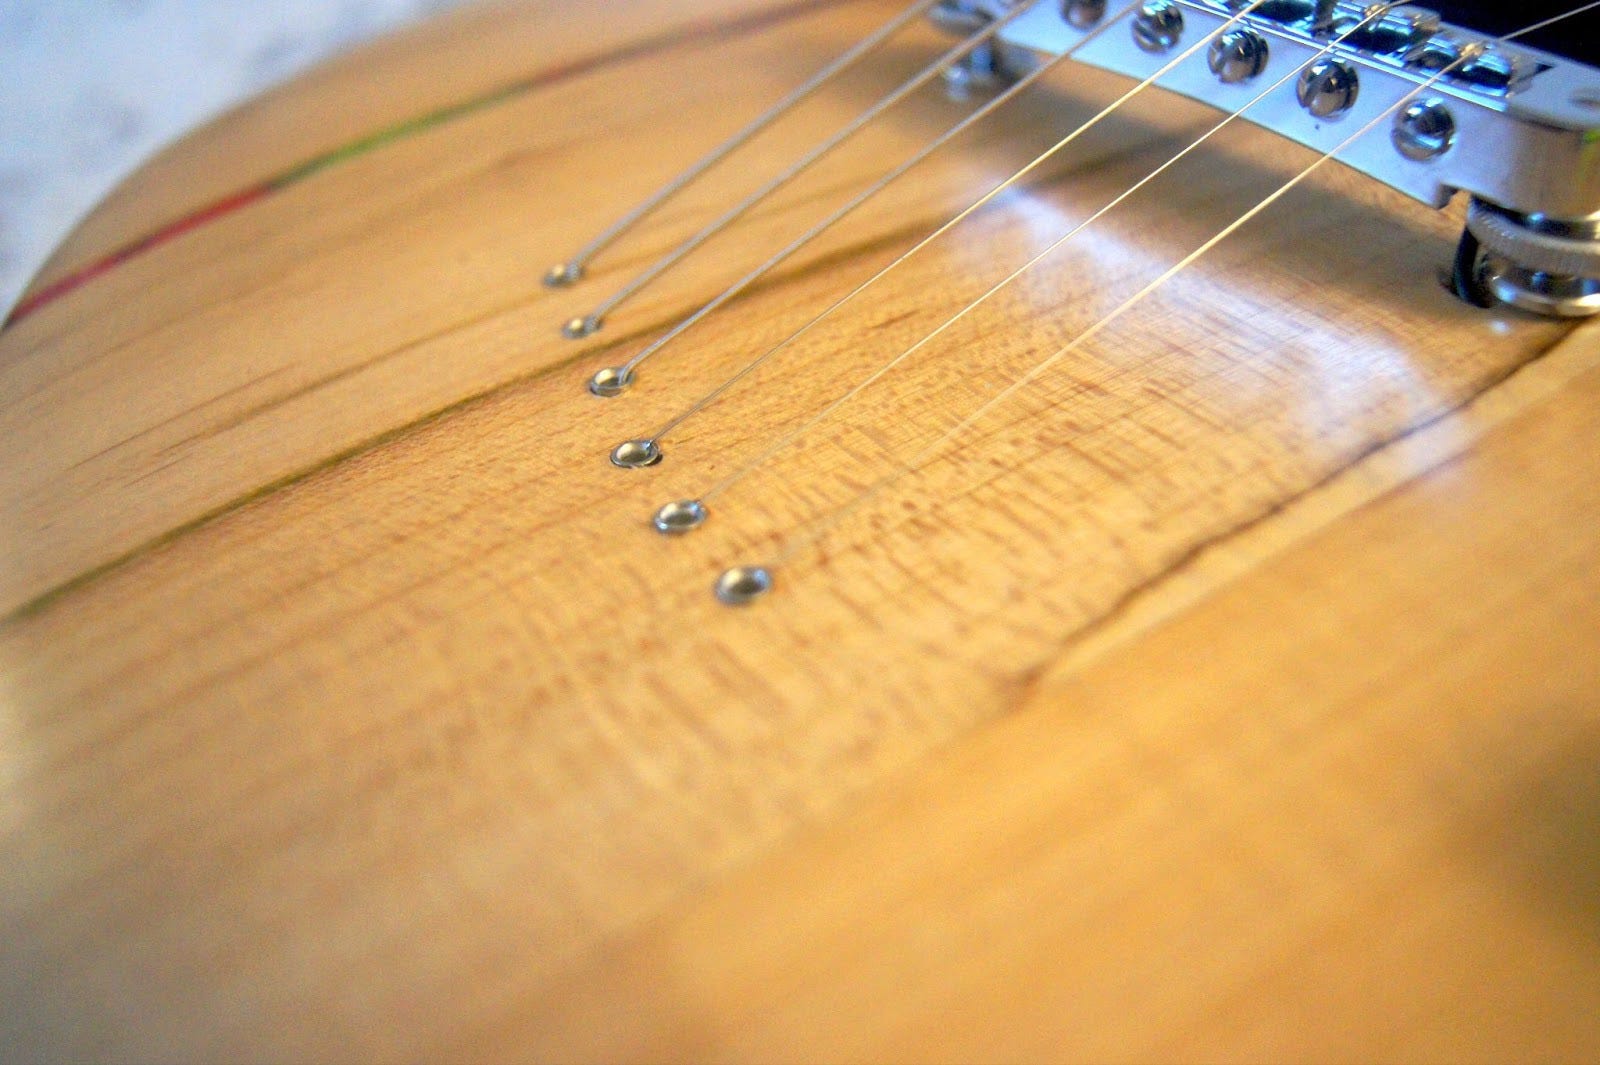
About the string-through design: typically a TOM bridge is paired with a stop tailpiece, essentially a metal bar with six holes into which the strings are anchored (in the diagram in the introduction, see item #12). In a string-through design, the strings are anchored in the back of the guitar, travel through holes and emerge in the front, and then are run straight to the bridge saddles.
I wanted a string-through design for several reasons. One was aesthetics: it looks cool. Another was elegance: less metal hardware than a tailpiece (measured by mass), just a simple connection of string to body. A third was the rumored increase in sustain and harmonic resonance provided by the direct transfer of vibration and increased length of string behind the bridge. (Later I verified this, for my guitar at least, as I noticed a lot of chime-like tones ringing out like sympathetic notes as I played.)
I was able to arrange the string-through holes in a curve that mimicked the curved cut-offs on the horns and at the end of the headstock; it also happened to replicate the curve at the end of the body.
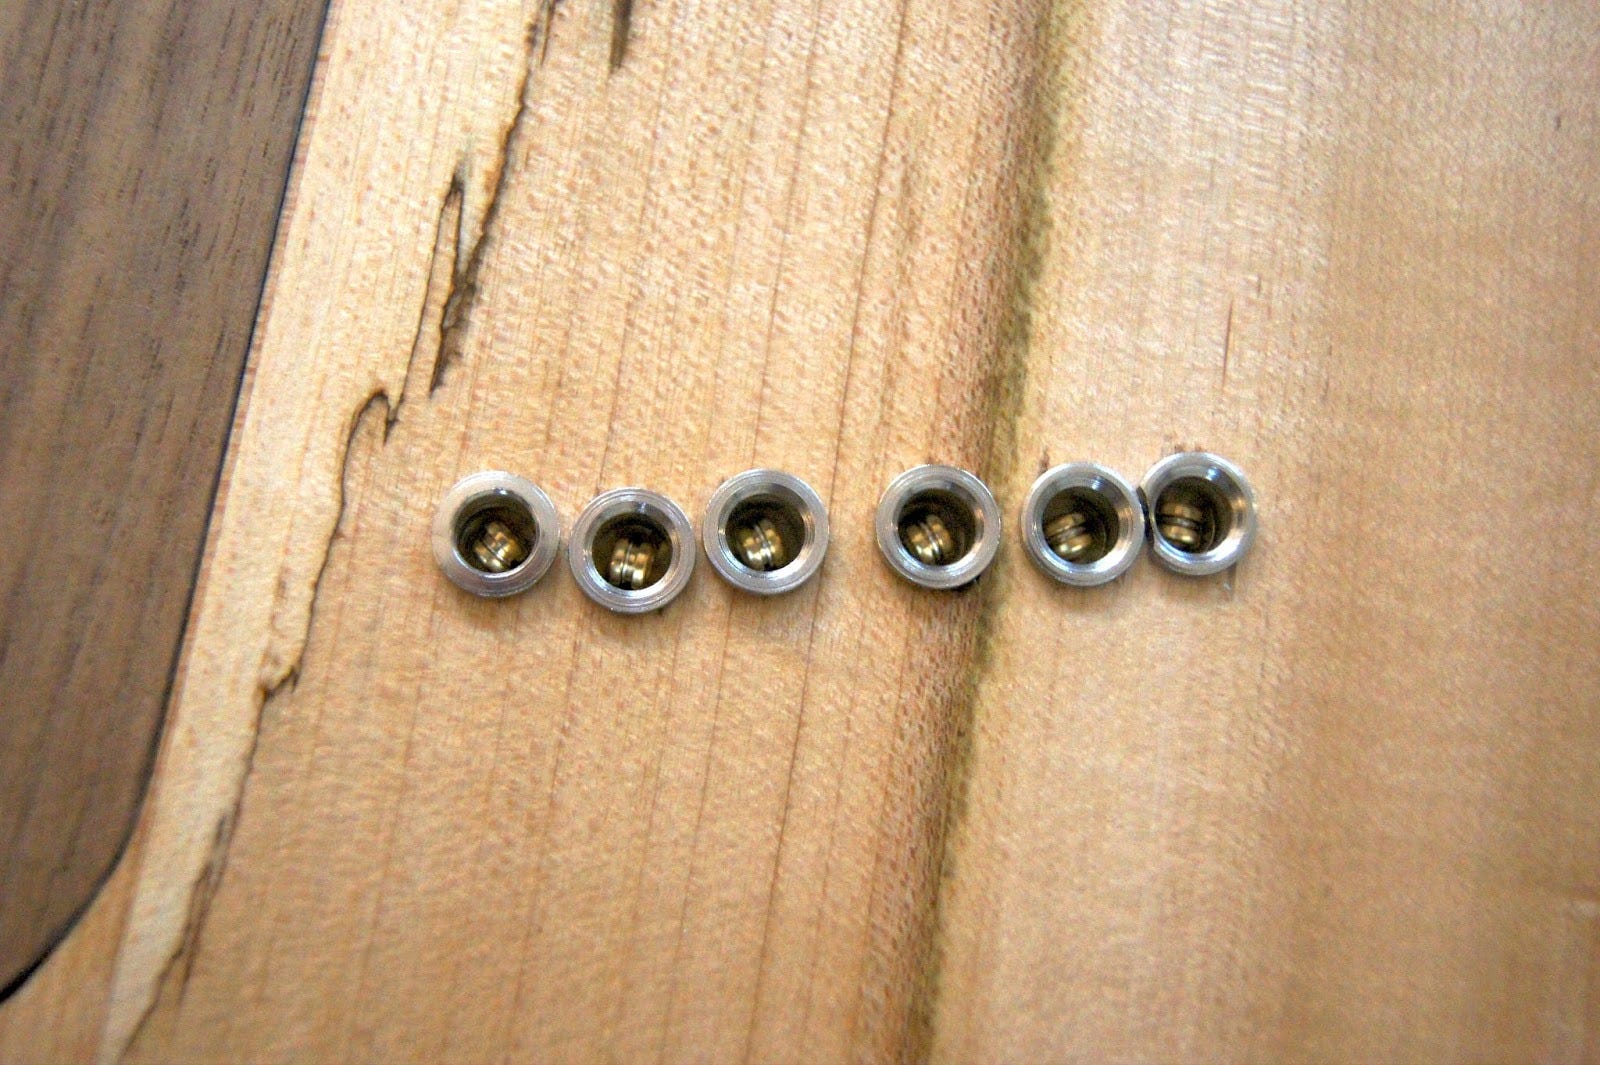
I drilled holes to put the strings through and installed ferrules in the back to retain the strings so the ball ends didn’t bite into the wood. I didn’t want front ferrules because I don’t like how they look, so to keep the strings from eating into the wood on that side of the body I decided I’d use small metal cylinders embedded in the tops of the holes. But I didn’t buy the metal cylinders until after I’d strung up my dummy guitar; they would wait to be installed in the real thing later.
For now I had a dummy guitar, but one I could actually play. And I did.
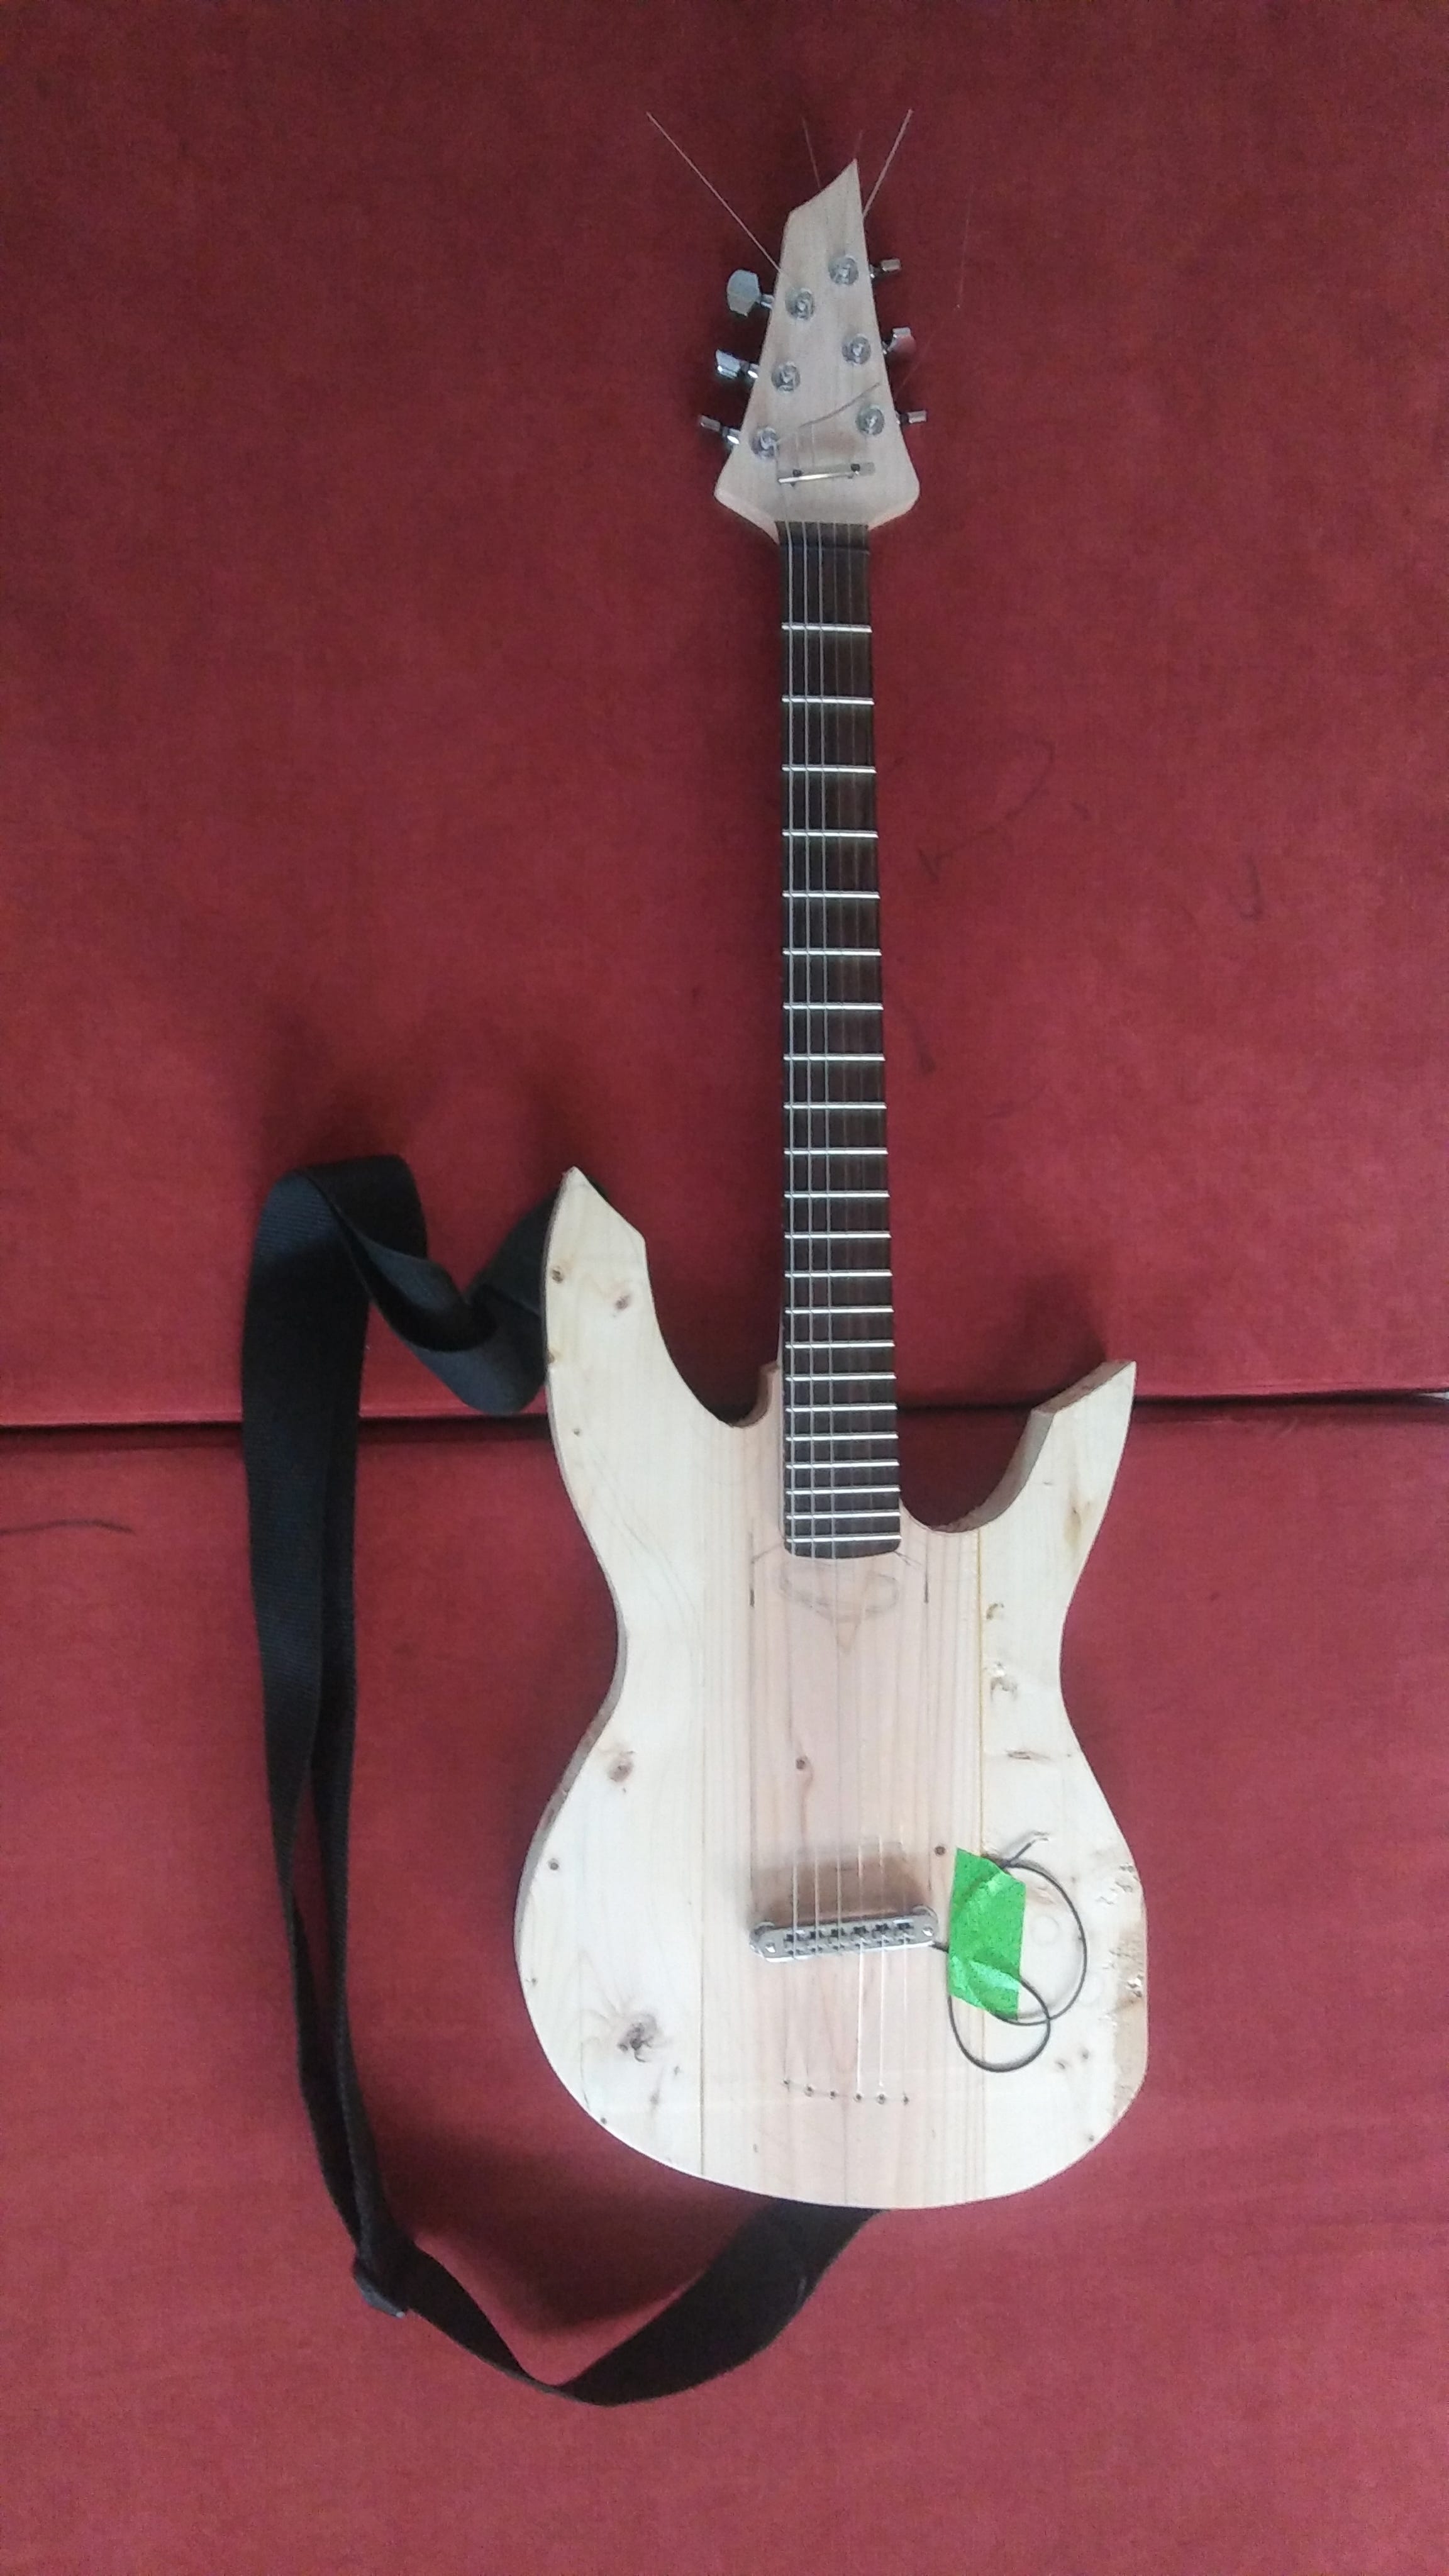
Those first thirty minutes were hugely exciting, and left me with a sort of giddy headrush that lasted the rest of the day. The adage about a guitar you like turned out to be true, as well: walking past the guitar, I felt compelled to grab it off the wall and start playing, basically every time. I couldn’t believe how balanced and smooth it felt in my hands. Everything was just the way I liked it, and amazingly, something I thought I liked in my head turned out to be something I liked even after I’d manifested it into palpable reality. That hadn’t happened for me a lot so far.
But unplugged electric guitars are only so satisfying. I started wondering, what would it sound like plugged in? To find out I needed to keep forging ahead.
Chapter six: Lektronix
It was time to think about magnetic pickups. These come in several varieties, the most common of which are single-coil and humbuckers. Single-coils look like long skinny ovoids; humbuckers look like two single-coils right next to each other, because in most respects that’s exactly what they are. Some humbuckers have covers on them that conceal the poles (the shiny metal circles) and thus look like fat rectangles.
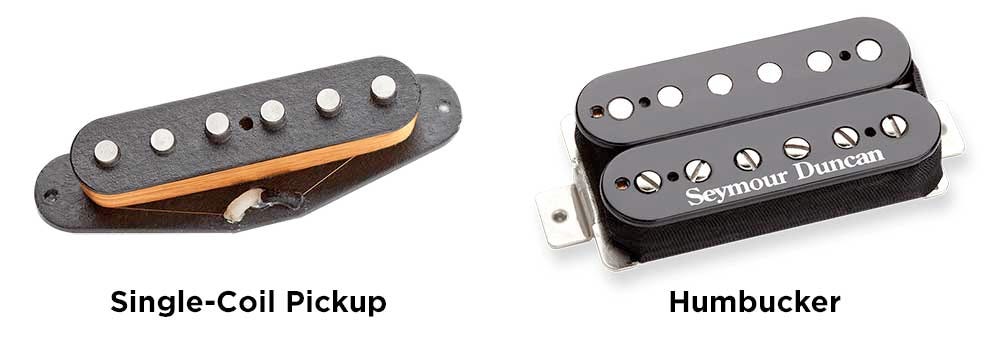
Credit: https://images.equipboard.com/blog_content/single-coil-pickup-vs-humbucker.jpg
Single coils tend to give a brighter, crisper sound, whereas humbuckers, like I had in all my existing guitars, sound warmer and “fatter”. I wanted a single coil pickup in the neck position (under the strings between the fretboard and bridge but close to the neck) which would serve to further increase my sonic reach. But I also planned to put a humbucker in the bridge position (close to the bridge but still under the strings) to be able to access those very different sounds at the flip of a switch. And at the additional tap of a pedal, I could also go from clean or acoustic- like sounds to distorted “metal” sounds. Either or both of these pickups’ signals could be mixed with the piezo signal from my Powerbridge.
I knew that pickup placement changed the sound–that’s why there are separately manufactured bridge and neck pickups in the first place. Without getting too technical about it: near the bridge, magnetic pickups produce a sound that is more resonant and trebly; near the neck the sound is fuller and bassier. But beyond those basic facts is a world of variation, embodied in the different pickup placements and angles you’ll see if you browse a guitar store. What I needed was to be able to experiment with various spots for my pickups and mark the place where I liked the sound most.

Credit: https://www.frudua.com/immagini/pickups_placement.jpg
To accomplish this I routed a huge “swimming pool” cavity in the front of the guitar between neck and bridge. I lined the bottom of it with sheet metal, thinking I was so clever because the magnets in the pickups would just hold them in place (an idea I’d seen on a boutique guitar in a video), though it turned out that this didn’t work so well (the boutique guitar had special pickups designed to allow it to adhere that way; my guitar did not); I eventually removed the sheet metal and used double-sided tape instead.
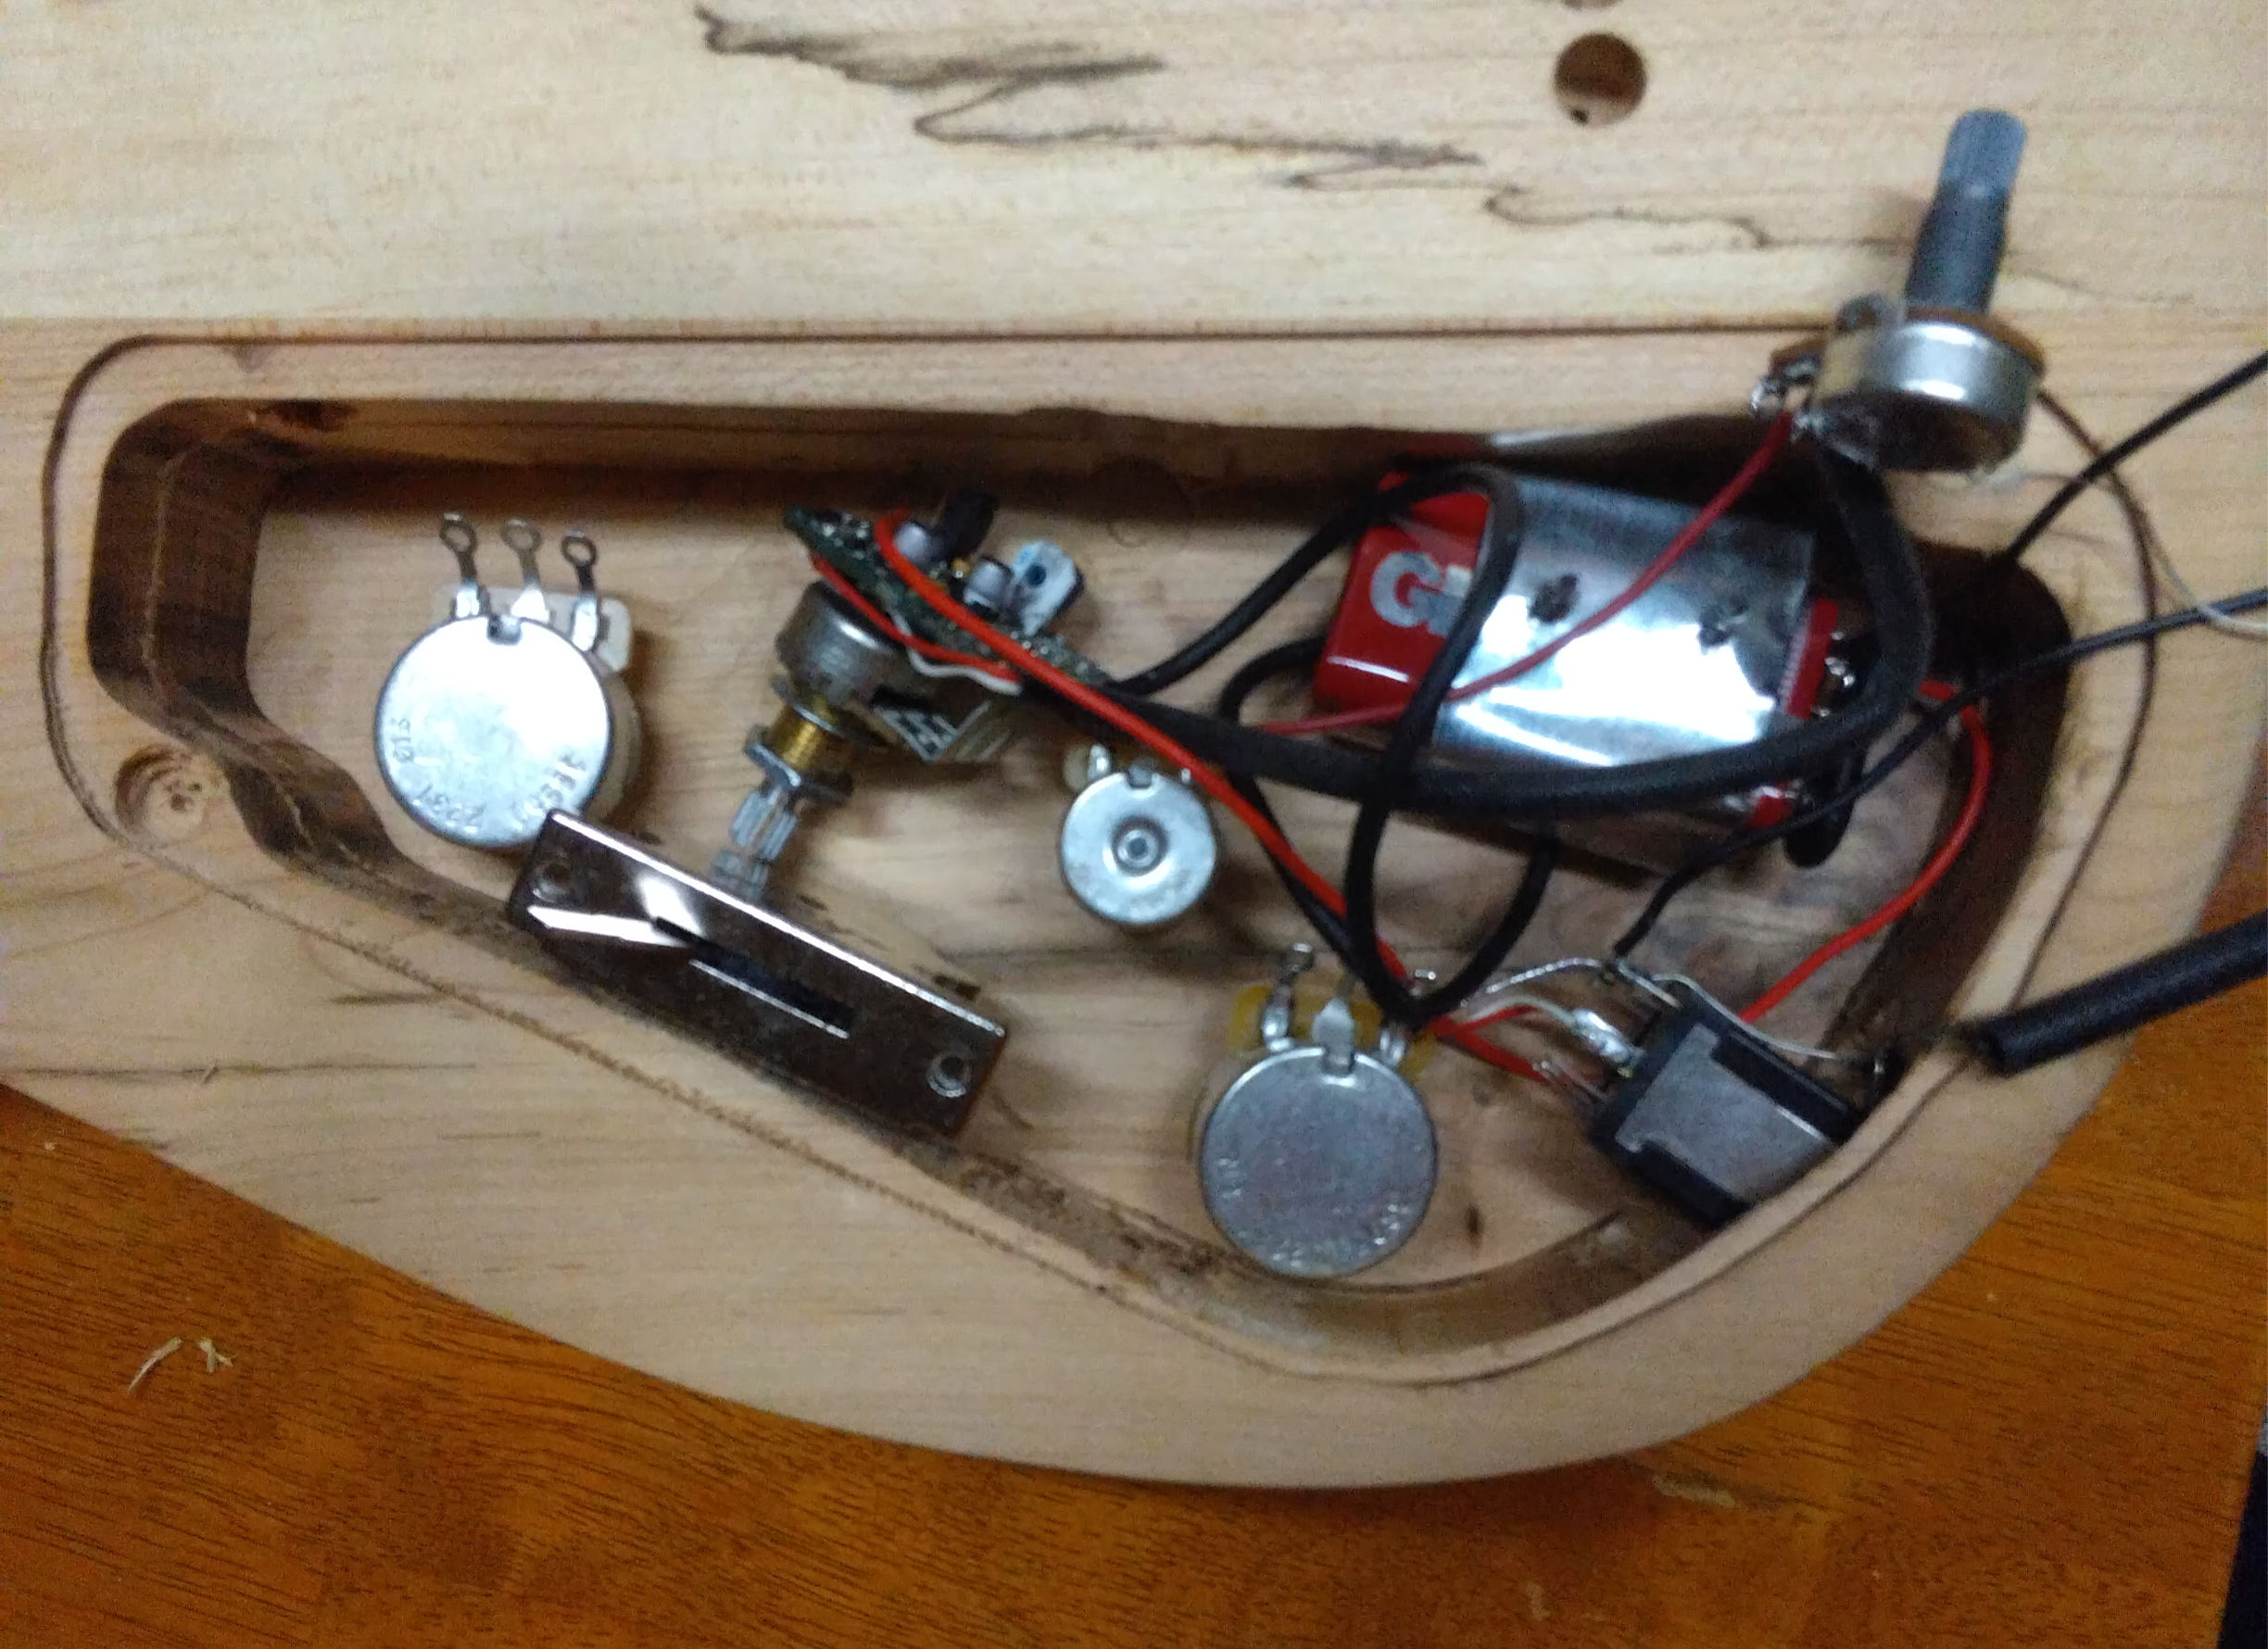
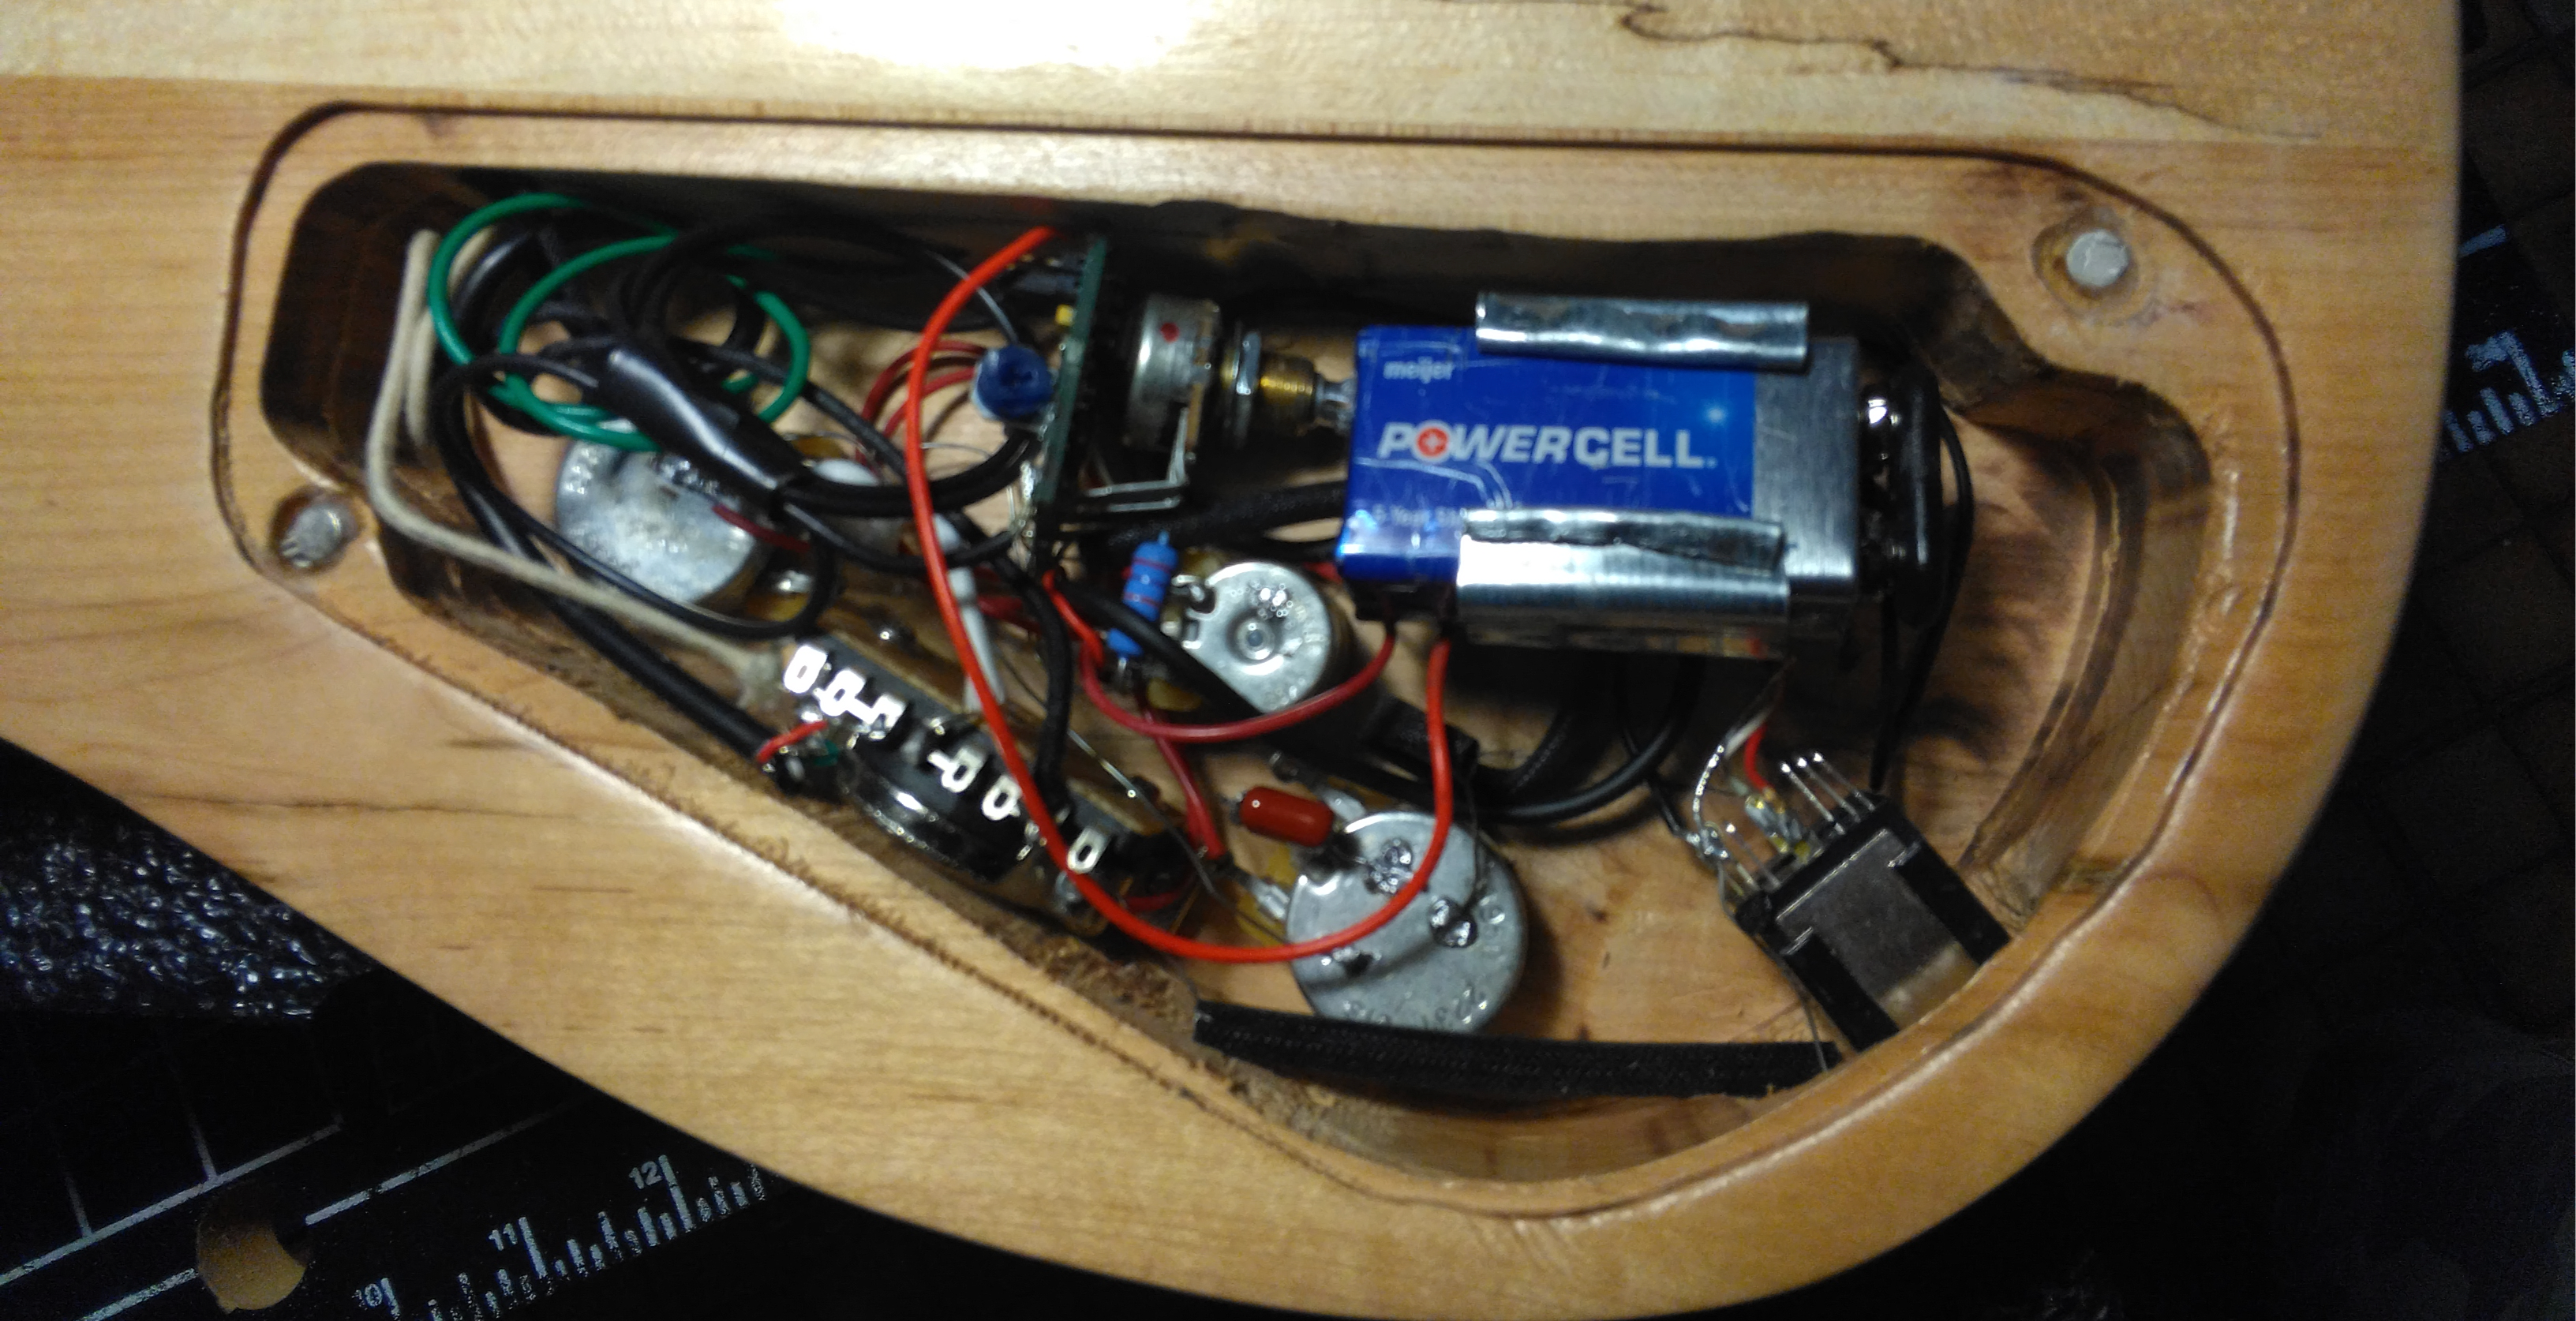
Then I flipped the guitar over and routed a control cavity, leaving a wide berth for the bridge posts and string-through ferrules. In that cavity I could install my Fishman Powerchip onboard preamp (without which the Powerbridge wouldn’t be very useful), my volume and tone potentiometers (“pots”), and any switches. My controls would stick out on the other side.
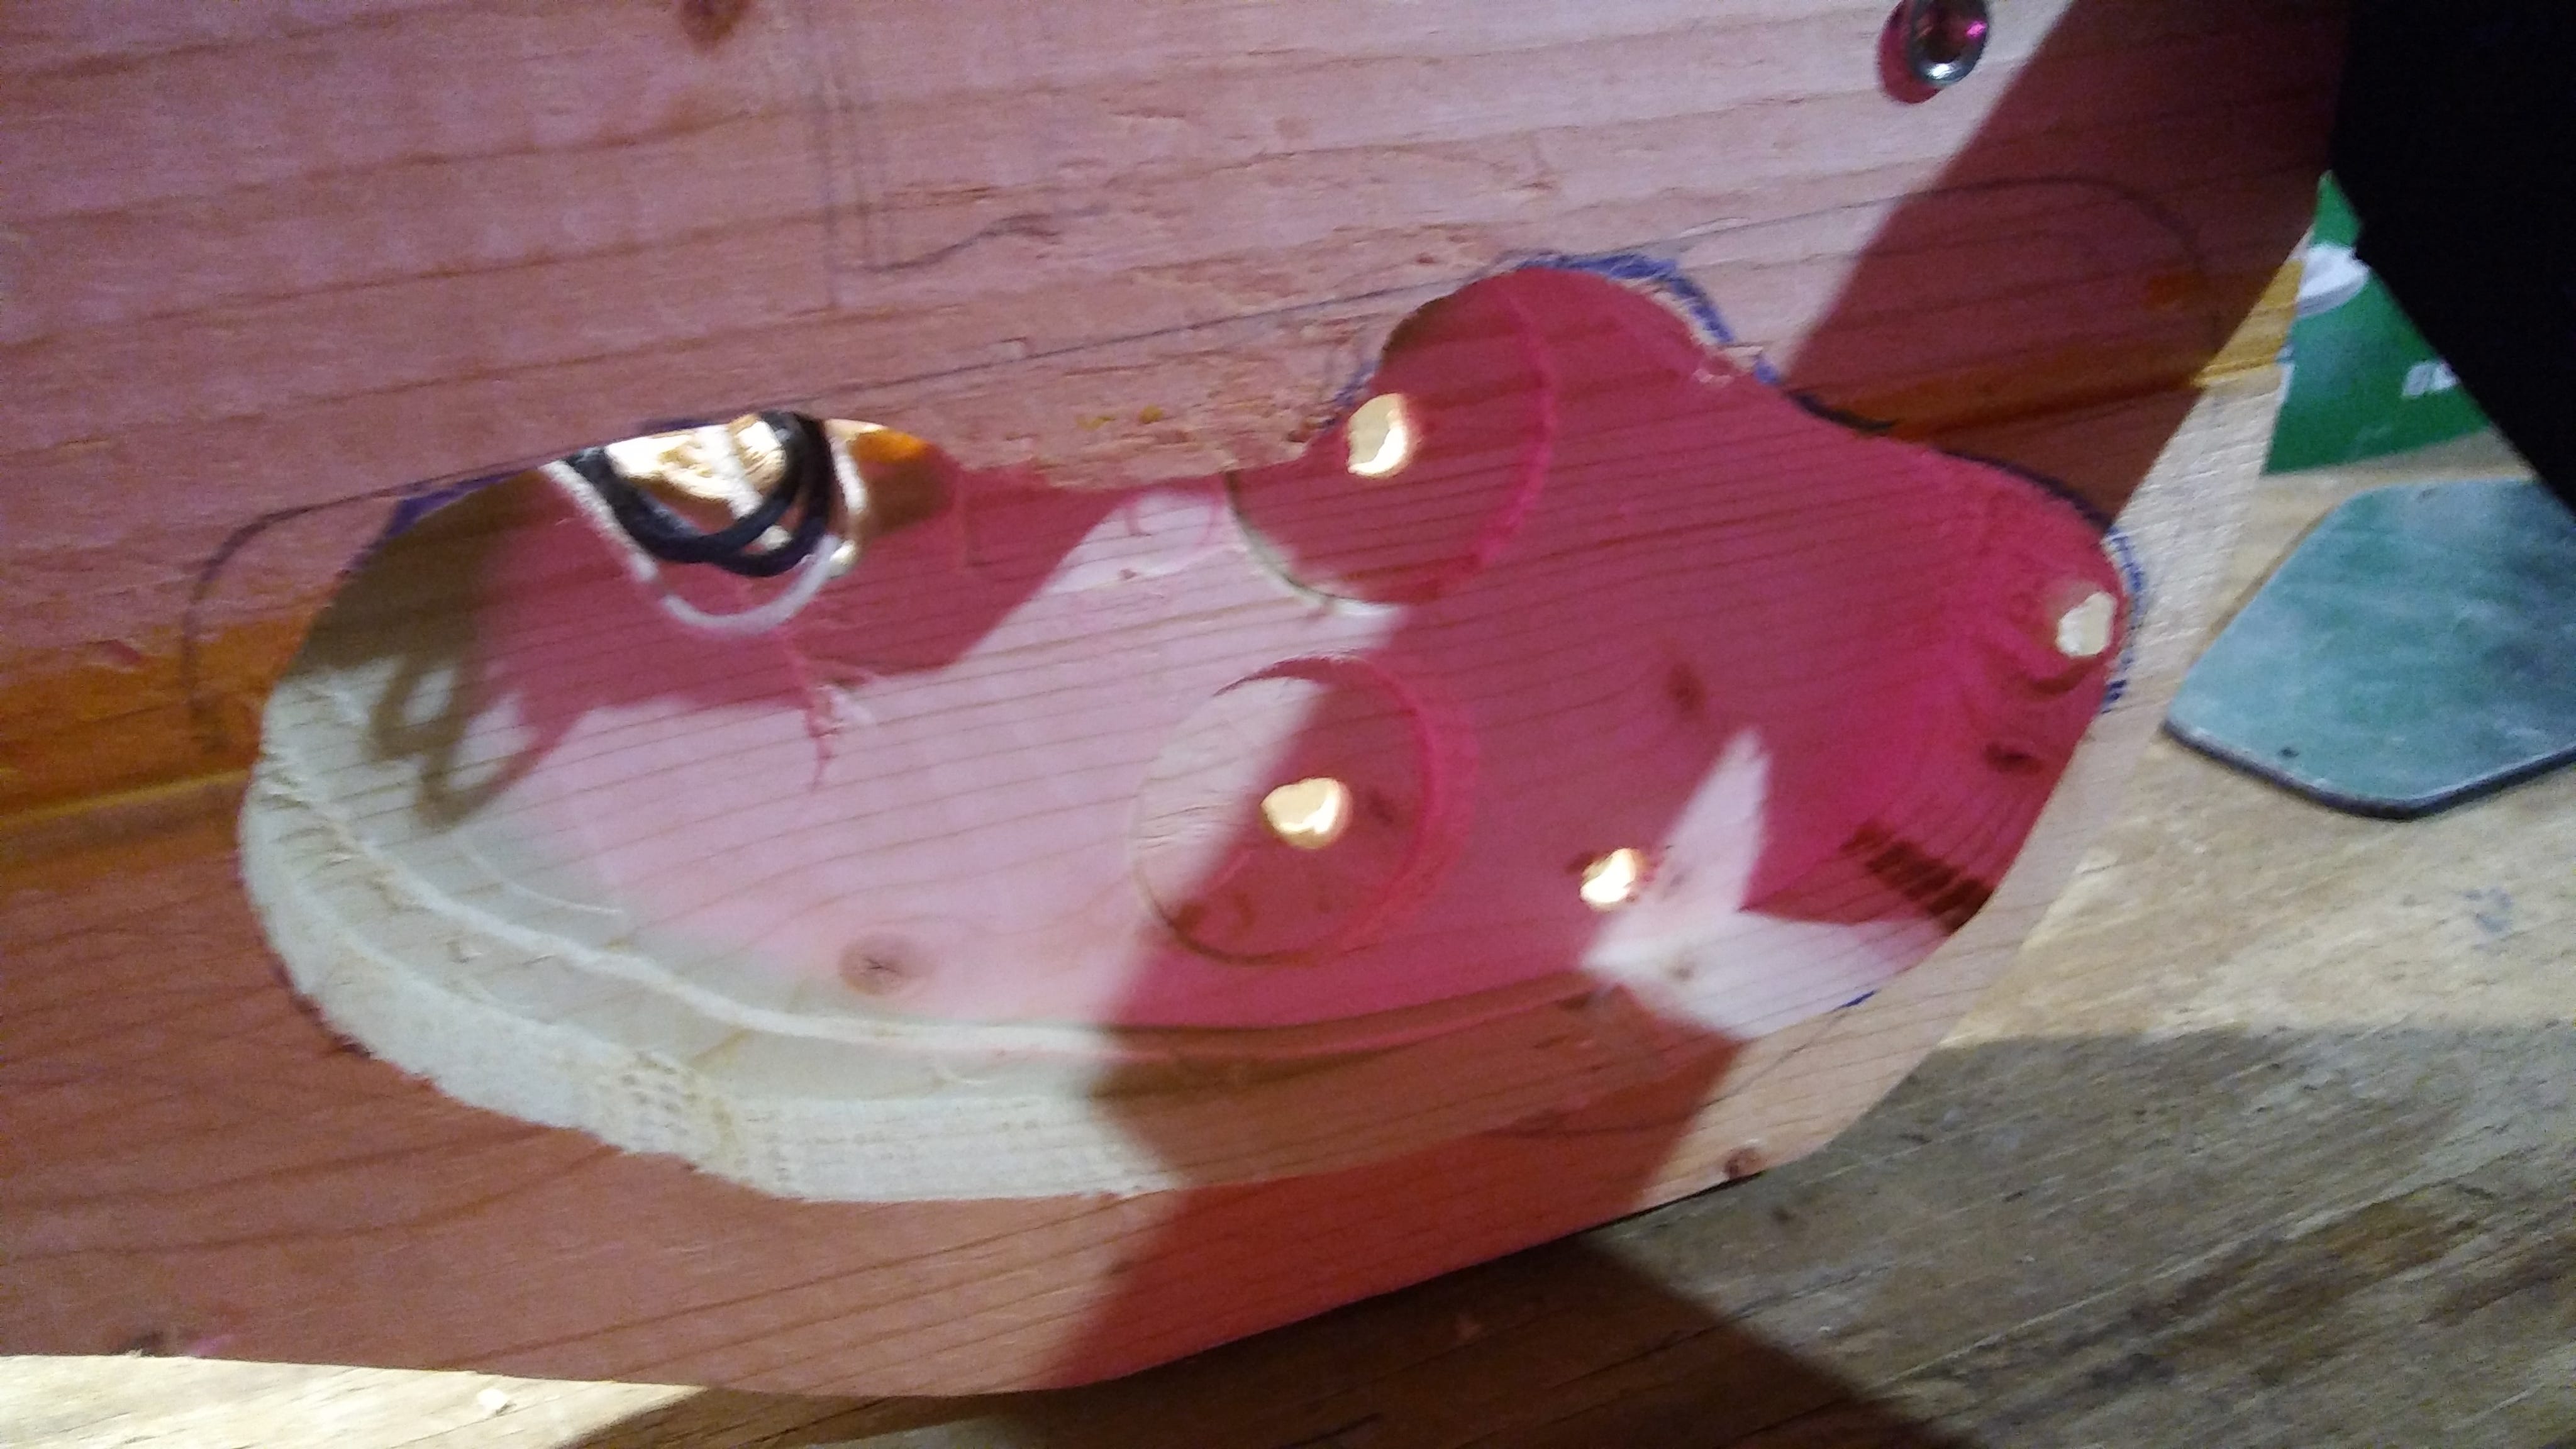
The Powerchip required a 9V battery. I decided for simplicity’s sake that I’d house the battery right inside that same control cavity. On many guitars with active electronics the battery is given its own special cavity, but this means extra routing and an additional cover for it.
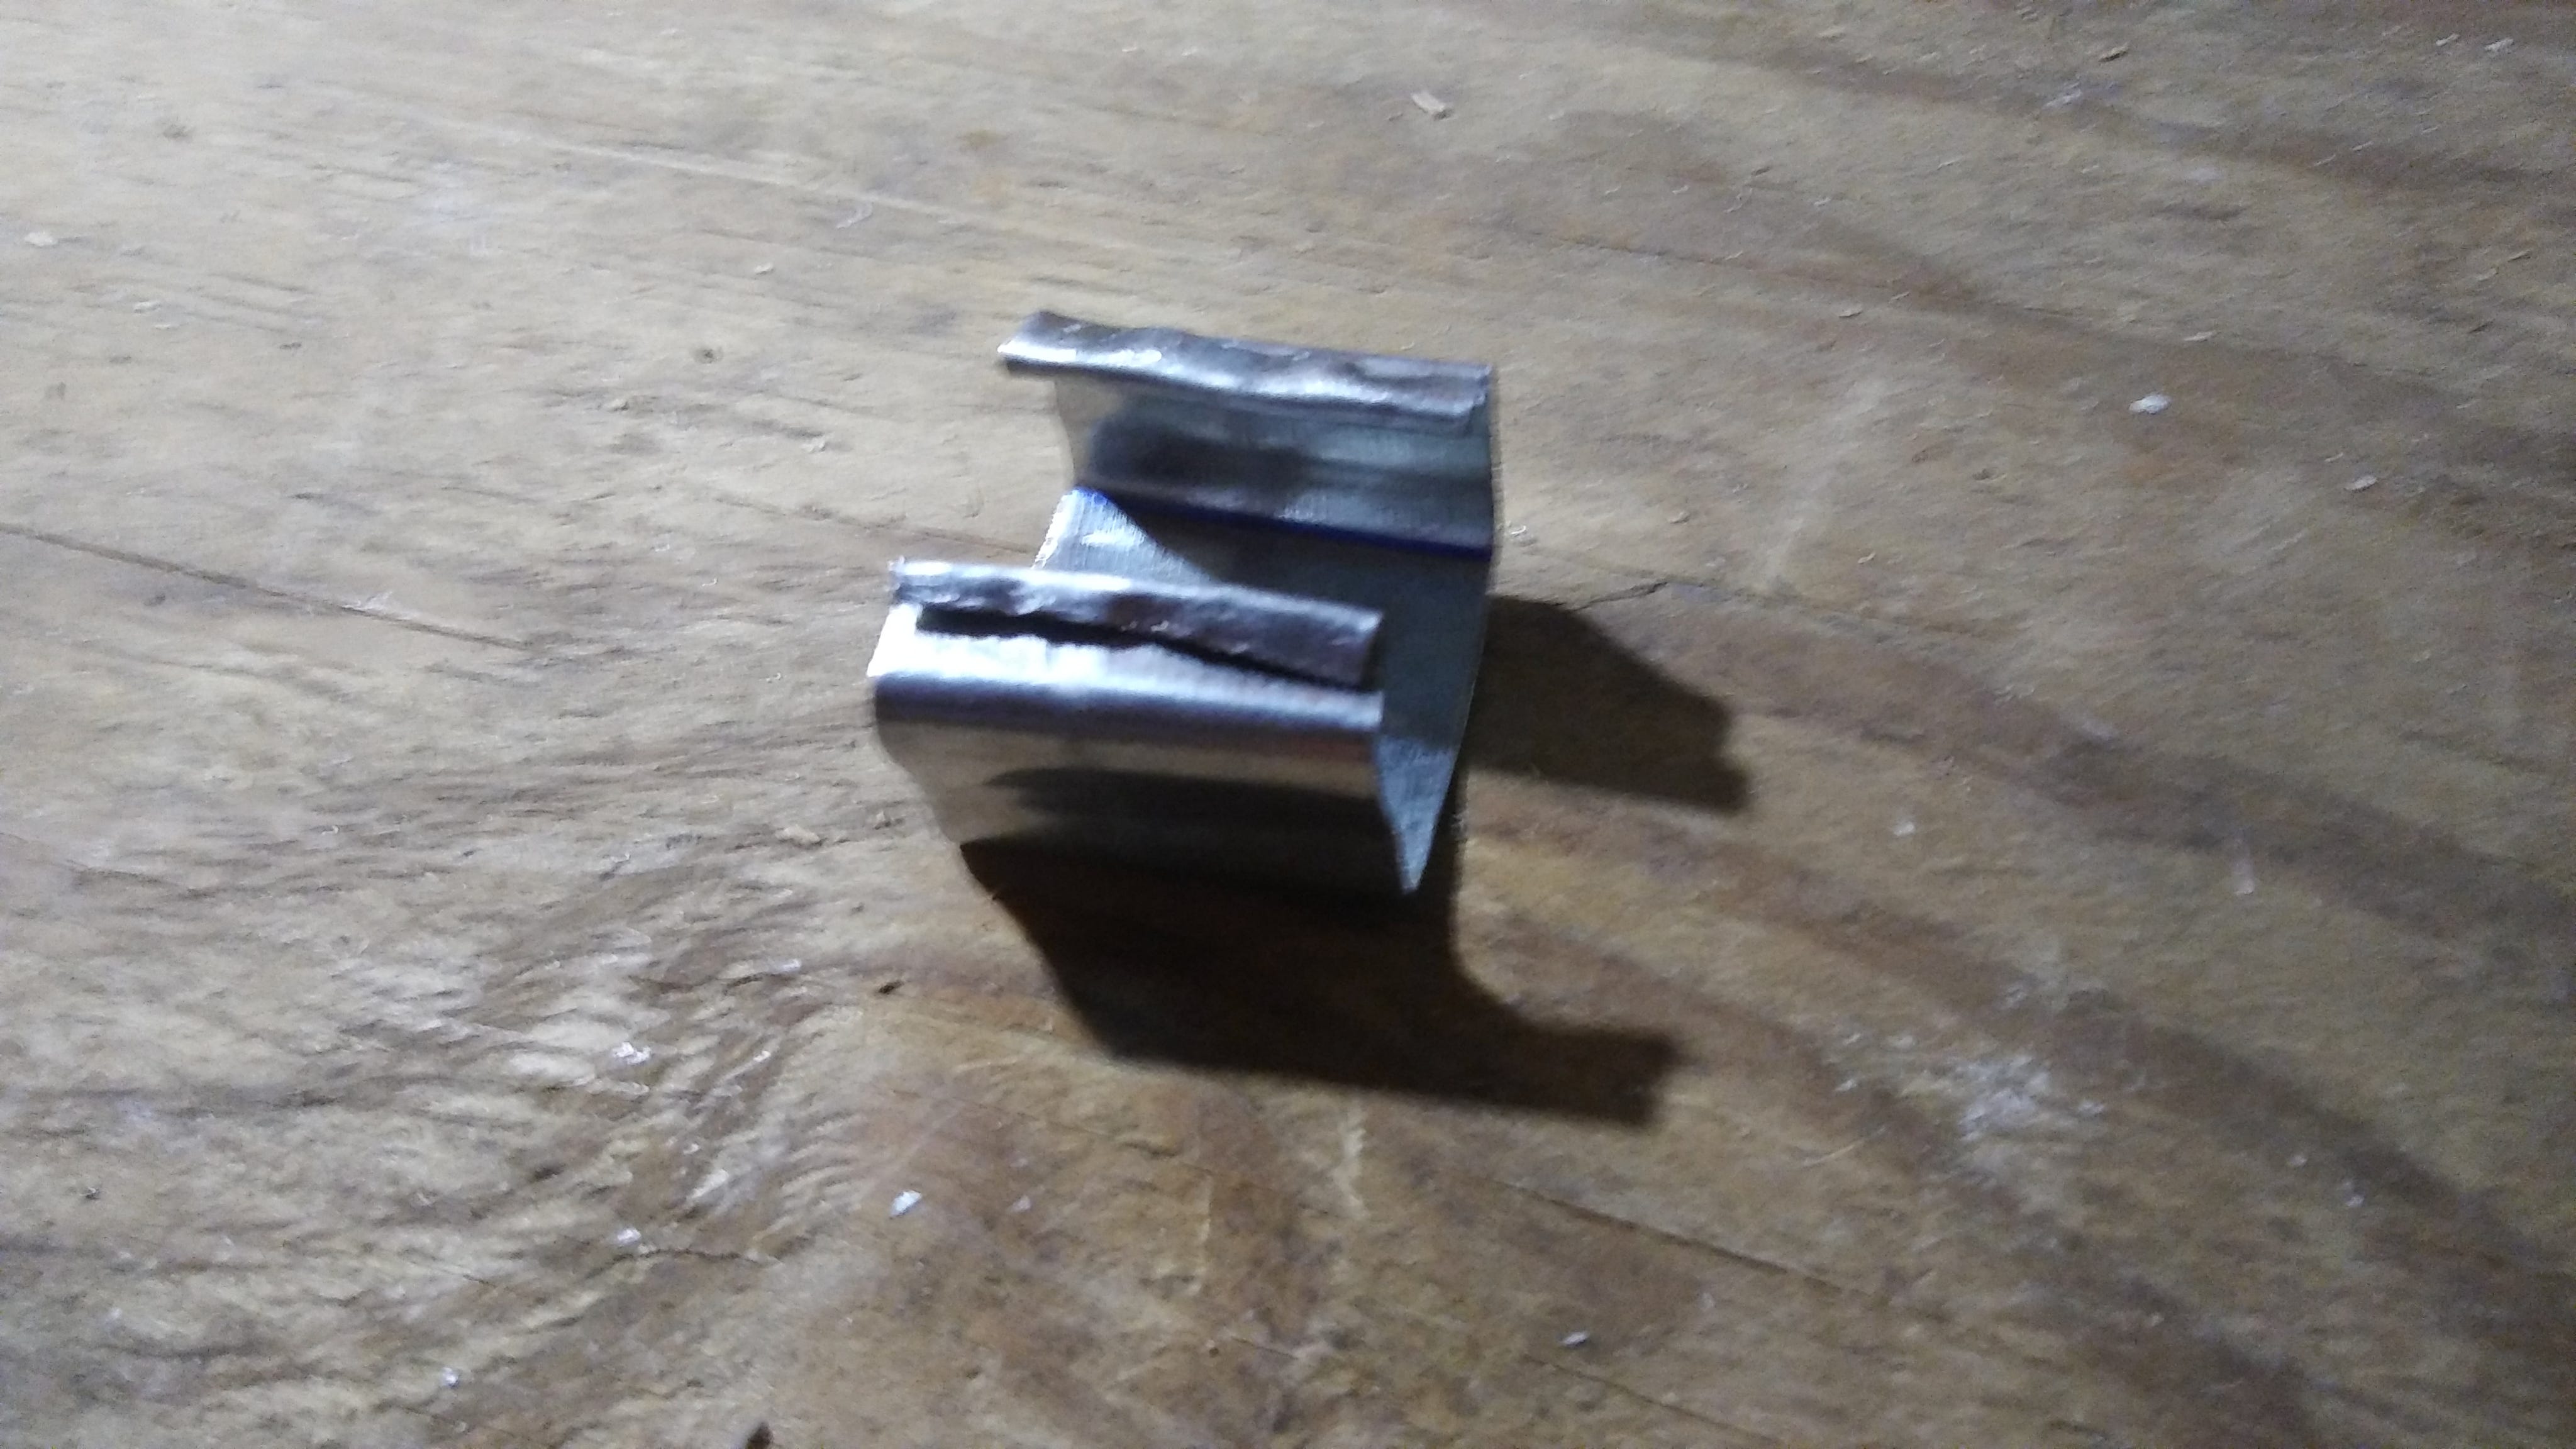
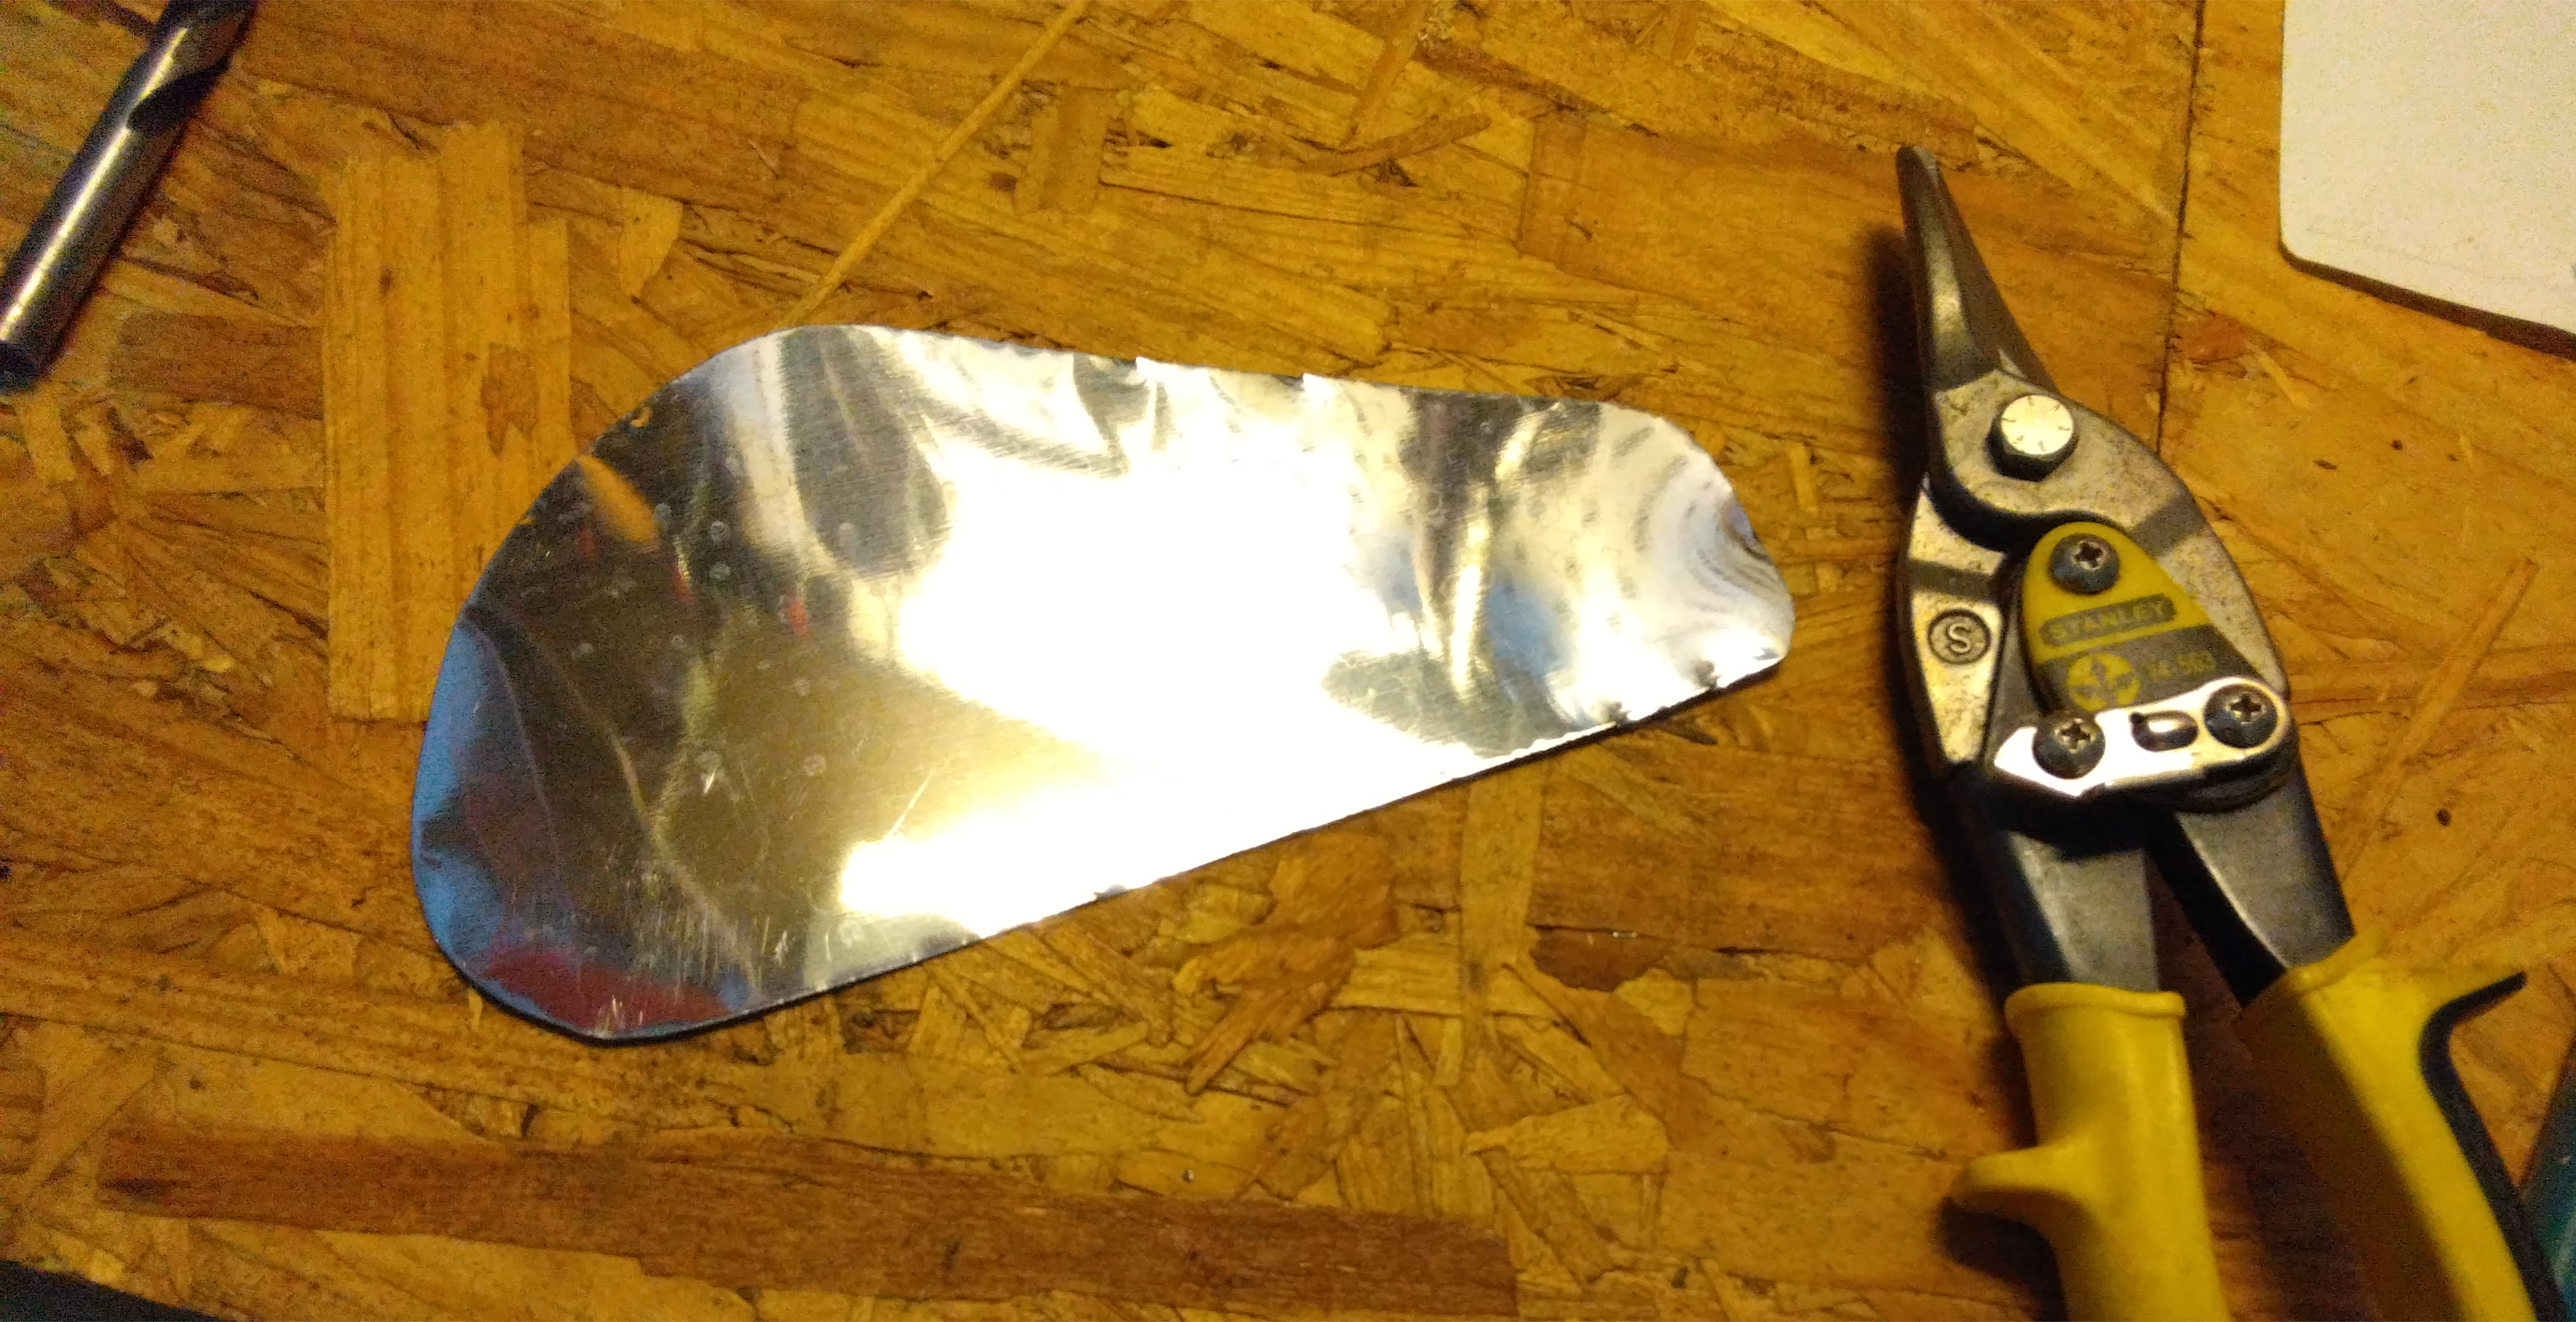
By the way, did you know that if you go to Amazon.com to buy a clip for a 9V battery your only option is to buy in bulk? I didn’t need a bag of twenty of them, so I opted instead to fabricate one myself out of sheet metal. Not pretty but it worked well.
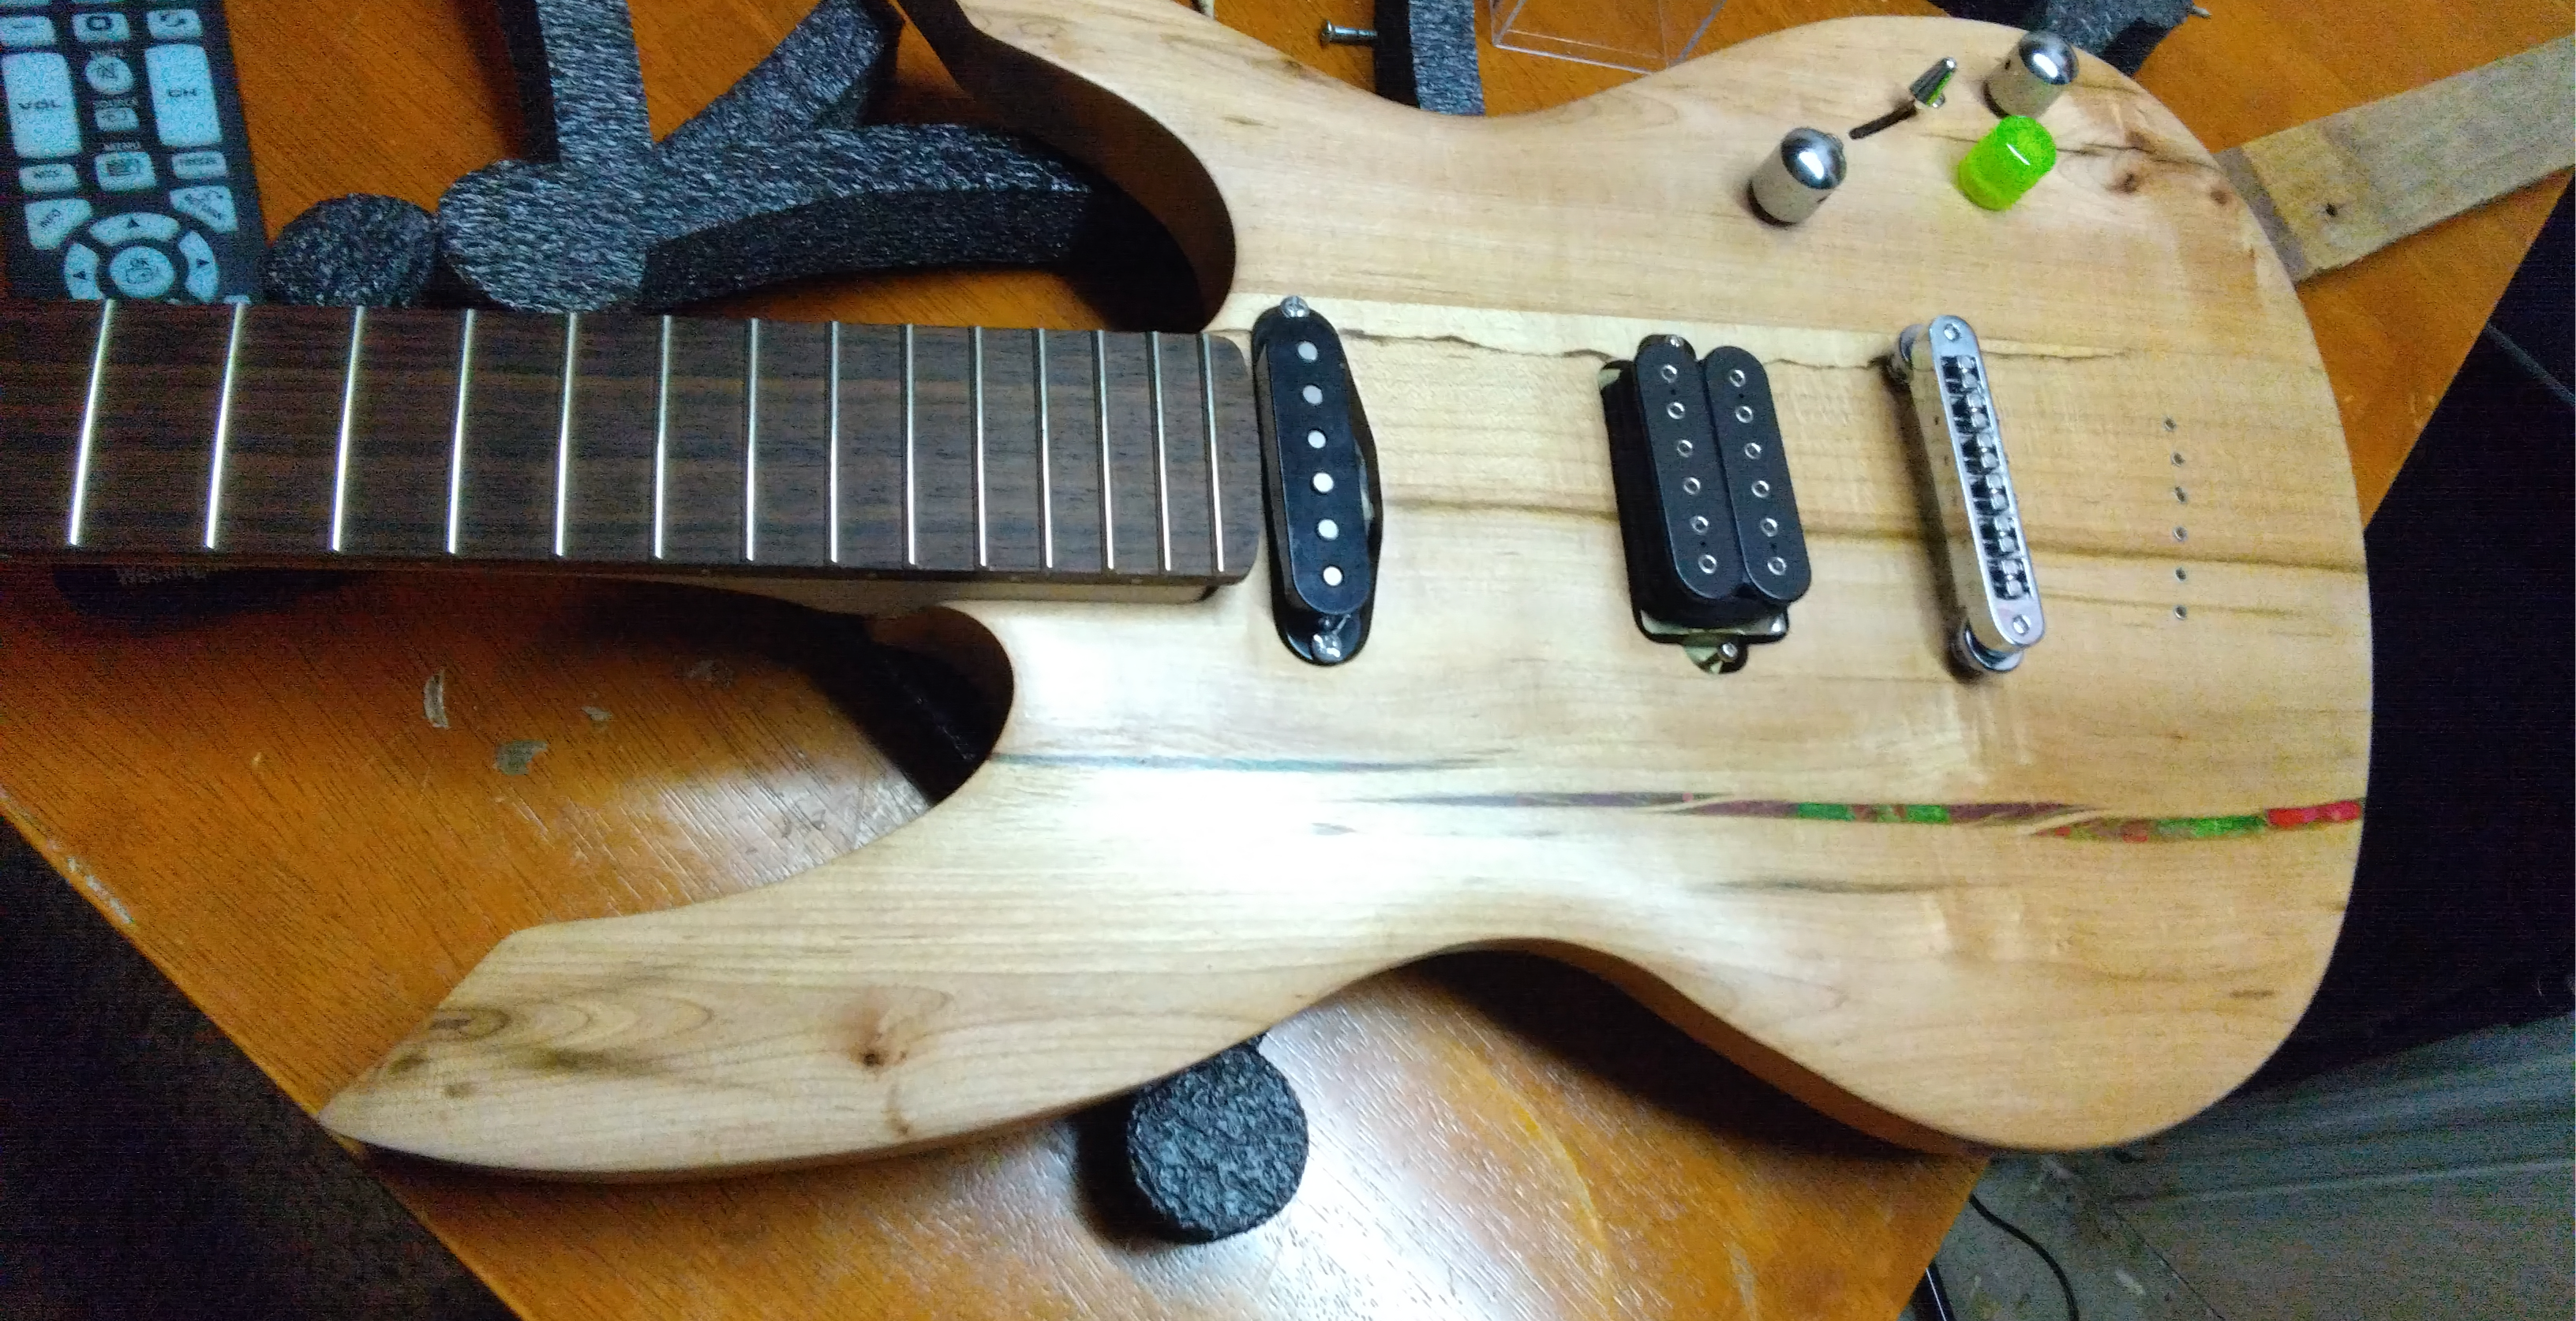
For my magnetic pickups, I decided to start by just adding the neck-position single-coil, get that one right, and then make up my mind about a bridge-position humbucker later. I chose to do it that way because the neck single-coil was more important in a way: aside from the piezo, it’s what would distinguish this guitar’s sound most from that of the SoT guitar’s. The pickup I chose, on the recommendation of someone on a forum who seemed to understand what I was going for, was a Dimarzio True Velvet.
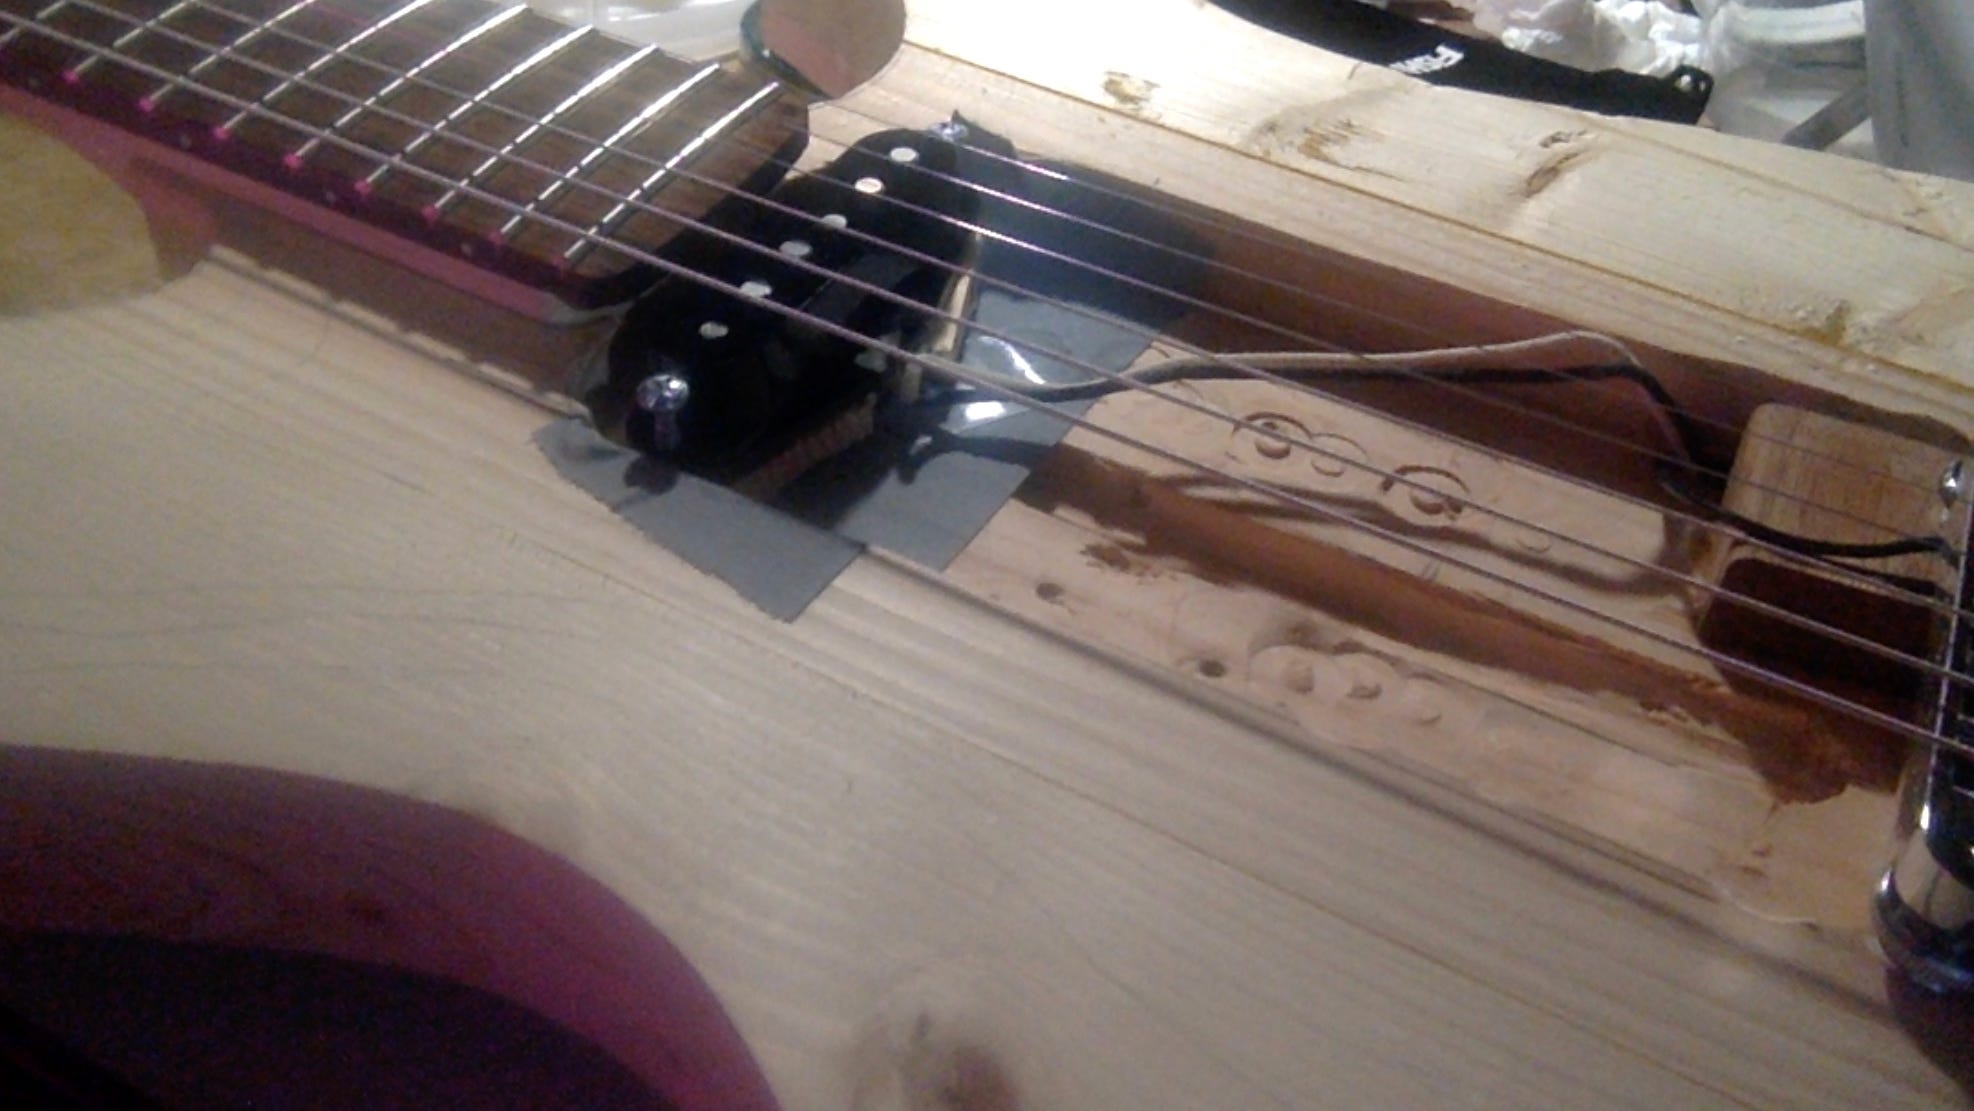
There were a few hiccups, owing in part to a hasty router job I rushed between work and picking up kids, but after a few days of sawdust and a couple late-night soldering sessions, I had a guitar I could plug in and adjust the volume and tone and actually hear out of my amp! I noodled around for a long time but eventually I even got scientific about the pickup placement by writing a riff that used various parts of the guitar’s range, and recording it over and over again with the pickup in various places, and with my volume and tone pots turned to various settings.
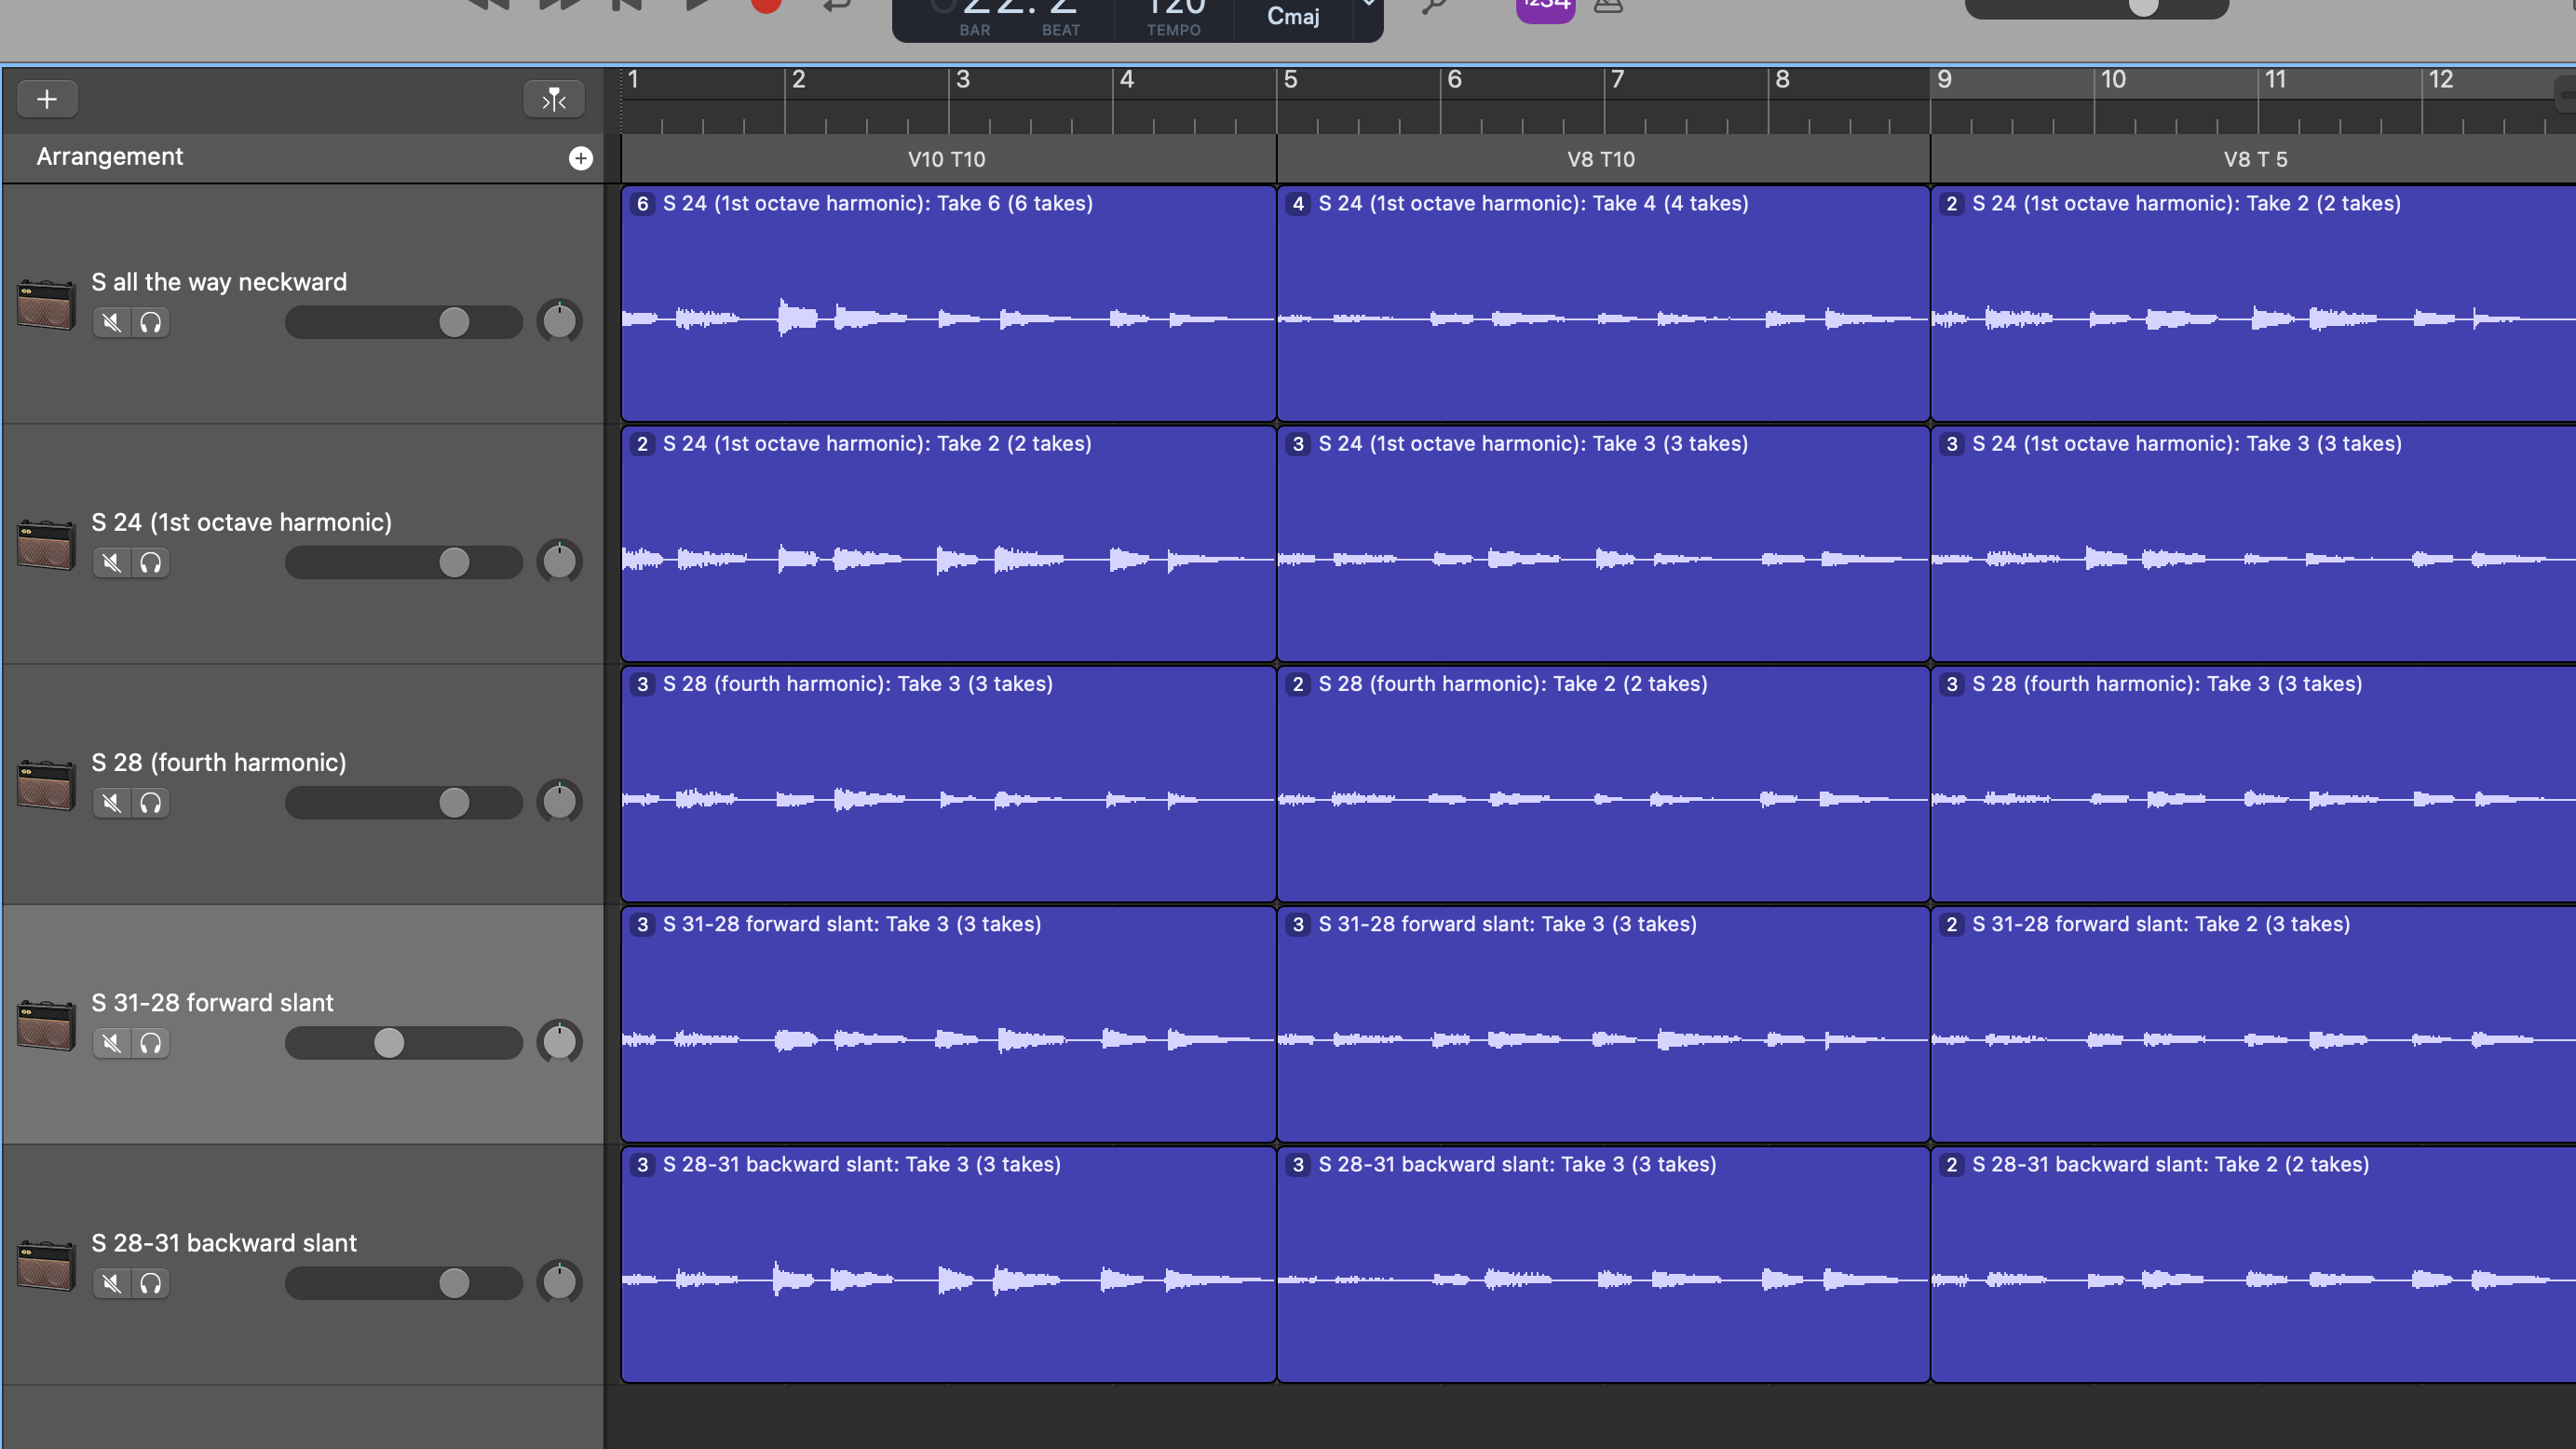
This was an interesting experiment because sometimes I was surprised by how little difference placement seemed to make, but other times I noticed it and was delighted. A big takeaway was how many other variables there are, such as proximity to the strings, what kind of strings, how old the strings are, and so on. Another cool surprise was that the most oddball configuration I tried–a backward slant just aft of the neck position–actually sounded pretty good, better than some of the other configurations. But in the end I got the most balanced results from simply placing the pickup straight across at about where the 24th fret would be, exactly halfway along the string. A bit conventional, but that’s one area where conventional makes sense even for me.
That was all well and good for the True Velvet, but my piezo system appeared to have a grounding issue: if I turned the Powerchip to any position higher than 0, it produced only a loud hum. Ed double-checked my soldering and confirmed I’d made no mistakes, then we troubleshot by connecting the Powerbridge straight to the jack (bypassing the Powerchip), but it still didn’t work. After some back and forth with Fishman, they decided I needed to mail my bridge back to them. They told me the turnaround time would be a few weeks.
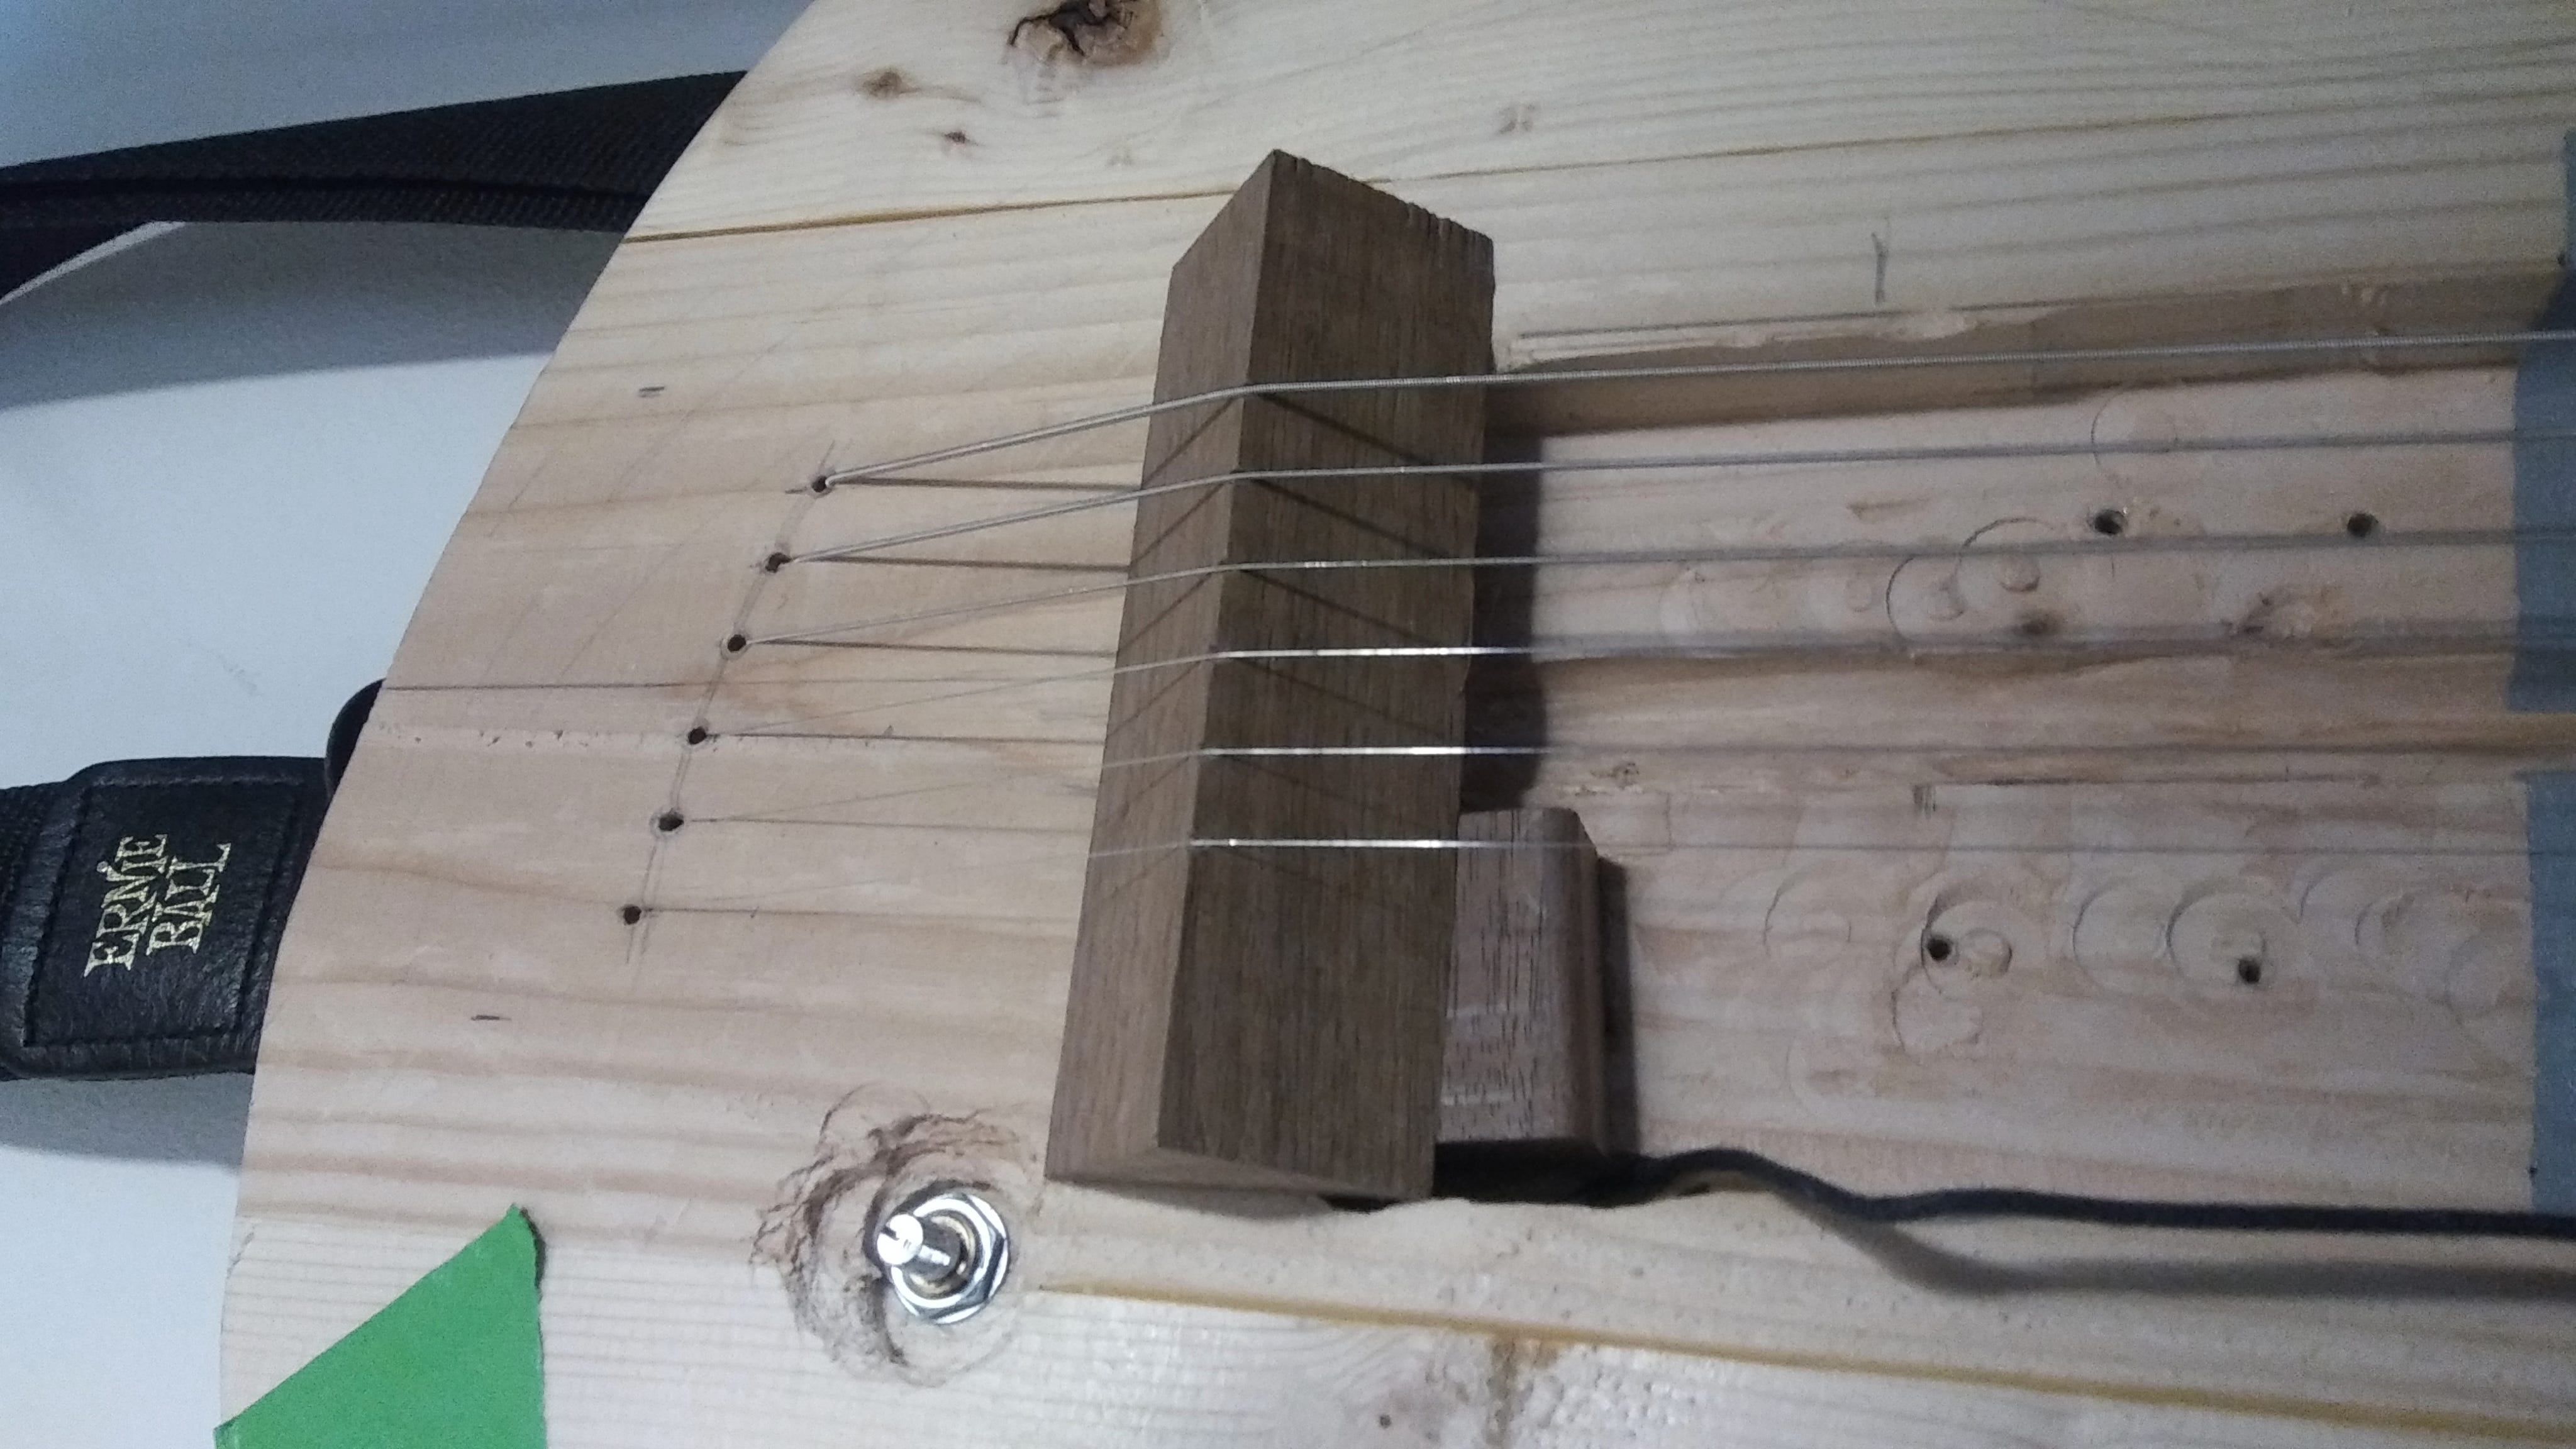
Finding unbearable the prospect of not being able to play my guitar for that time even in its dummy state, I fashioned a temporary bridge out of a piece of scrap hardwood. (I couldn’t cannibalize the TOM from my beginner Ibanez because I’d recently sold it, eager to not accumulate any more gear than I needed.) There was much trial and error but eventually I got the intonation on my improvised bridge “close enough”. It was awkward and unwieldy but it worked.
While I was sorting out that issue with Fishman, I purchased the rest of my electronic components: I upgraded my pots from the old junky “trying things out” ones I’d found lying around in my basement (I think they were the original pots from my ToS guitar), I bought a switch so I could select between magnetic pickups, I pulled the trigger on a blend pot with center detent rather than a switch to mix my piezo and magnetic signals, and I decided on and purchased a humbucker pickup for the bridge position: a Dimarzio DP100. For placement, this time I took a shortcut and simply replicated the position of the bridge humbucker on my SoT.
Typically, bridge-position pickups, when played clean–without distortion–sound quite nasally, but in an audio comparison of 17 different bridge humbuckers on Sweetwater.com the DP100 did not. This meant I would be likely to actually use it in other contexts than just when playing with distortion, unlike my other guitars.
It perhaps wasn’t the most logical order to do things, but I’d gotten a lot of time to play the guitar with the dummy body and figure out what components I wanted and where I wanted each one. Mission accomplished.
Fishman replaced the Powerbridge, and after installing it I had the same grounding issue. This was maddening, until I discovered (with the help of a guitar forum) that I simply needed to ground the bridge chassis itself. A single wire, soldered to the body of my volume pot and touching one of the bridge posts through a secret hidden hole inside the guitar, solved the problem instantly. I was over the moon; the piezo sounded amazing.
The electronics and hardware “system” was now complete, and I felt ready to put everything together. It was also nice to know that I was done buying things for the guitar and that all the tasks ahead of me would only be cutting, sanding, brushing on finish, (re)soldering, and assembling.
Chapter seven: Tha rill dill
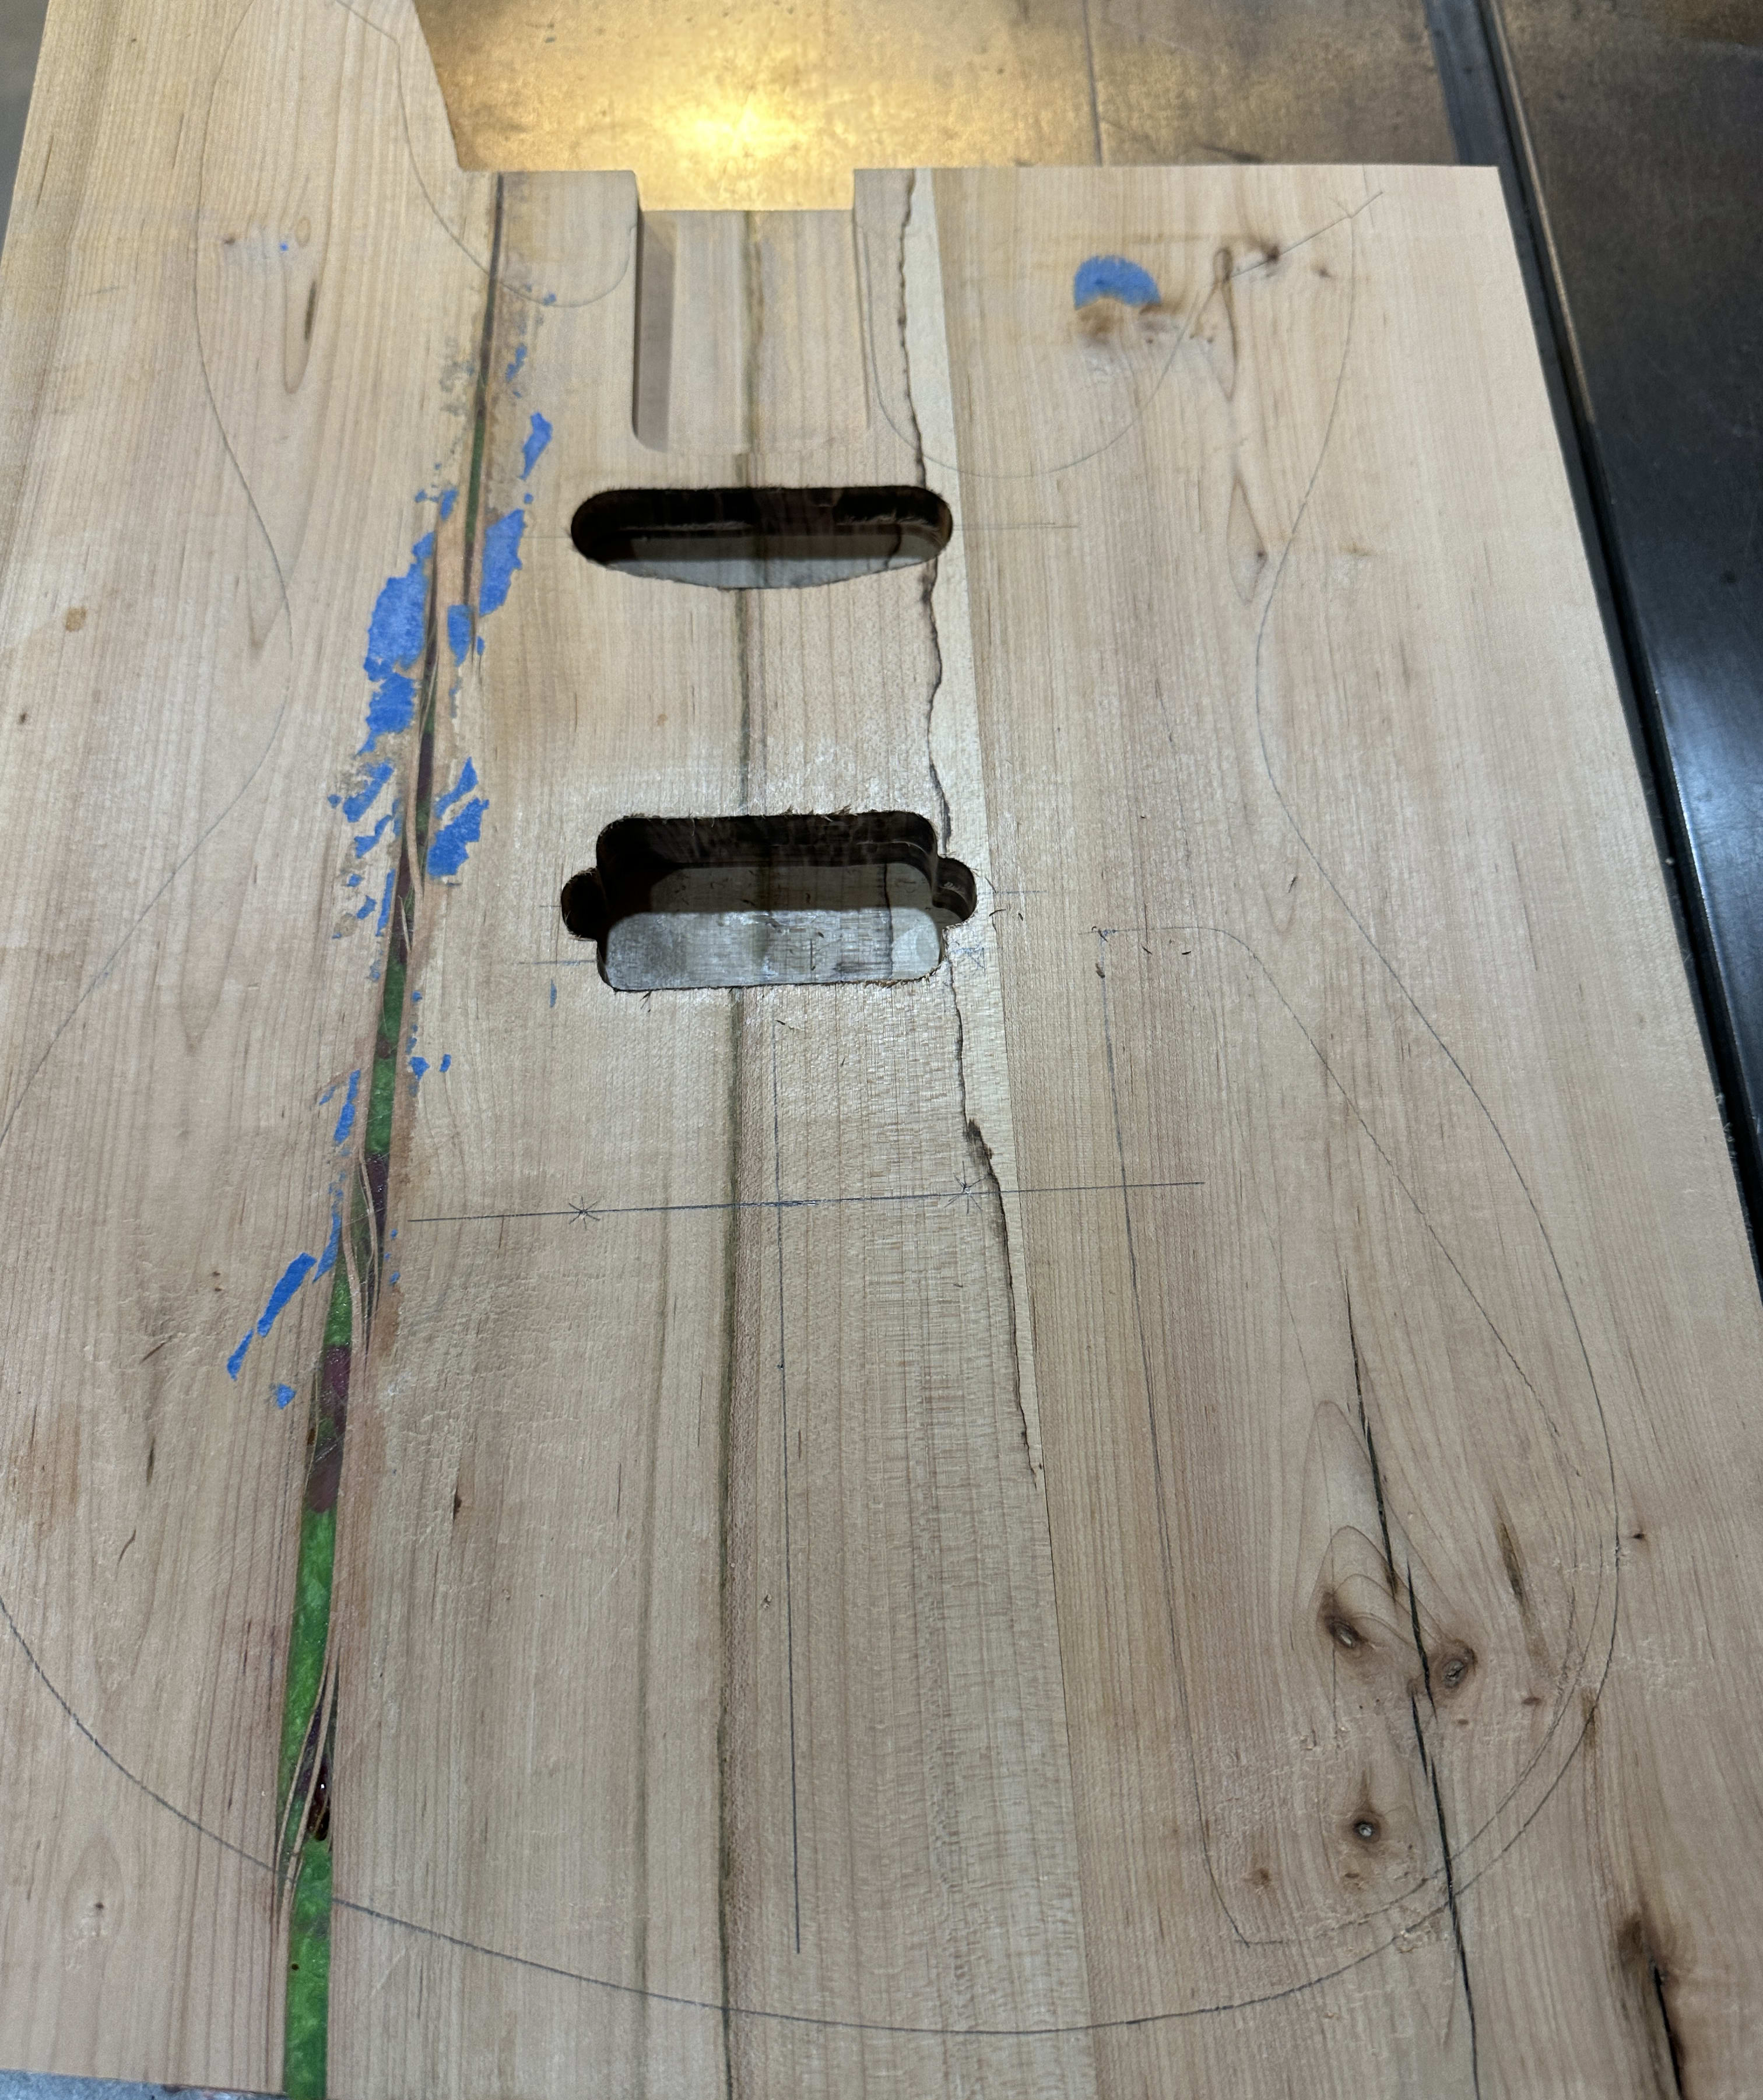
At last I was ready to begin working on the actual maple body slab. Using the same template and method as before, I routed the neck pocket, only this time I routed it to exactly the right depth.
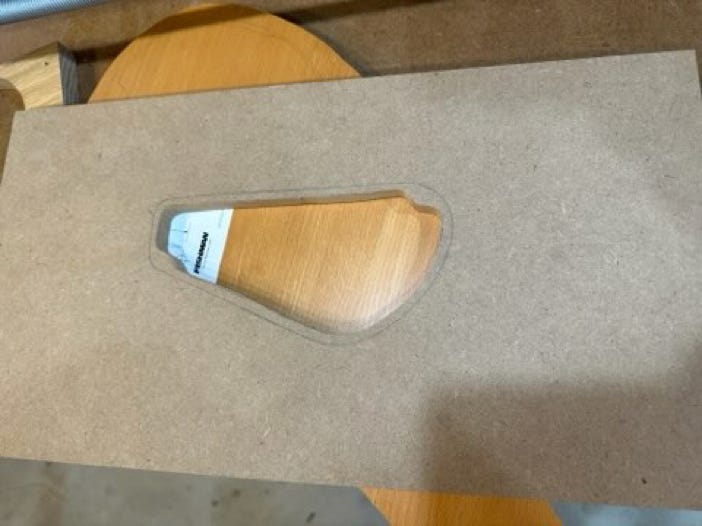
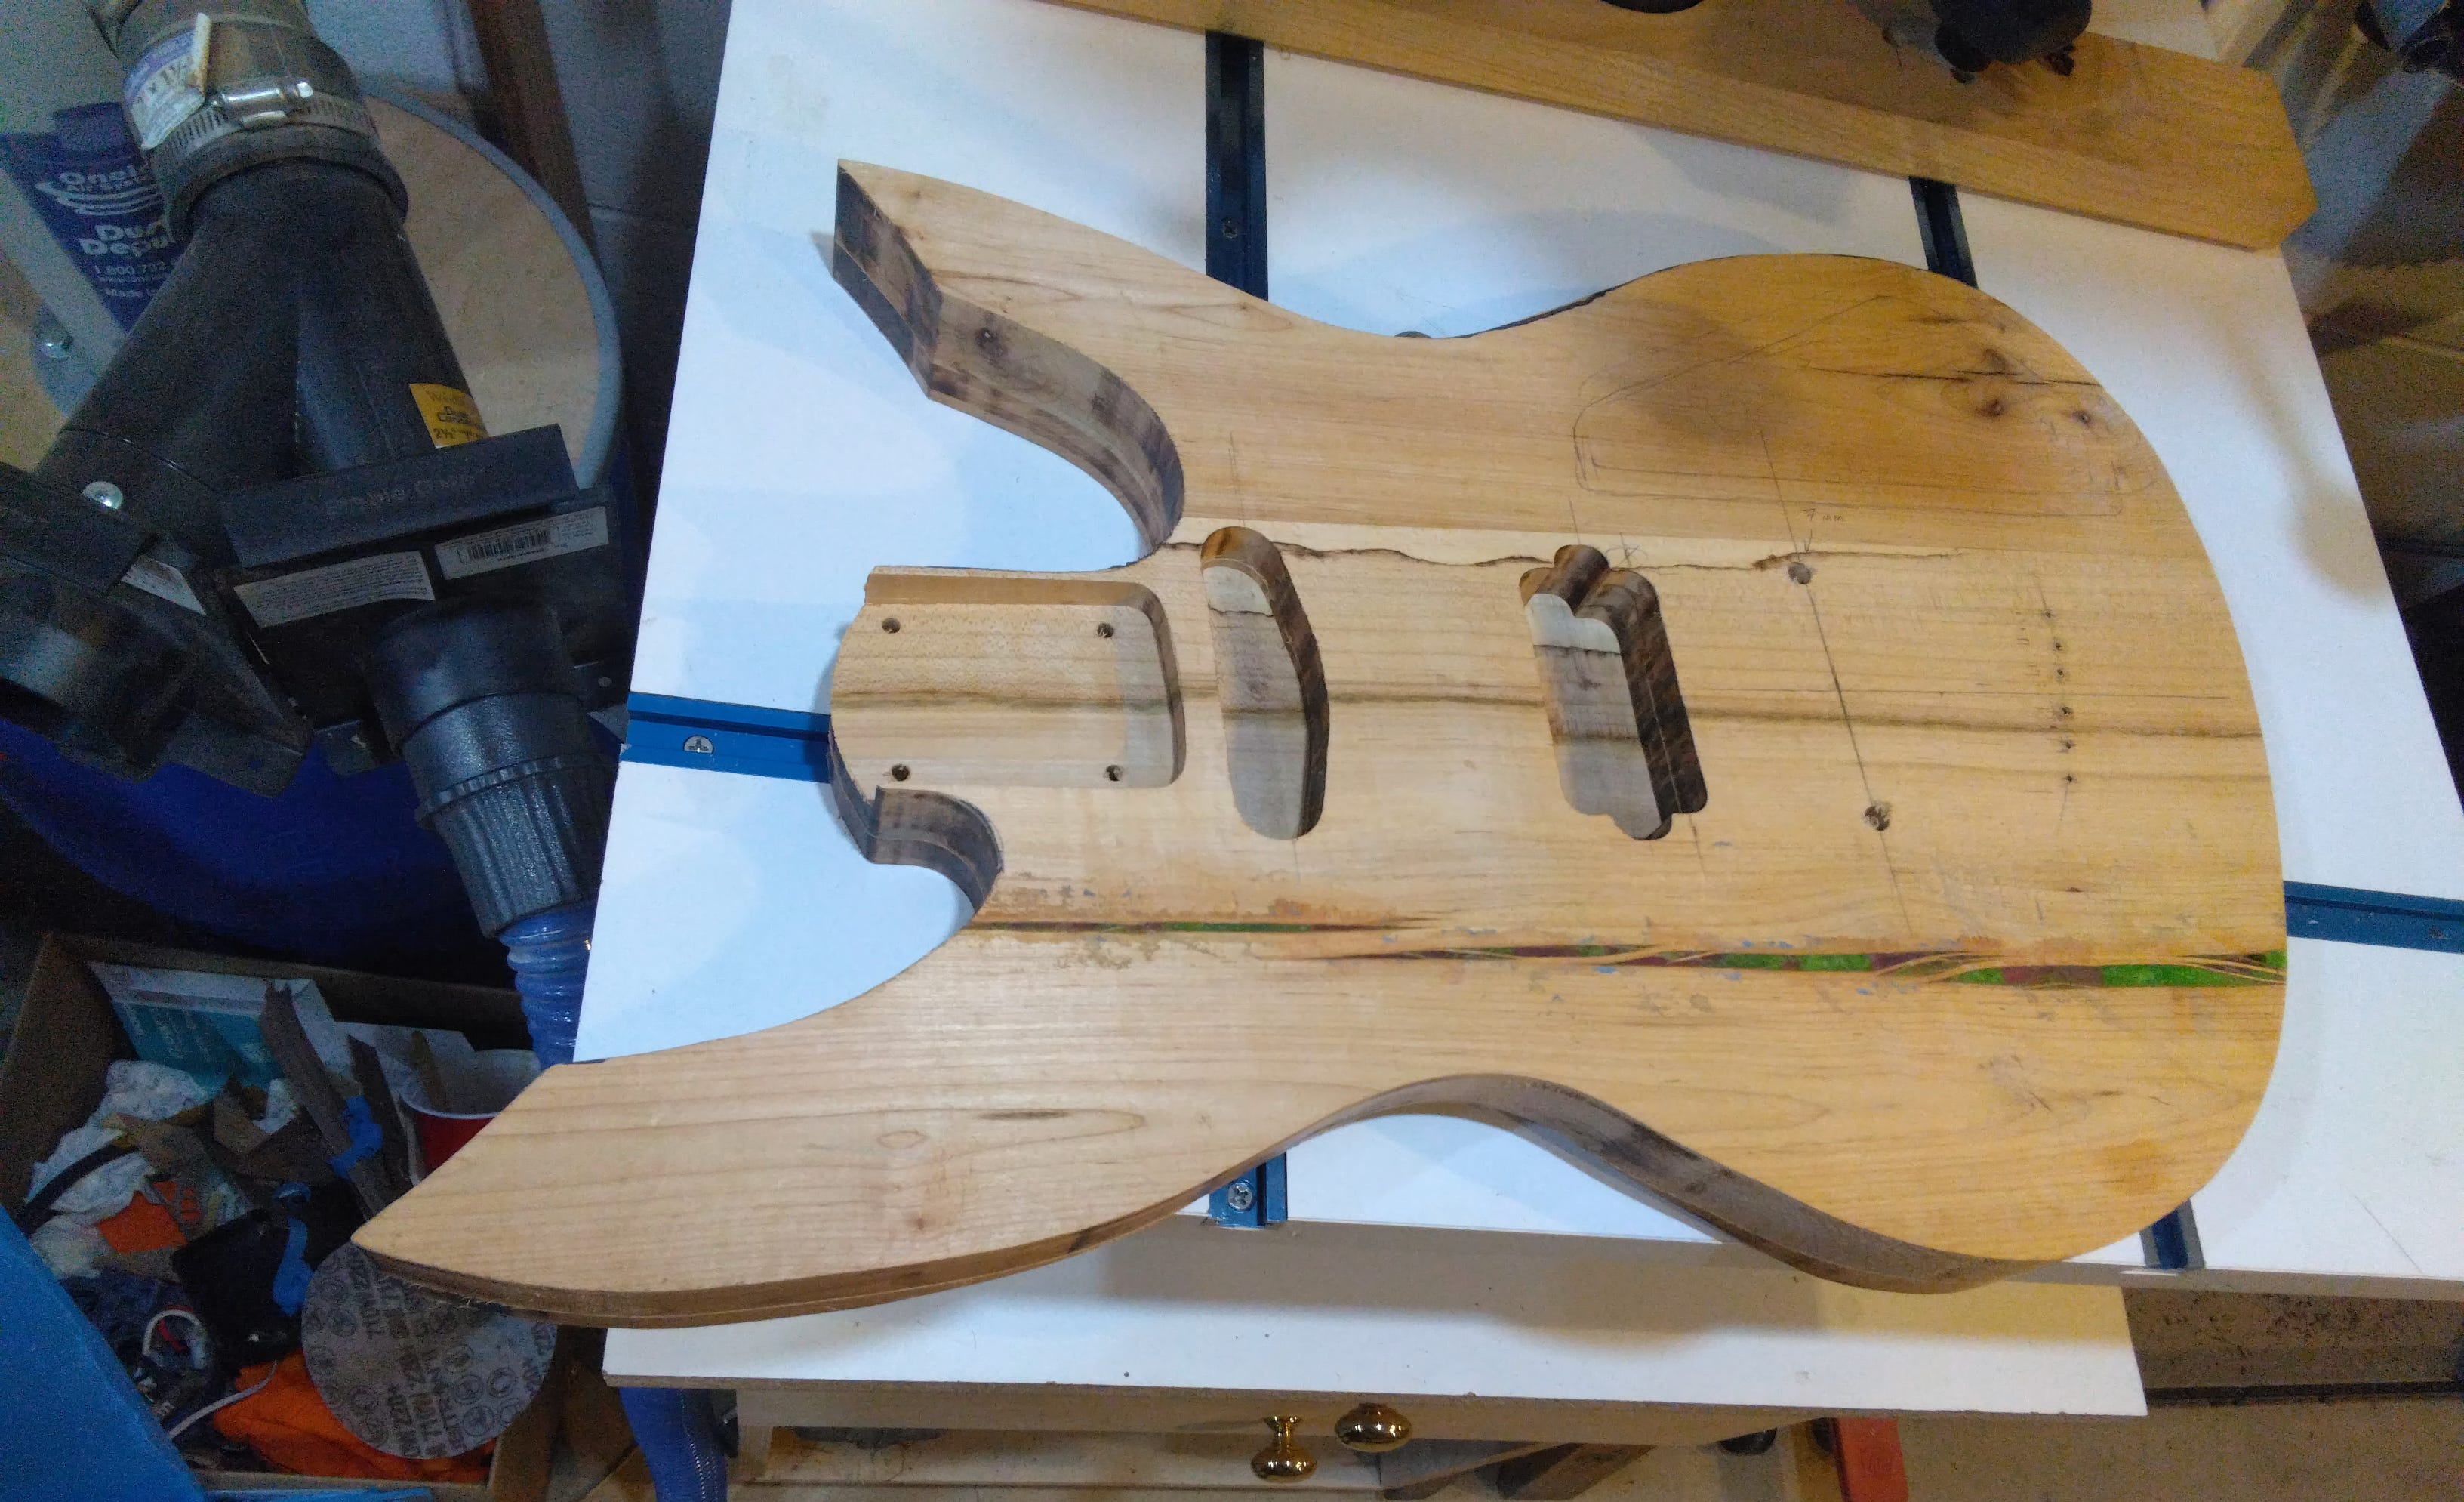
Instead of a big ugly rectangular “swimming pool” pickup cavity like on the dummy body, the finished guitar would have individual cavities for each pickup, placed exactly where I’d determined I liked their sound most. Although pickup cavity routing templates can be purchased, I opted to create my own templates on paper and glue each one to a piece of MDF. I then used a scroll saw, a spindle sander, and a rasp to cut out the cavity shapes. Using these templates to guide the router, each cavity would be just the right size and shape for its pickup.
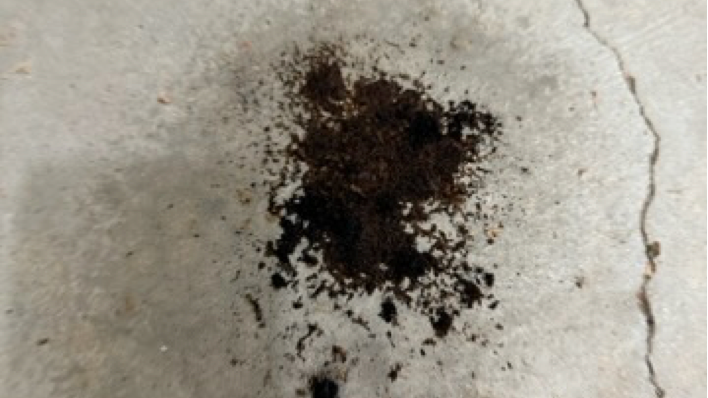
We had some excitement while I was routing the first cavity, as the heat from the friction of the router bit caused the sawdust built up in the cavity to ignite. Ed yelled “switch it off!” and I turned off the router; he then deftly scooped out the smoldering embers from the cavity, dumped them on his concrete floor, and sprayed water on them before his sawdust collection system sucked them up.
(A sawdust collection system is essentially a network of tubes leading from where wood is being cut to a big vacuum cylinder that collects sawdust; it’s basically mandatory in any indoor woodworking shop, especially when power tools are used. If Ed’s system had sucked up that combusting sawdust it might have produced a very bad outcome indeed.)
I suspect this happened because the router bit, which I’d bought almost a year earlier at the start of the project, was by now quite worn. Continuous cycles of being heated by friction and then cooling down had caused the blades to rust, and the coating had also begun to strip off of its other parts, causing even more friction with the workpiece. After that session routing the pickup cavities, Ed provided me with a bowl of some kind of solution and a wire brush, with which I partially restored the bit so I could use it to rout the control cavity in the back of the guitar later on.
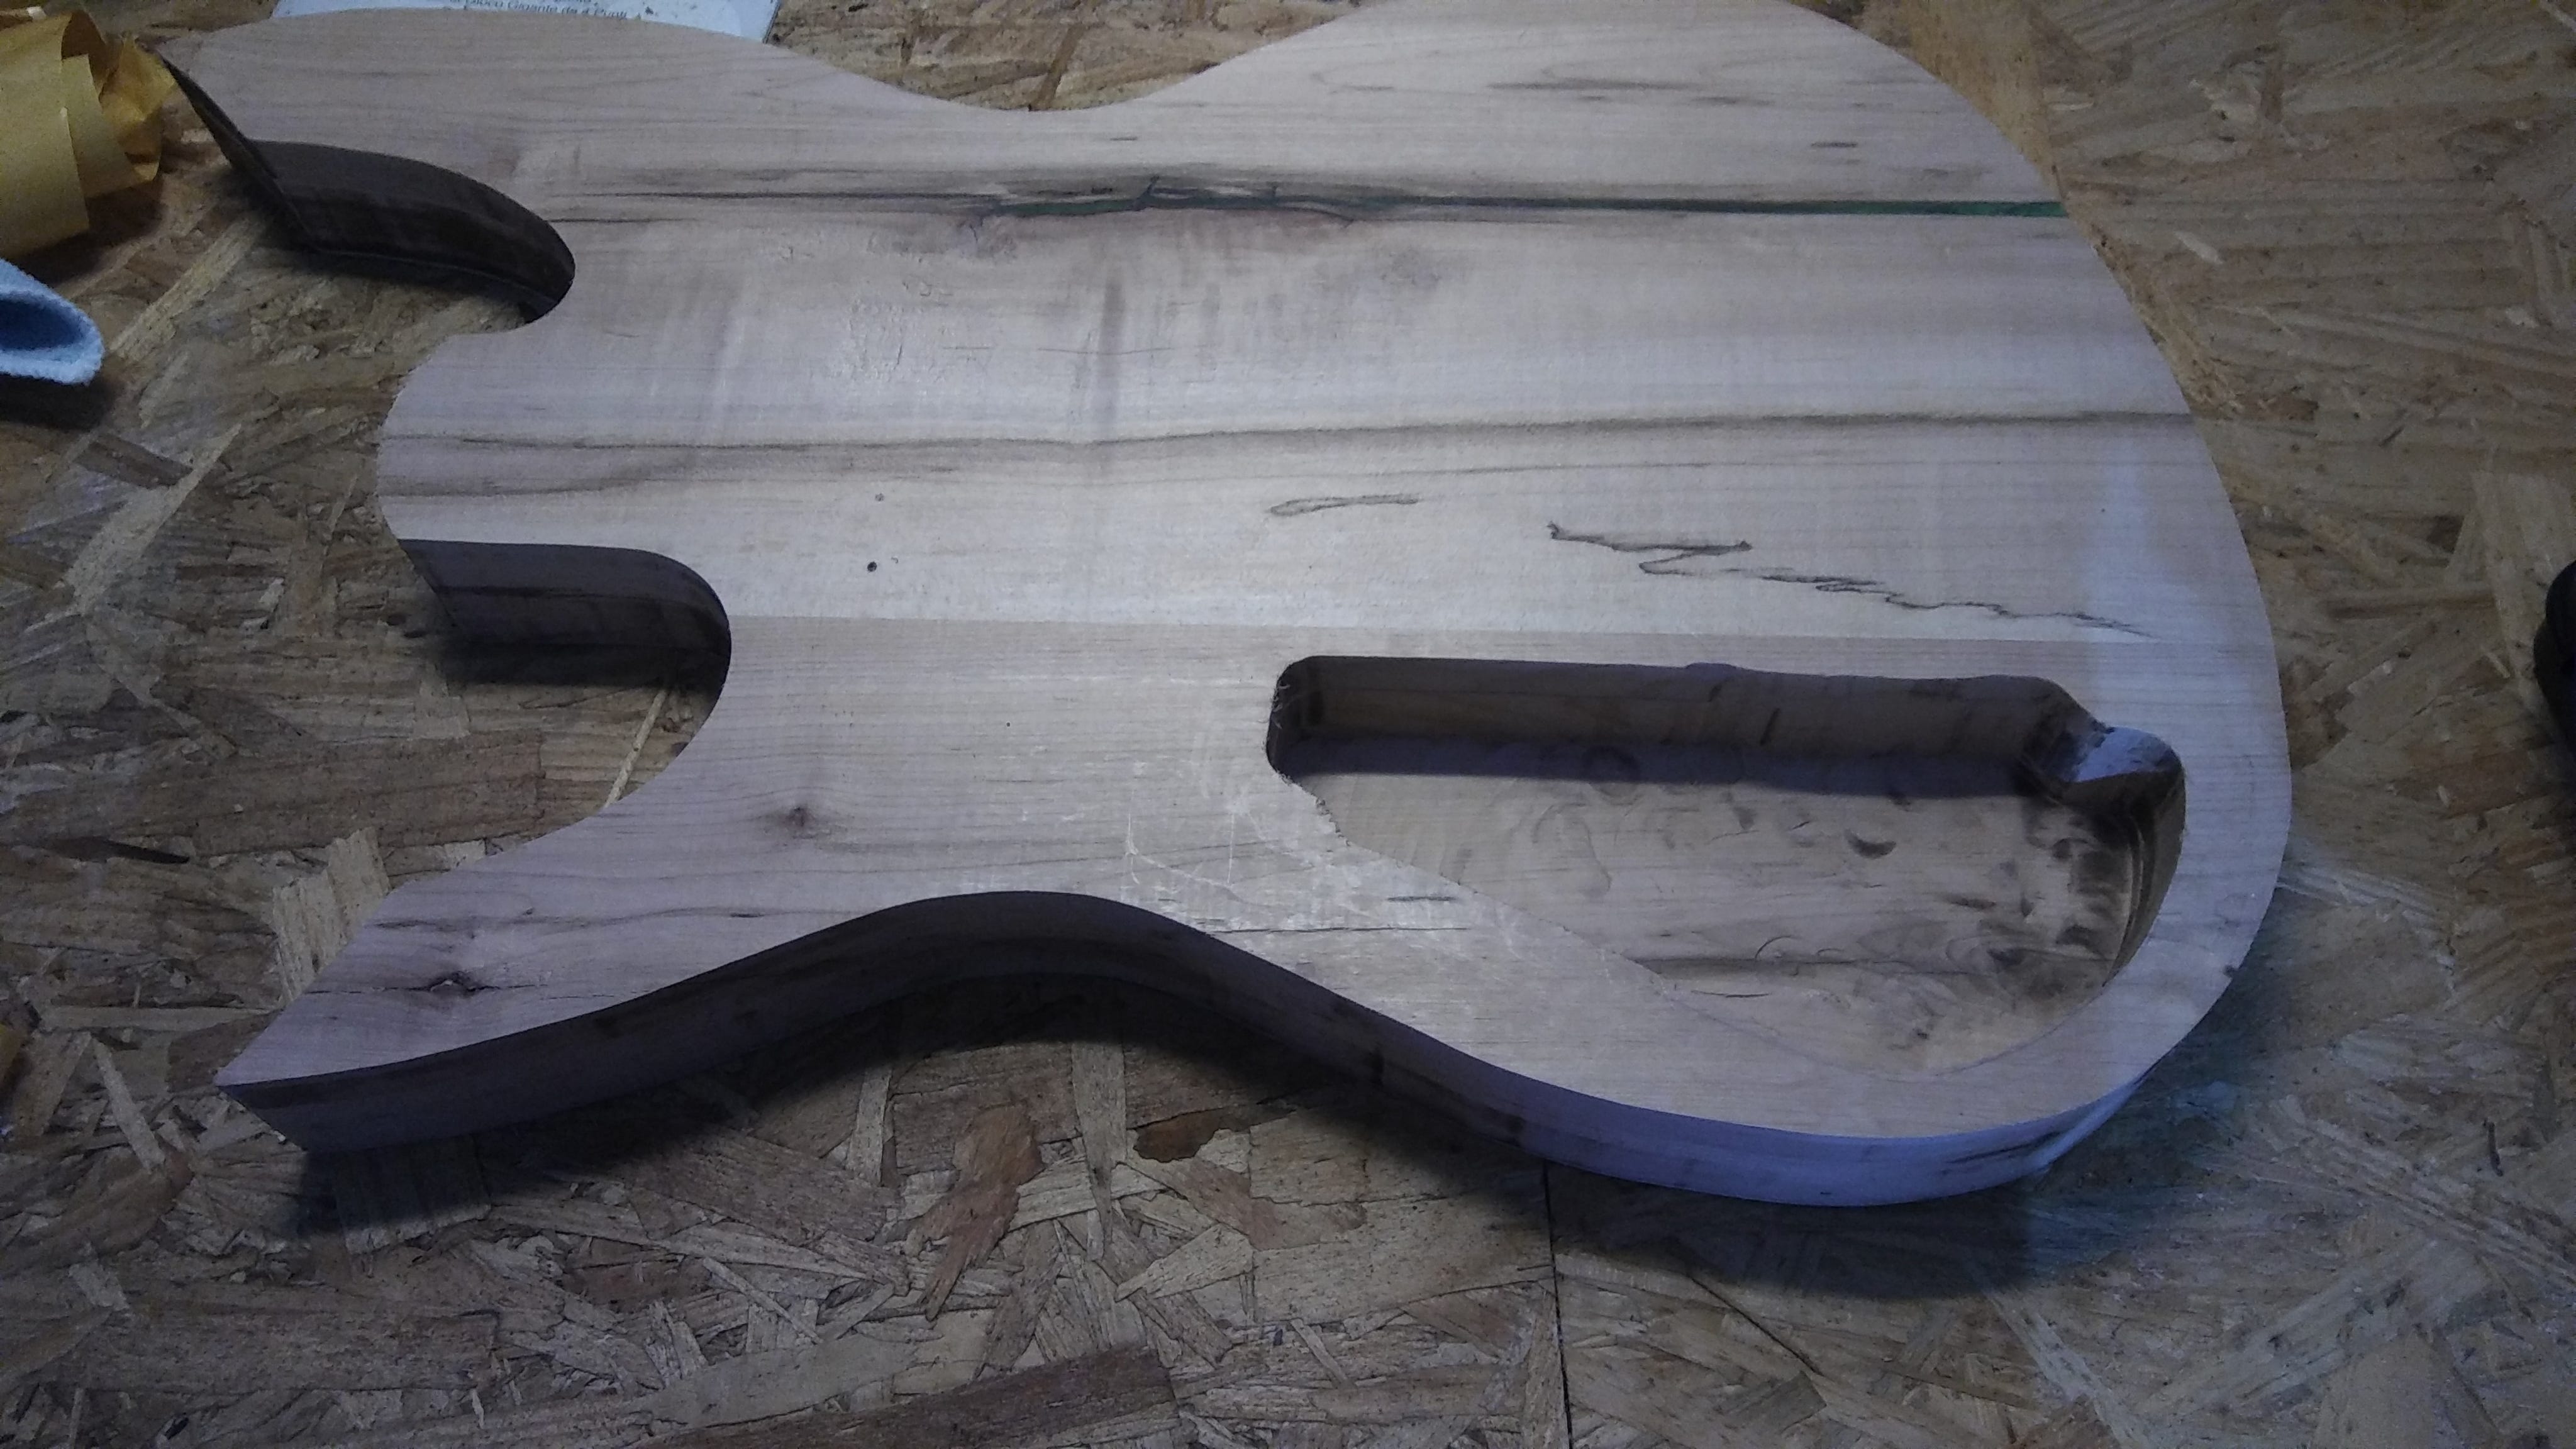
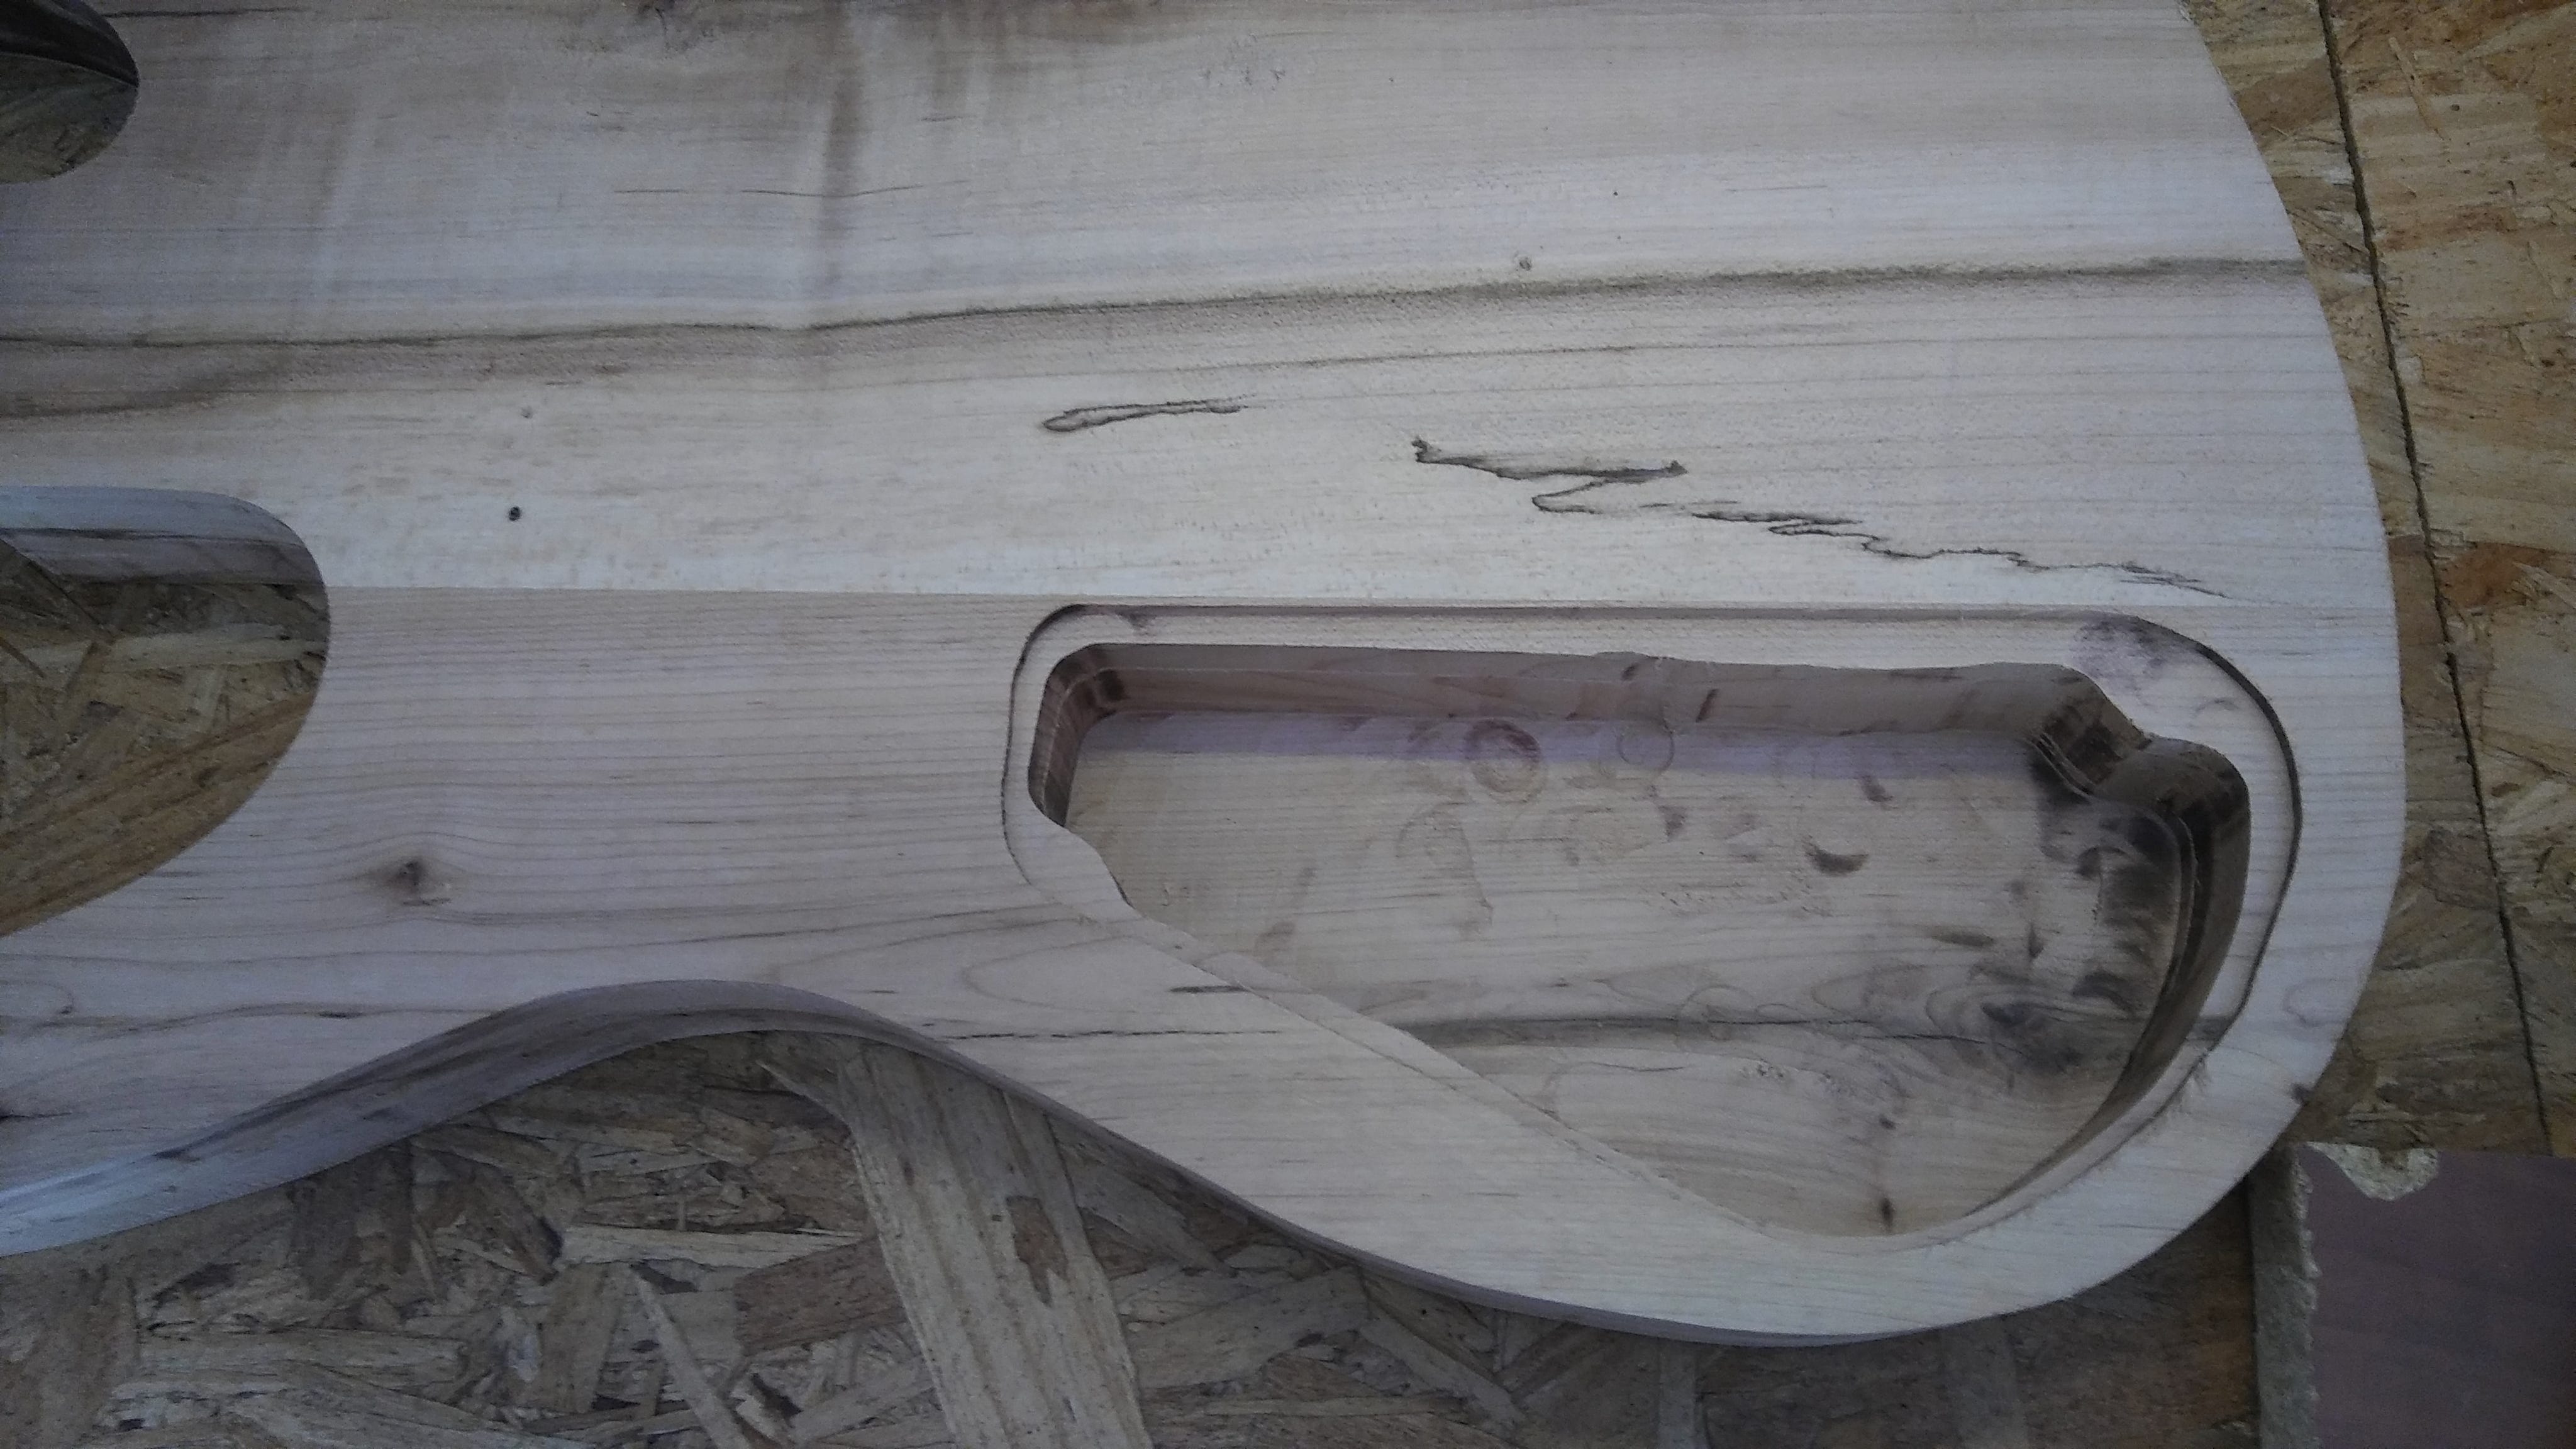
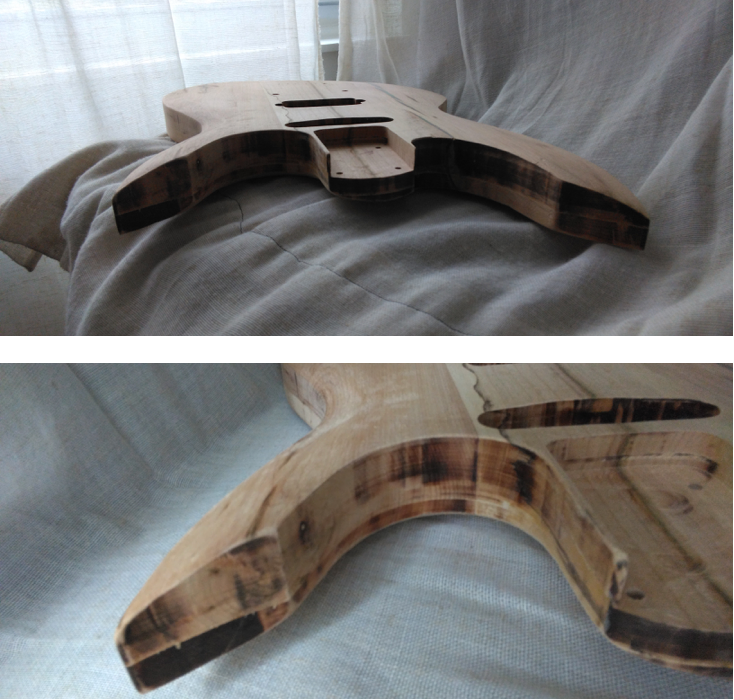
Meanwhile, the slab looked great with actual pickup cavities instead of the swimming pool.
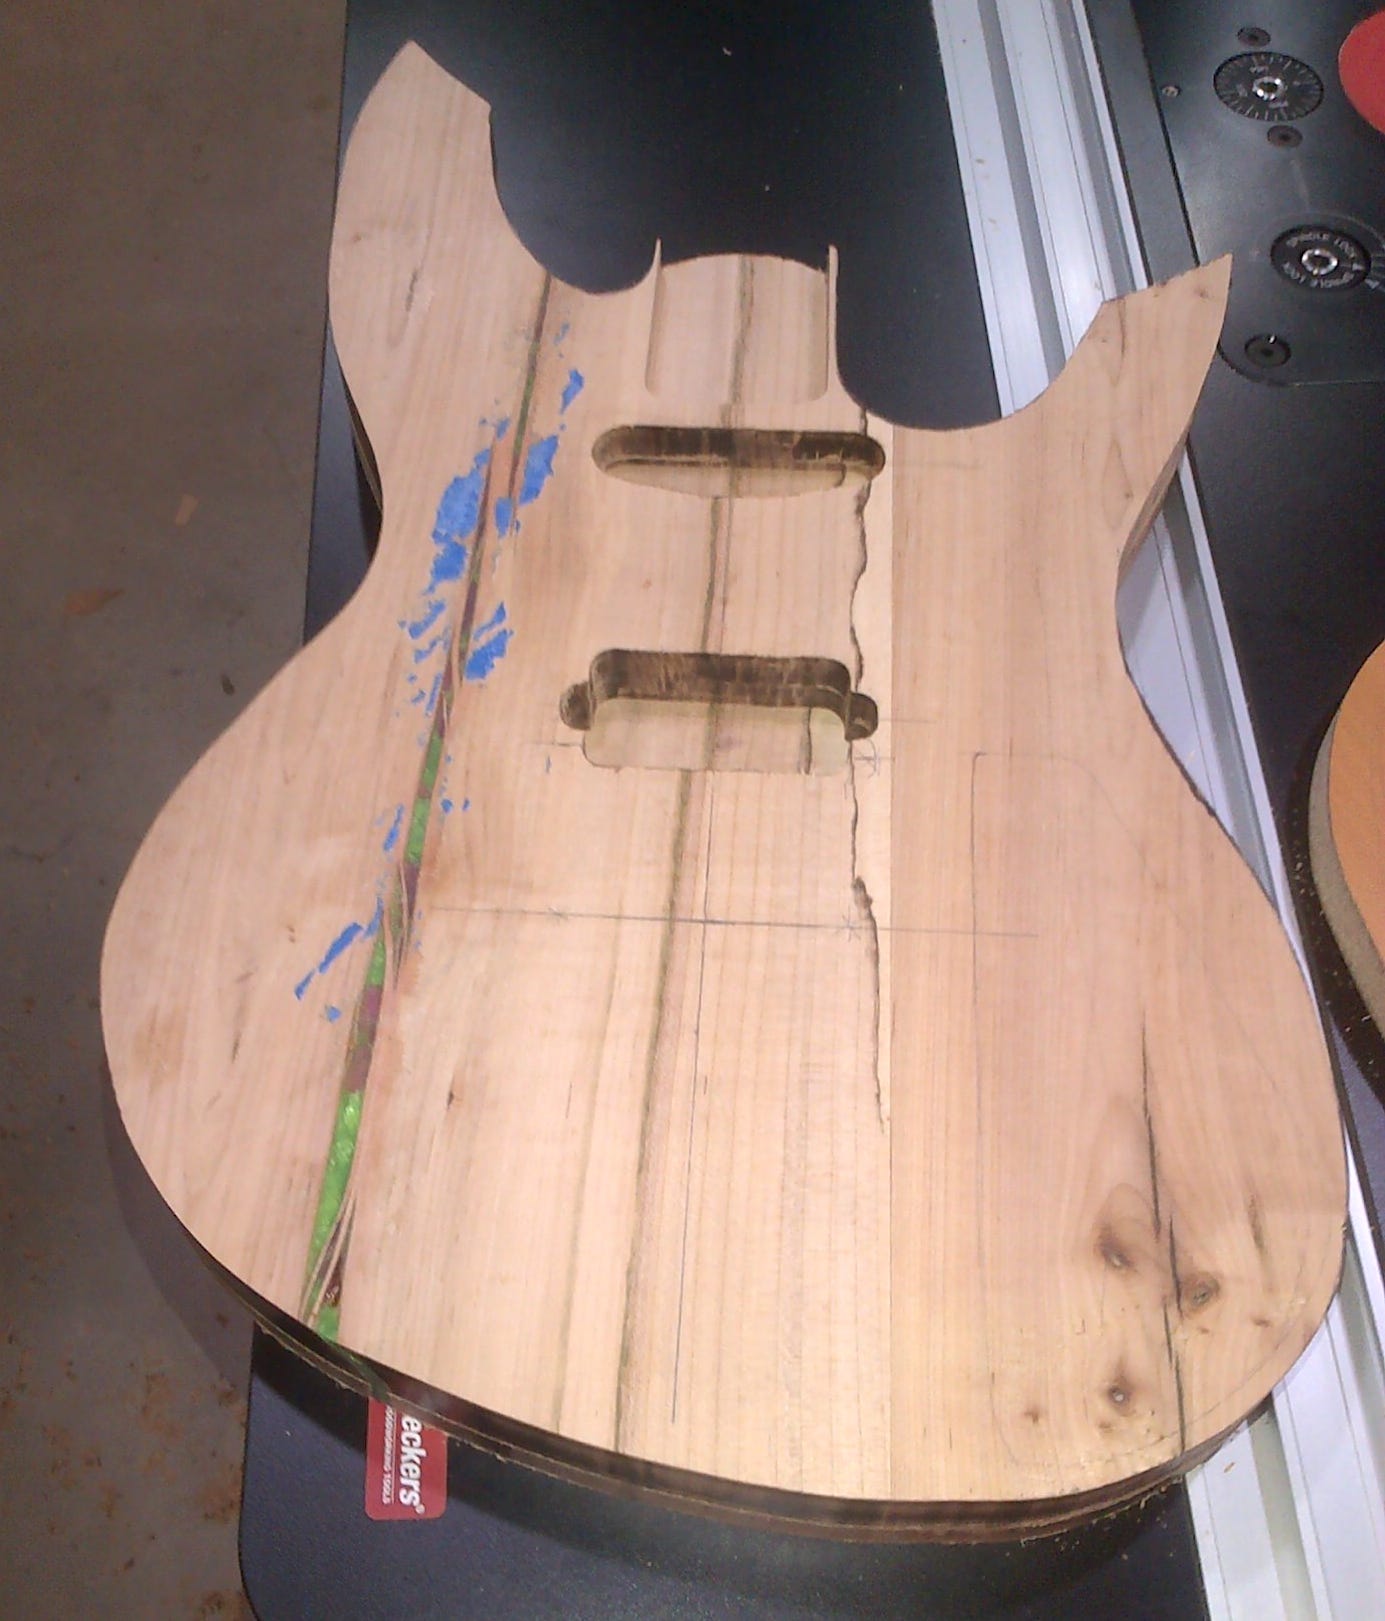
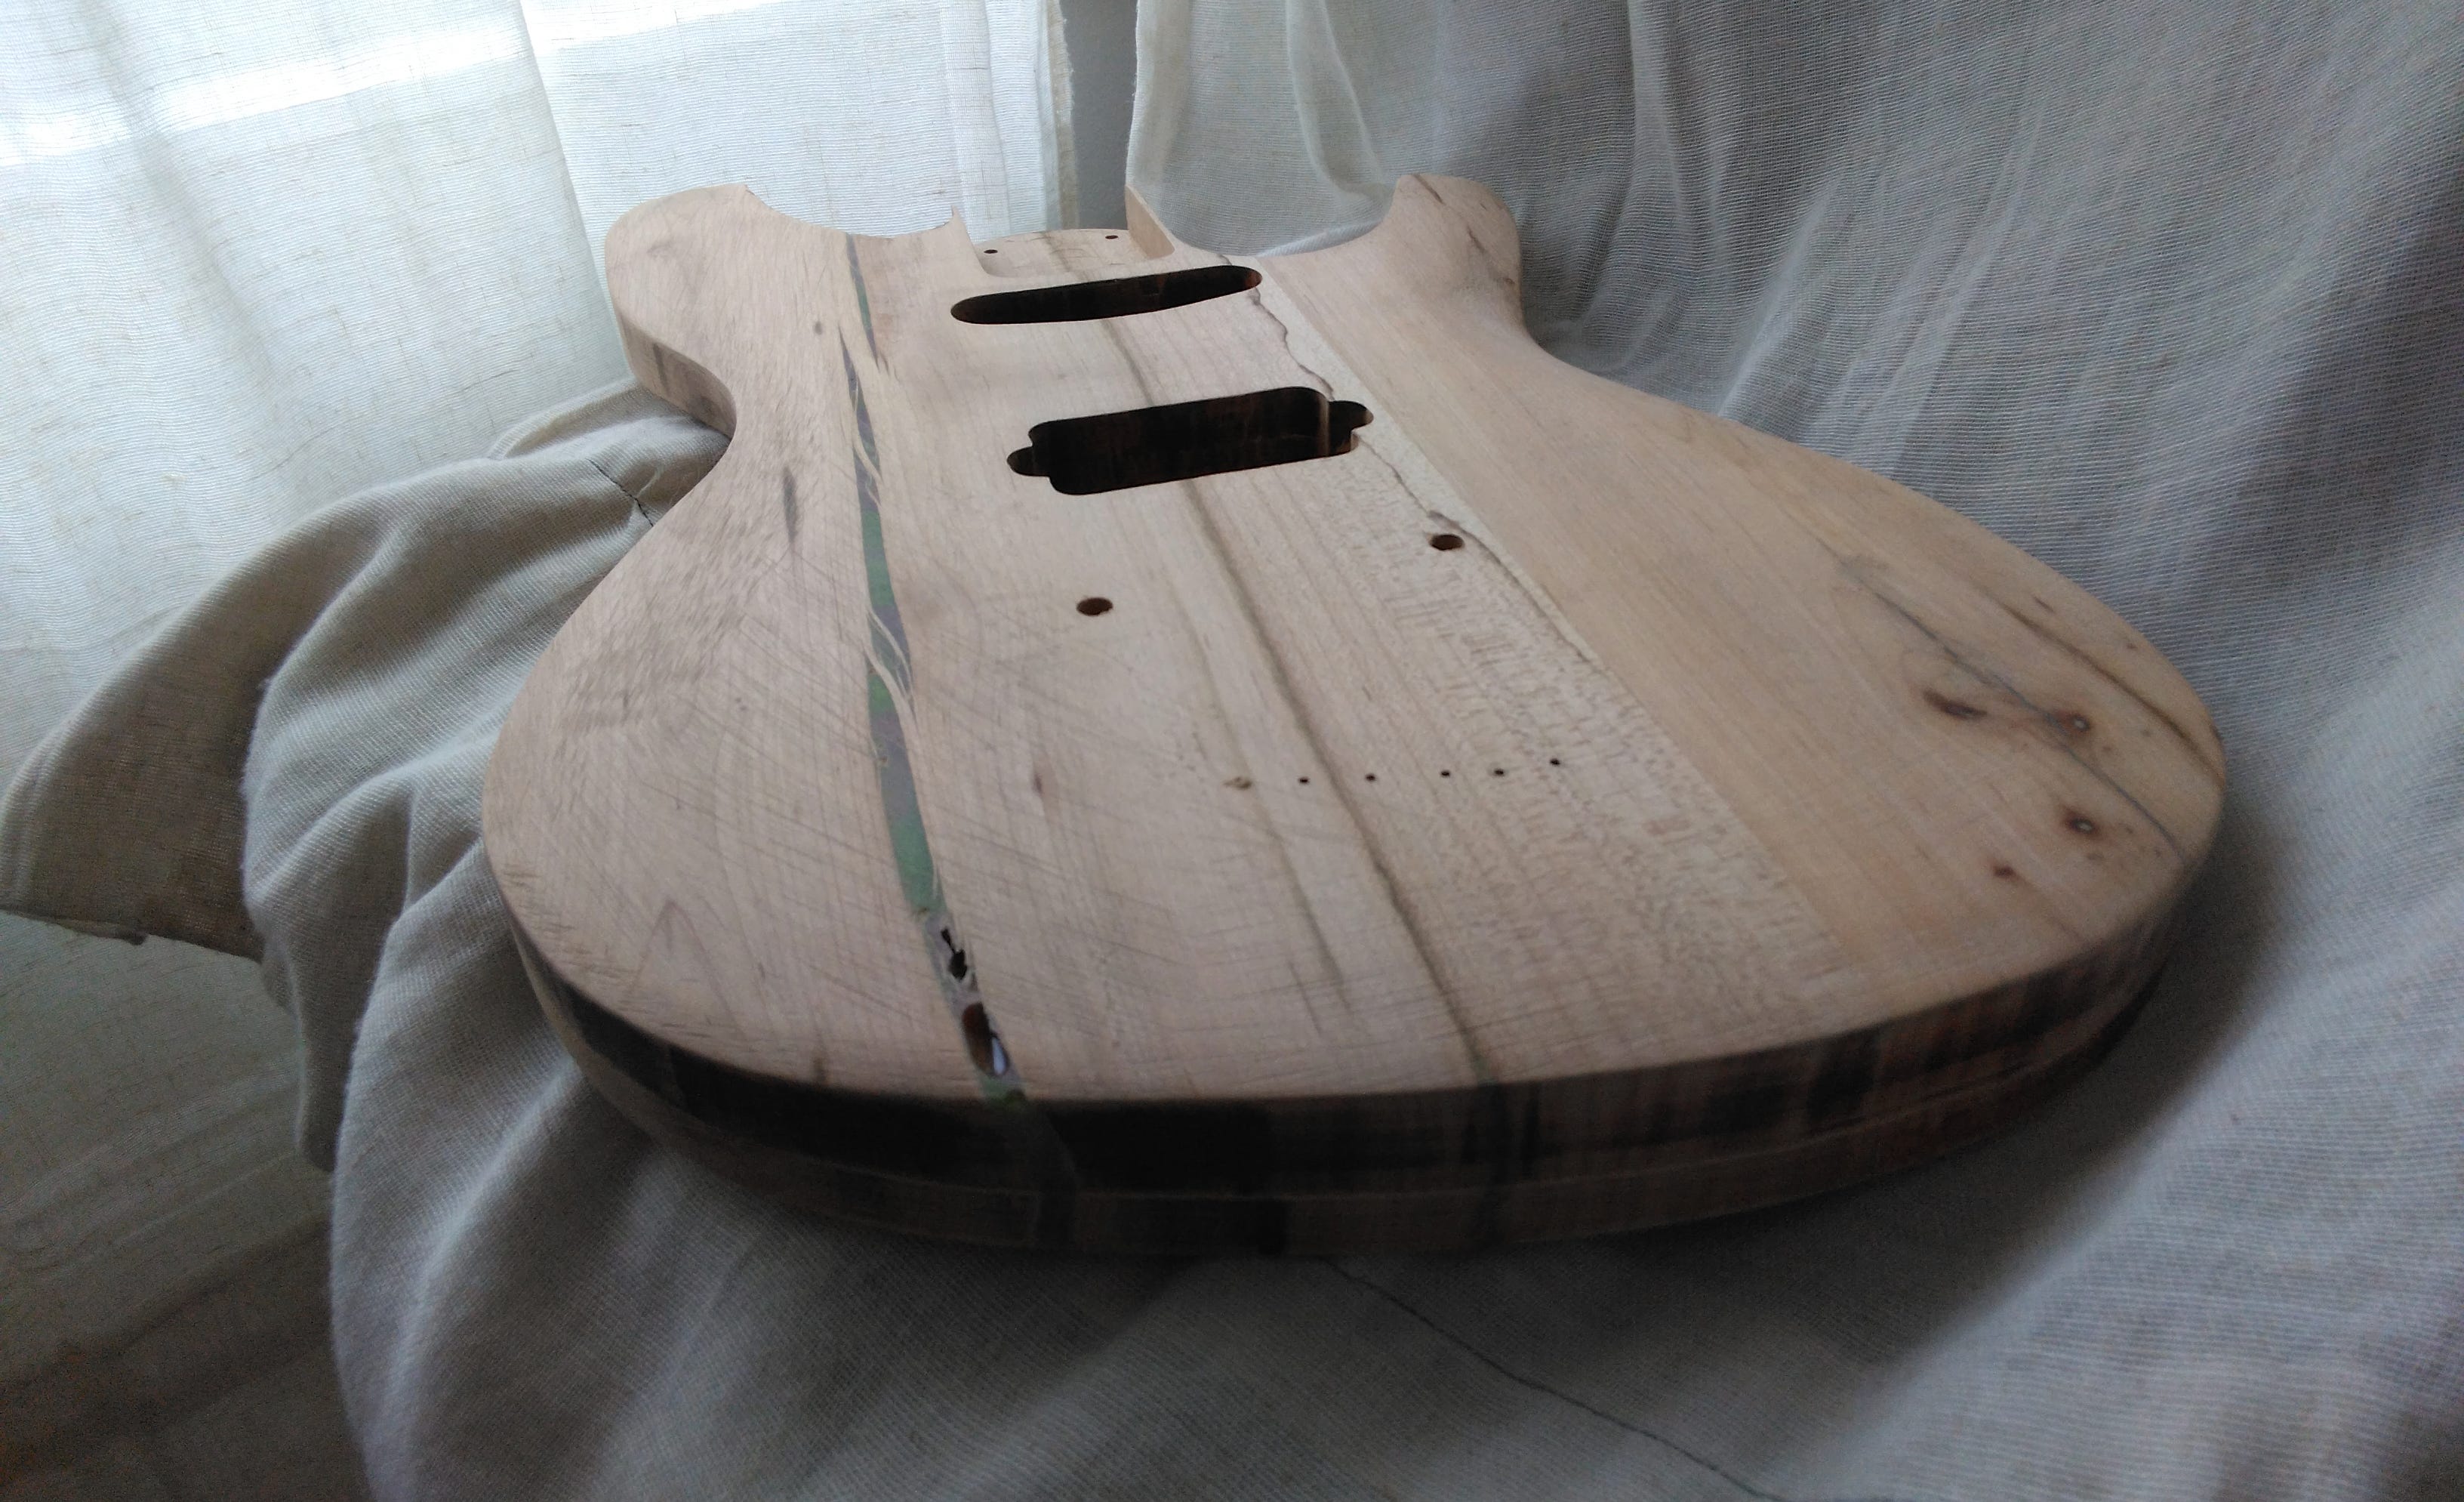
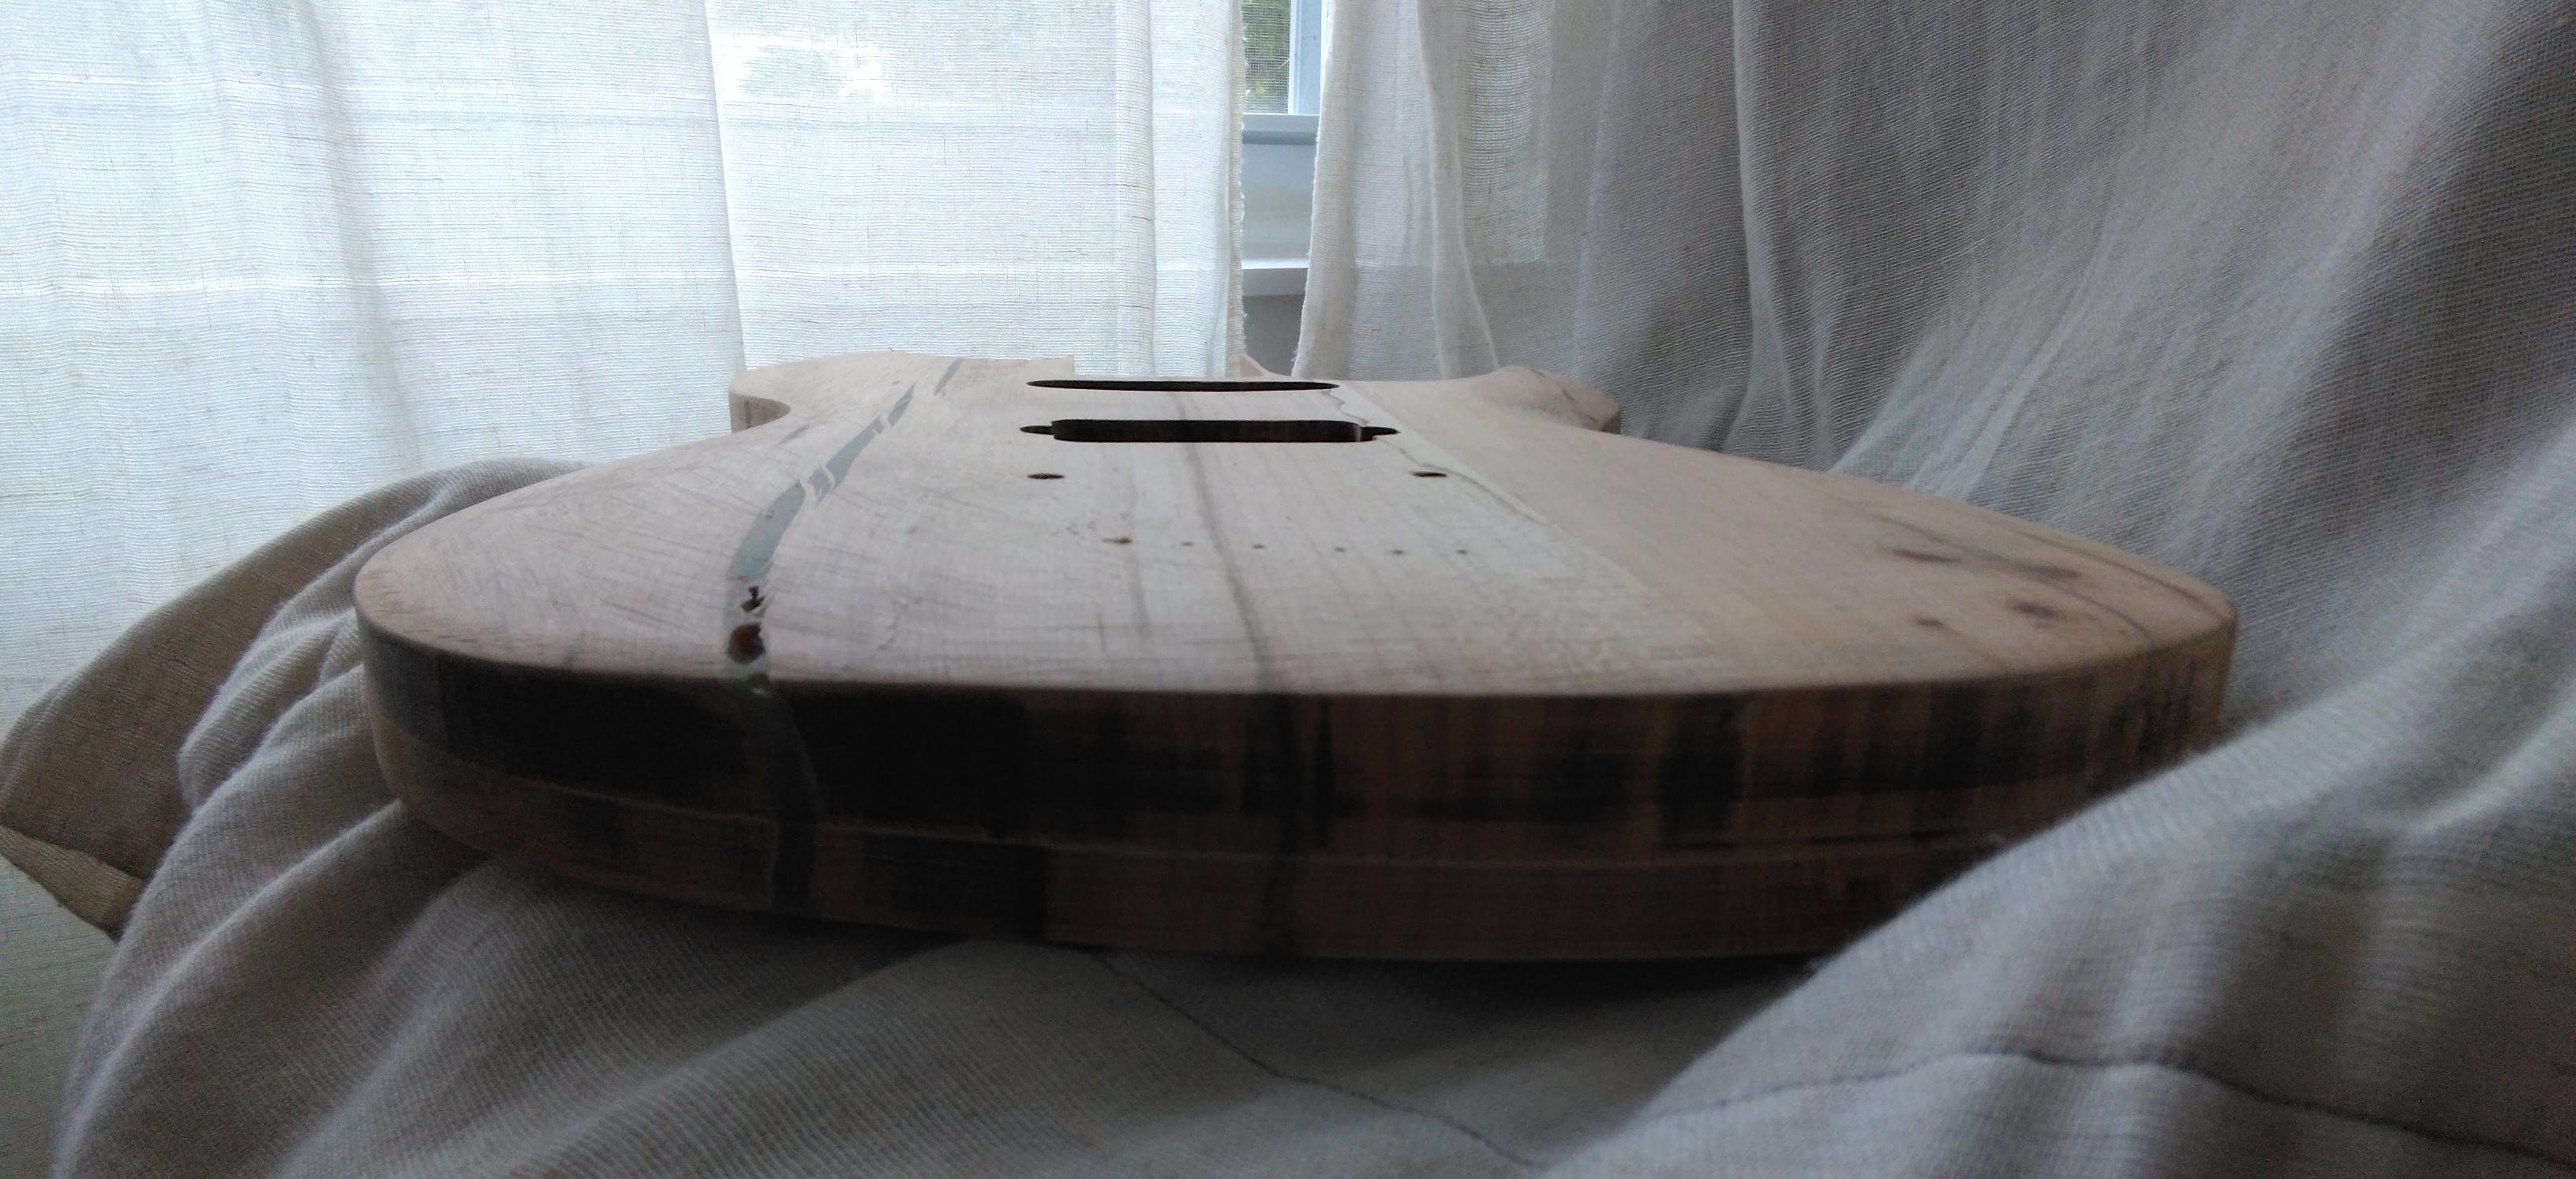
The next step was probably the most exciting of this stage: cutting out the body shape. First I cut most of the excess away with the scroll saw, then it was a simple matter of attaching the body template and running it carefully over Ed’s router table. This time there were no mistakes. I finally got to see what my guitar body would look like when constructed from the actual slab.
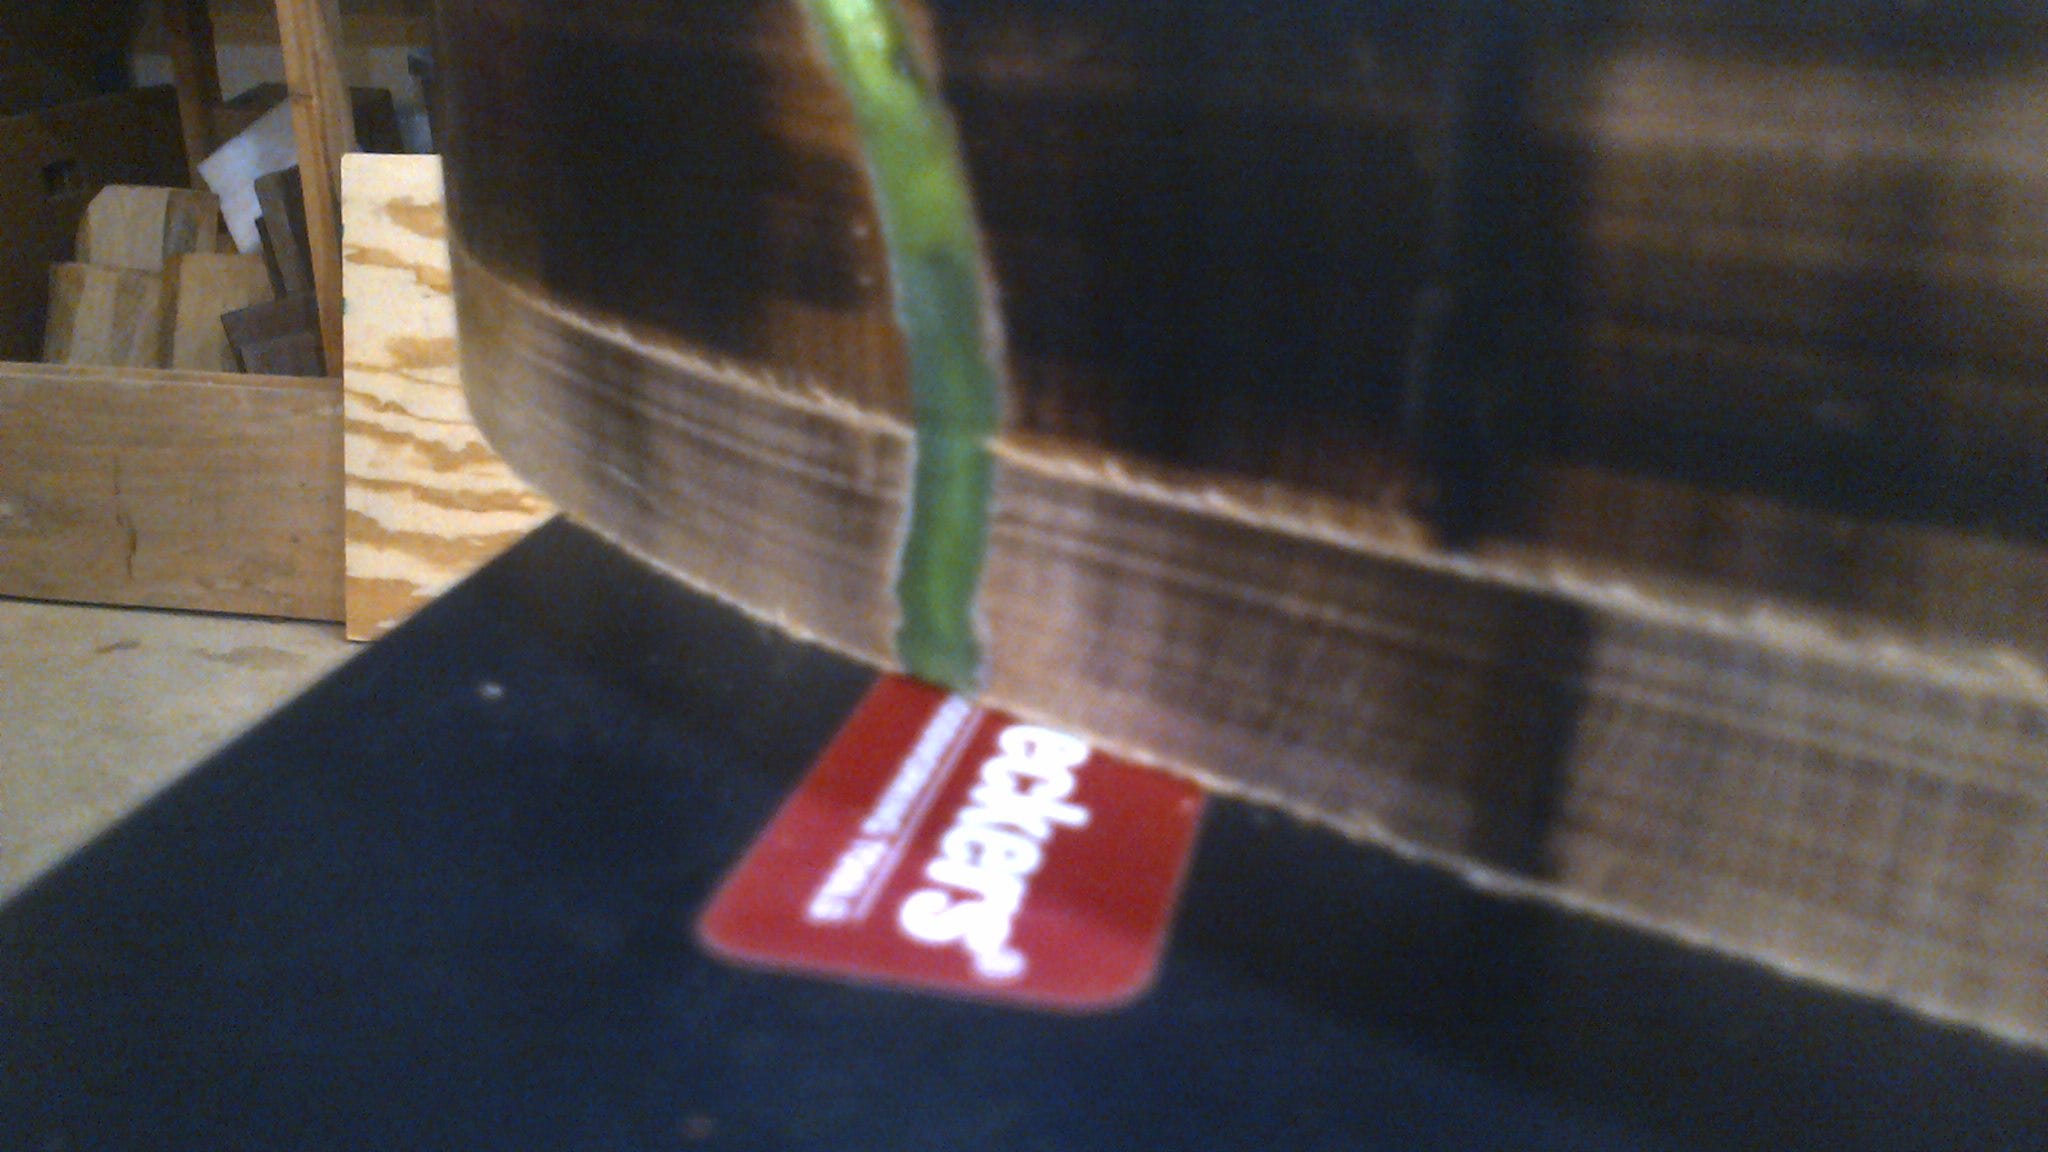
When the light hit the cross-section with the epoxy it was really cool, even with the edge unfinished. Exactly the toxic slime look I’d wanted:
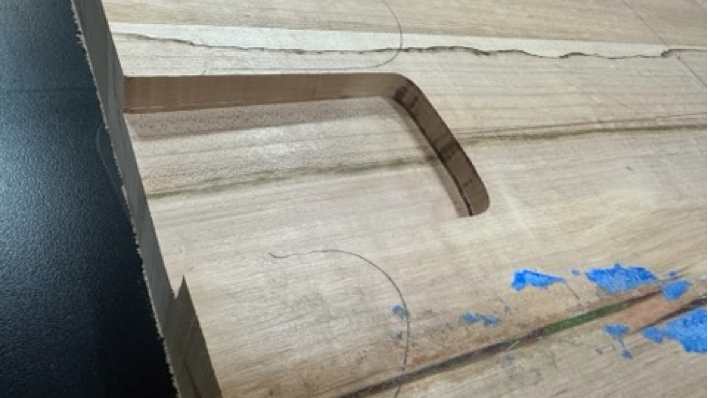
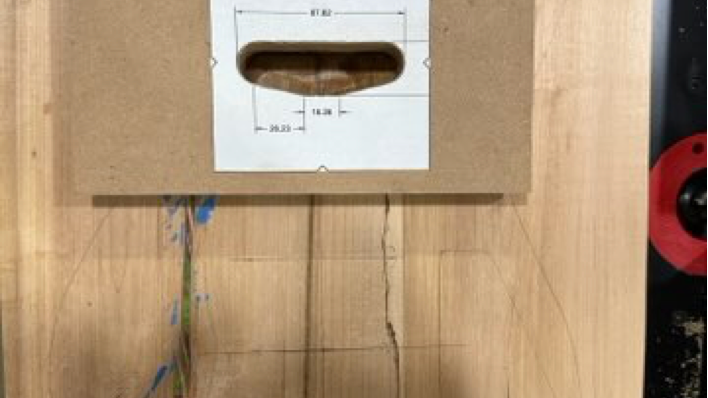
Then it was time to rout the control cavity. I’d routed the one on the dummy body very hastily and roughly, just big enough to stuff my electronics inside but not enough to actually close all the way or look nice; this time was the real deal, and I wanted to carve it out with more care.
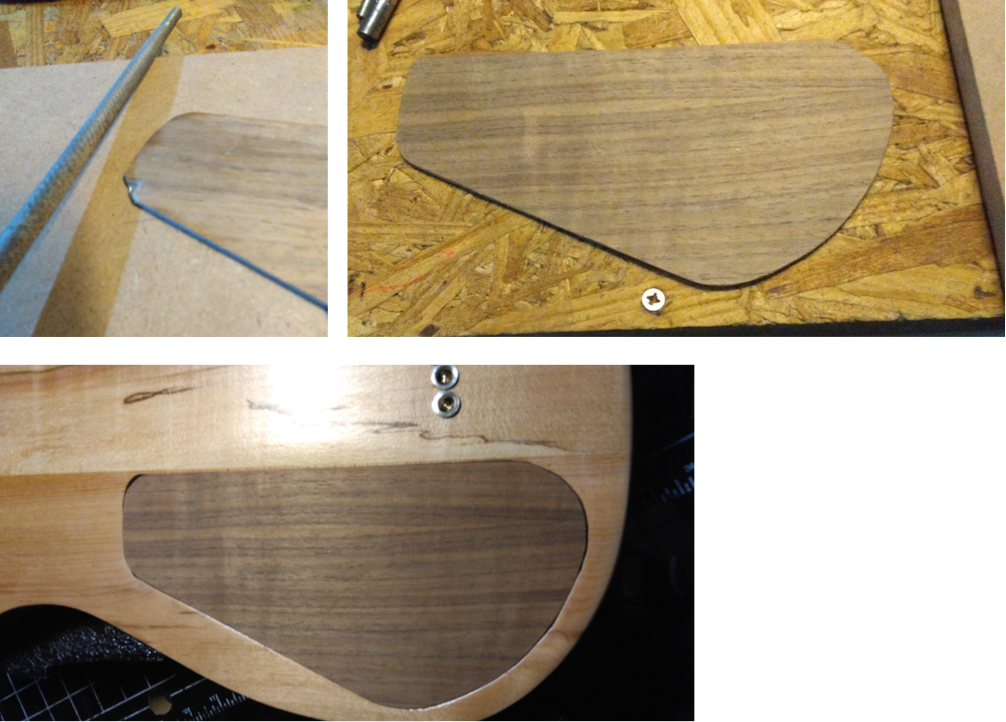
I designed a template with an inside and outside line. First I routed the cavity to full depth using the “inside line”, then widened the template to the “outside line” and used it to rout a shallow shelf for the cover to sit on. This way the cavity cover would have a recessed space to sit flush against the outside of the guitar body. The two “bumps” on the shelf would provide a place to embed magnets, so that with the help of a convenient fingernail-nick the cavity cover could be easily removed and then snapped back into place. What’s more, the final shape of the template could also be used to create the cavity cover.
Normally cavity covers are simply fastened onto guitars with screws, but the few times I’ve had to remove them I’ve always been annoyed at having to fetch a tiny screwdriver, then take out and replace those tiny bits of hardware without losing them in the interval, and the active electronics in this guitar meant I would have to occasionally open my control cavity to replace a 9V battery. So the convenience of a magnetic closure system was worth the extra planning.
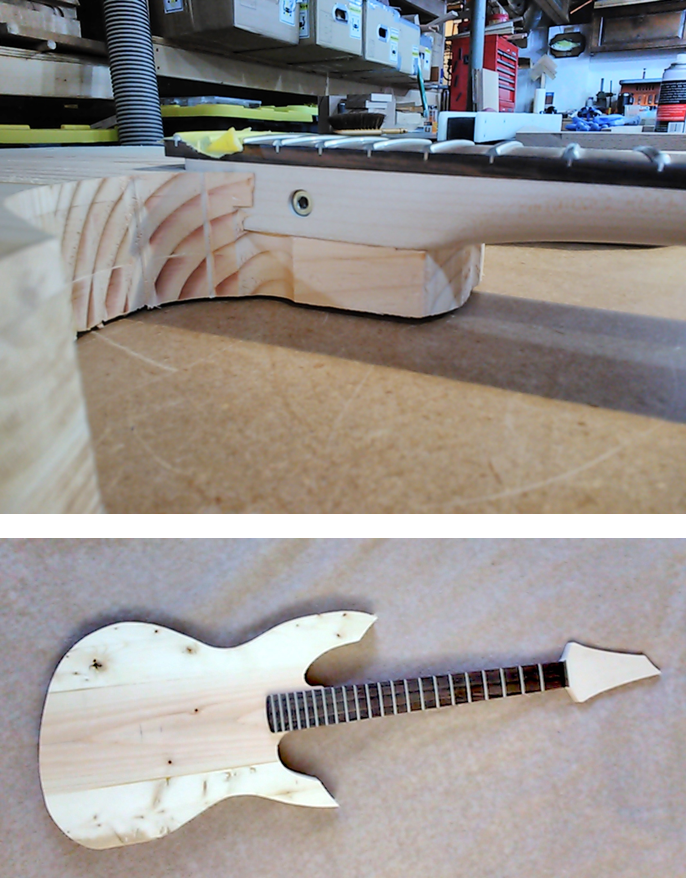
When guitar-builders give a guitar a contoured front surface they call it “carving”. Unlike, say, a Fender Telecaster body which is more or less an extruded shape with the front and back surfaces flat and totally parallel, I wanted my guitar to be carved – sculptural, even – both for aesthetic and ergonomic reasons. Indeed, some Telecaster owners modify their guitars with what’s called a “forearm cut”, which makes it so the player’s forearm doesn’t have to rest against a right-angle edge. Most non-Telecaster solid-body electric guitars have this cut or something similar, and some Telecaster owners modify their guitars with it as well.
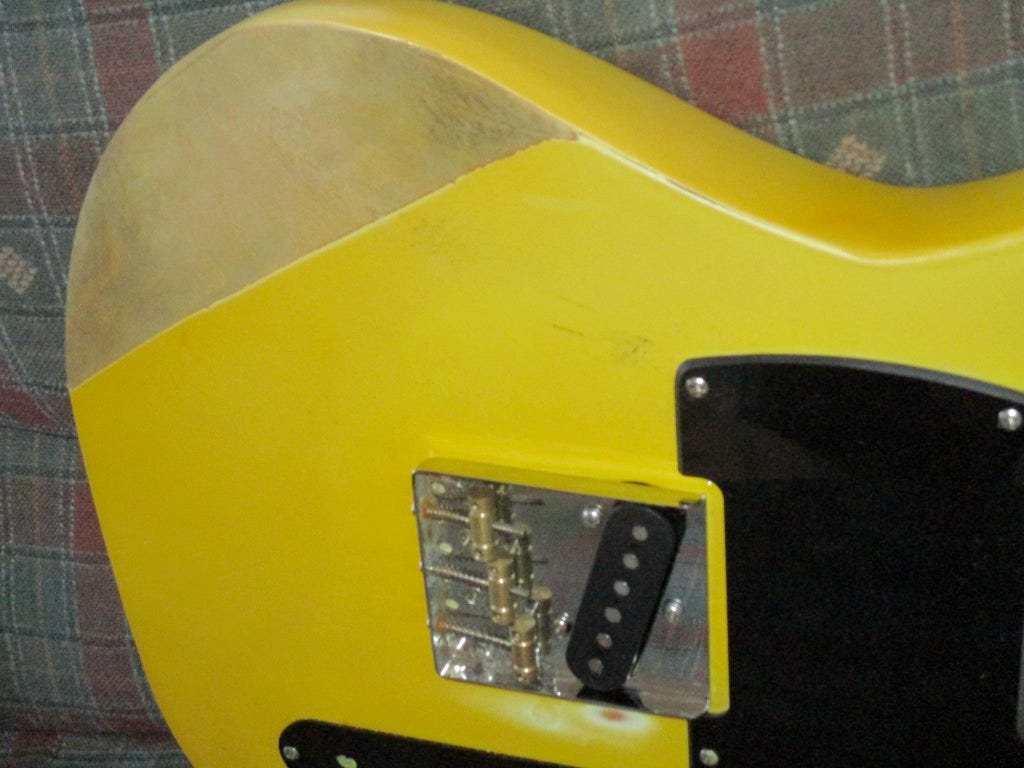
Credit: https://www.tdpri.com/attachments/img_0145-jpg.348105/
Another common cut on guitars (but also uncommon on the Telecaster) is the “belly cut” which somewhat forms the instrument to the performer’s body, making the guitar more comfortable. This is another not-unheard of modification on Telecasters.
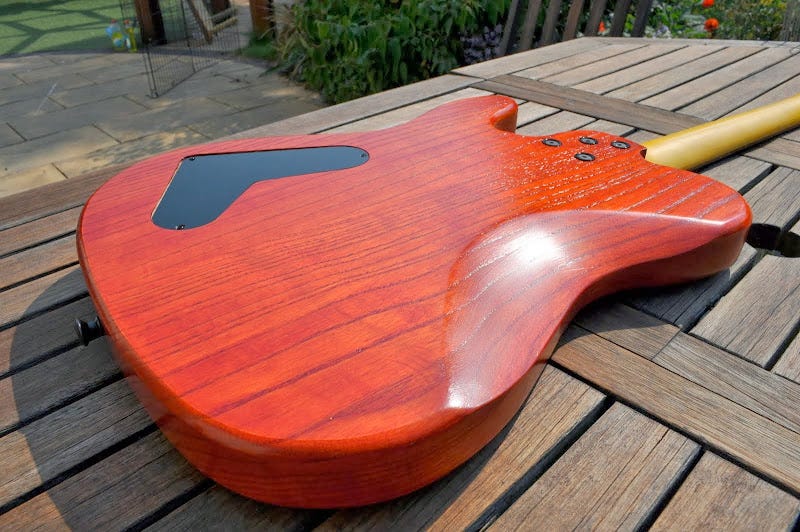
Credit: https://lh5.googleusercontent.com/-5vIh1yabpDM/UsAEzmzeqqI/AAAAAAAAIjU/iuVorS9pzZU/s800/DSC_3788.JPG
At Ed’s suggestion, I used a belt sander rather than a bandsaw to create the belly cut on my guitar.
When it came to carving the front, rather than a forearm cut, I wanted to contour the whole thing. The Ibanez S-series guitars come the closest to what I had in mind. Because of my electronics I wouldn’t be able to get my guitar nearly as thin as the S-series, but their generally rounded profile on the front is where I took my inspiration:

Credit: https://1.bp.blogspot.com/_wurOc3YrDLU/TGSElrNsAyI/AAAAAAAAABM/KGuV0DA9uso/w1200-h630-p-k-no-nu/s5703.jpg
My control cavity depth limited how much I could carve on the lower side of the front where the controls were. I wanted to create a bit of a curved surface there but I had to be restrained lest I make the area near the controls too thin, or even carve right through to the control cavity. A more dramatic reduction in material would be possible on the horns and along the upper edge where my forearm would rest–all places where the guitar body was solid all the way through.
I still needed to drill holes–a lot of holes: for the neck screws, the bridge posts, the pickup post screws, the pickup wires, the strings and ferrules, the piezo signal wire, the controls and output, the cavity cover magnets, and for the secondary bridge ground wire (the one that had eliminated the pesky hum after so much headache). That’s about 16 holes, some requiring multiple diameters drilled out of them. Most of these would need to wait until after the carving and initial sanding, but some–specifically for the bridge posts, the neck screws, and the strings–required reference holes that I needed to drill first, while I still had a flat surface to drill into.
Technically, at this point I could have simply drilled all the holes and the guitar body could have been fitted with hardware and used, but of course I wanted to carve the front. Initially I’d thought it would be simpler to carve it using the planer to remove most of the material and then just smooth things out with a palm sander later, but the belt sander was so effective for the belly cut it convinced me this was the right tool for the initial carving job too.
Indeed, the belt sander was able to follow the curves of the guitar more naturally than a planer would have. I gave the front a gradual convexity, steepening toward the edges in most places, but retaining a distinct edge nonetheless. After a crude 40-grit pass with the belt sander and then an only slightly less coarse 60-grit pass using a handheld sanding block, the contours were already delightful under my fingers. It was thrilling to have this shape I’d thought about for the better part of a year finally manifested in a physical form I could pick up and run my hands over.
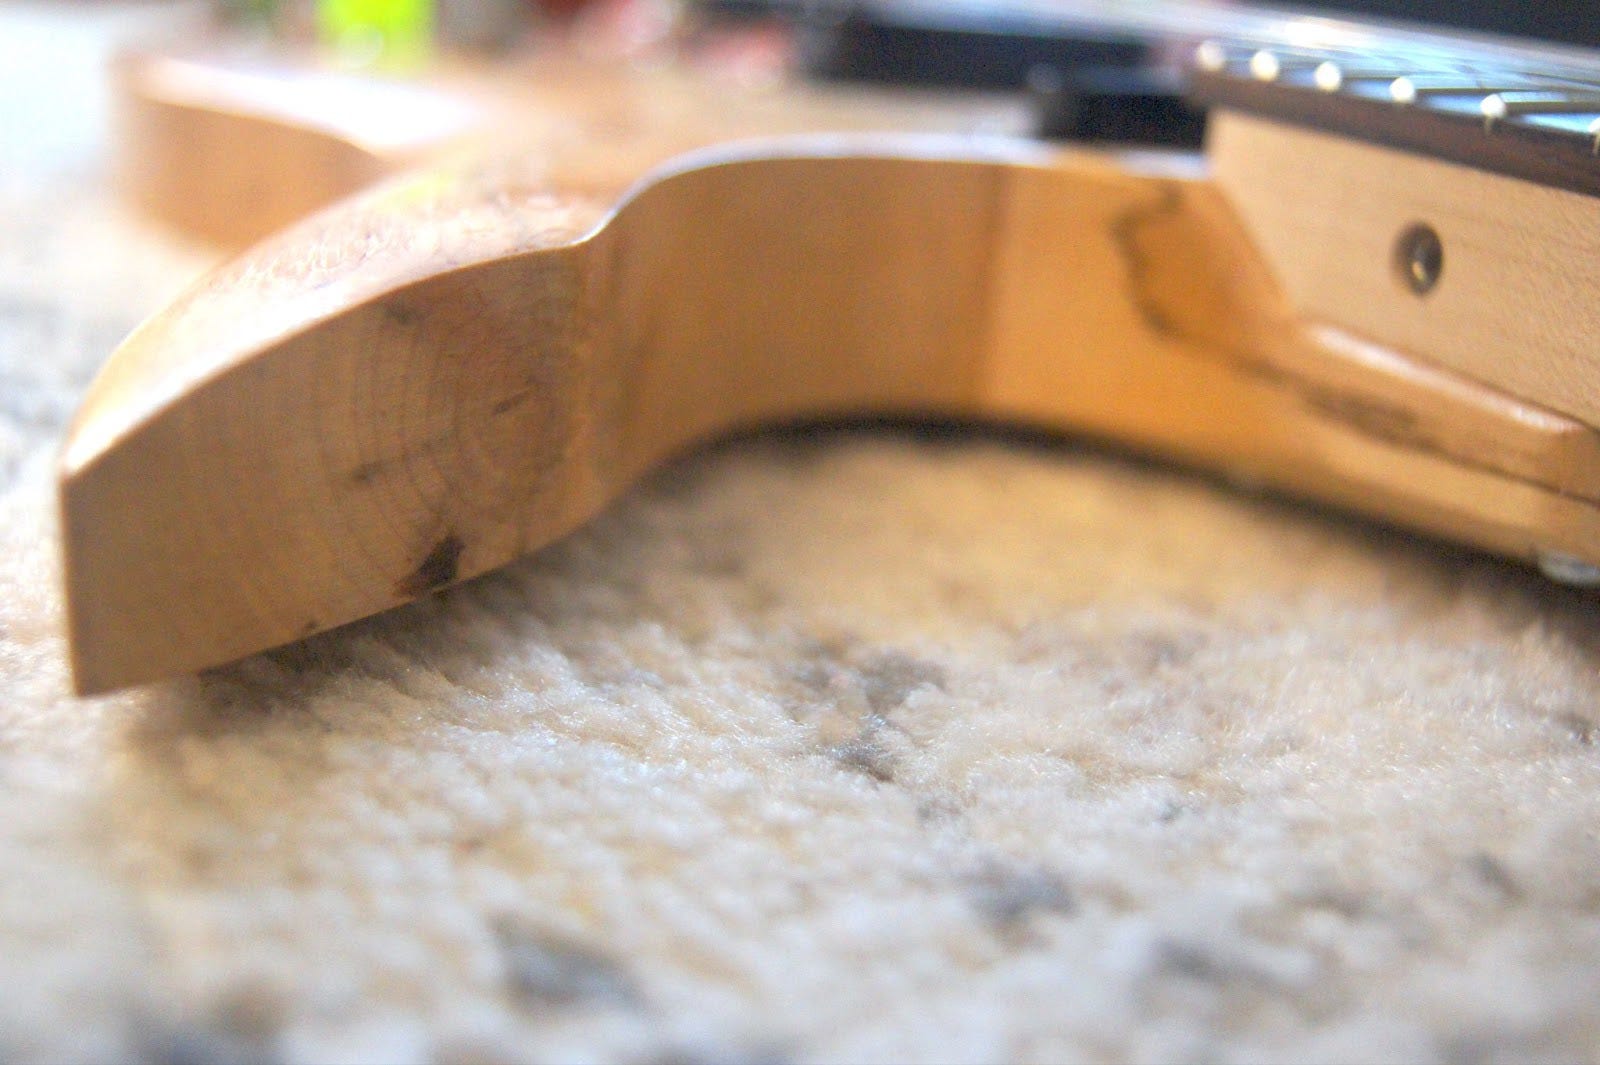
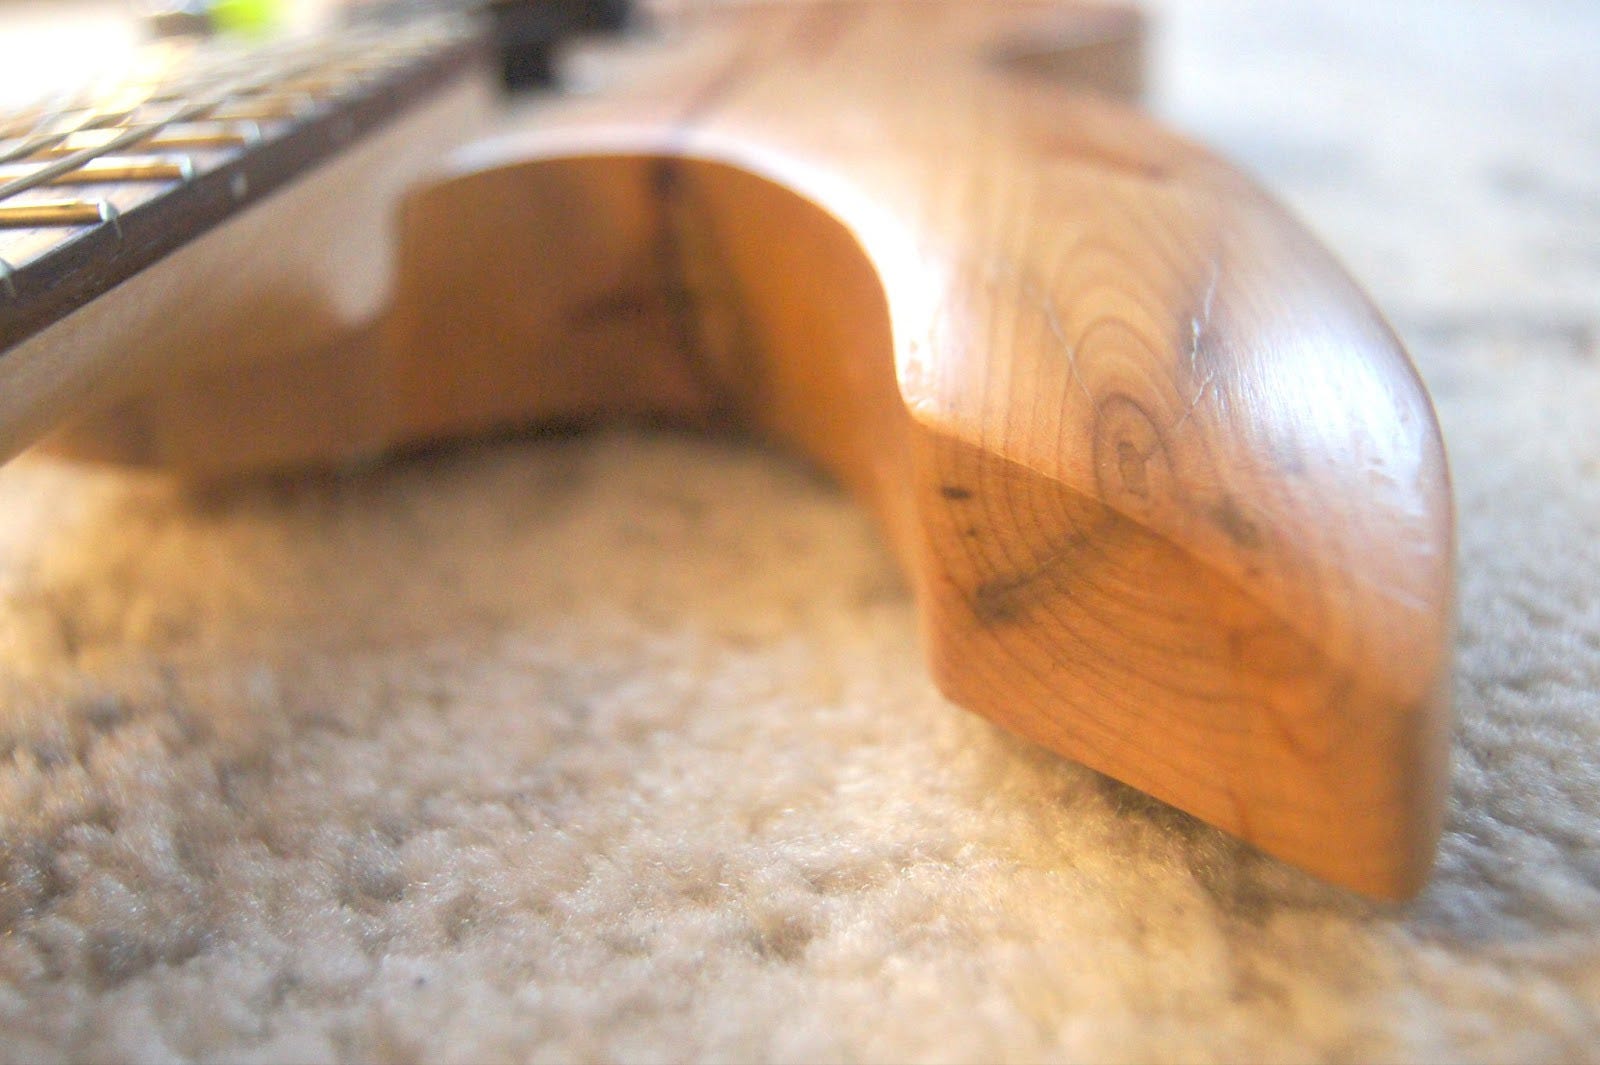
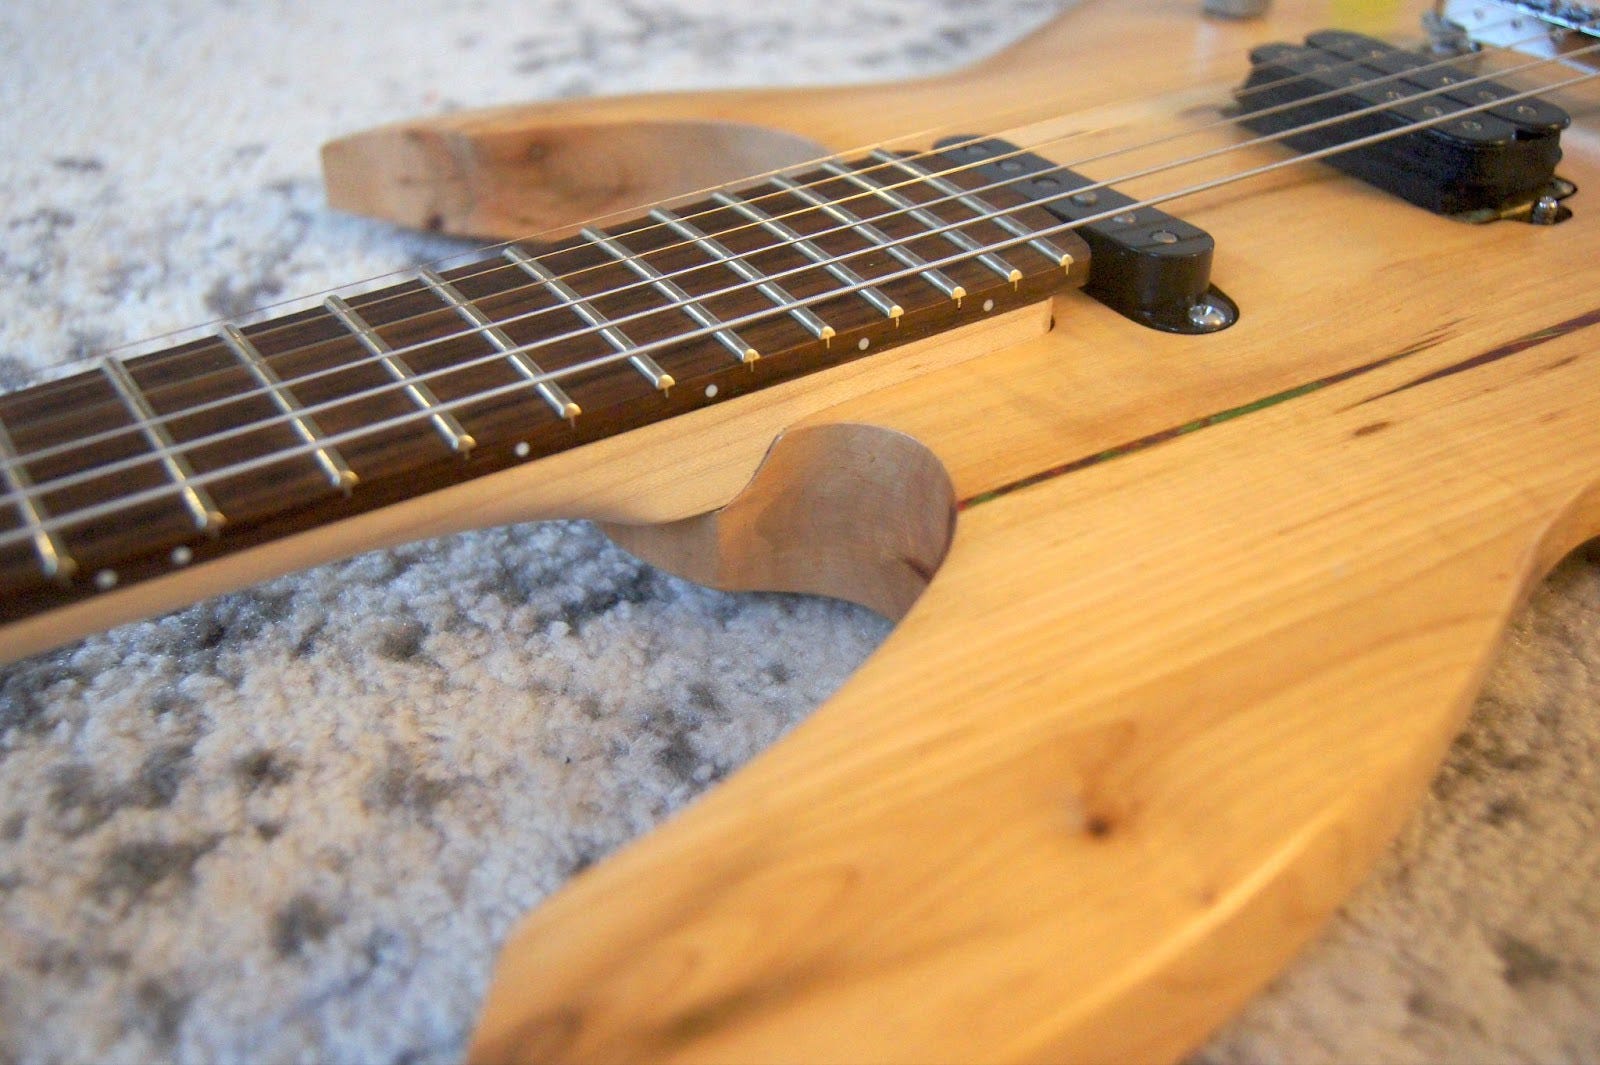
I’d sanded a bit more aggressively toward the horns, giving them a futuristic, sorta trapezoidal profile.
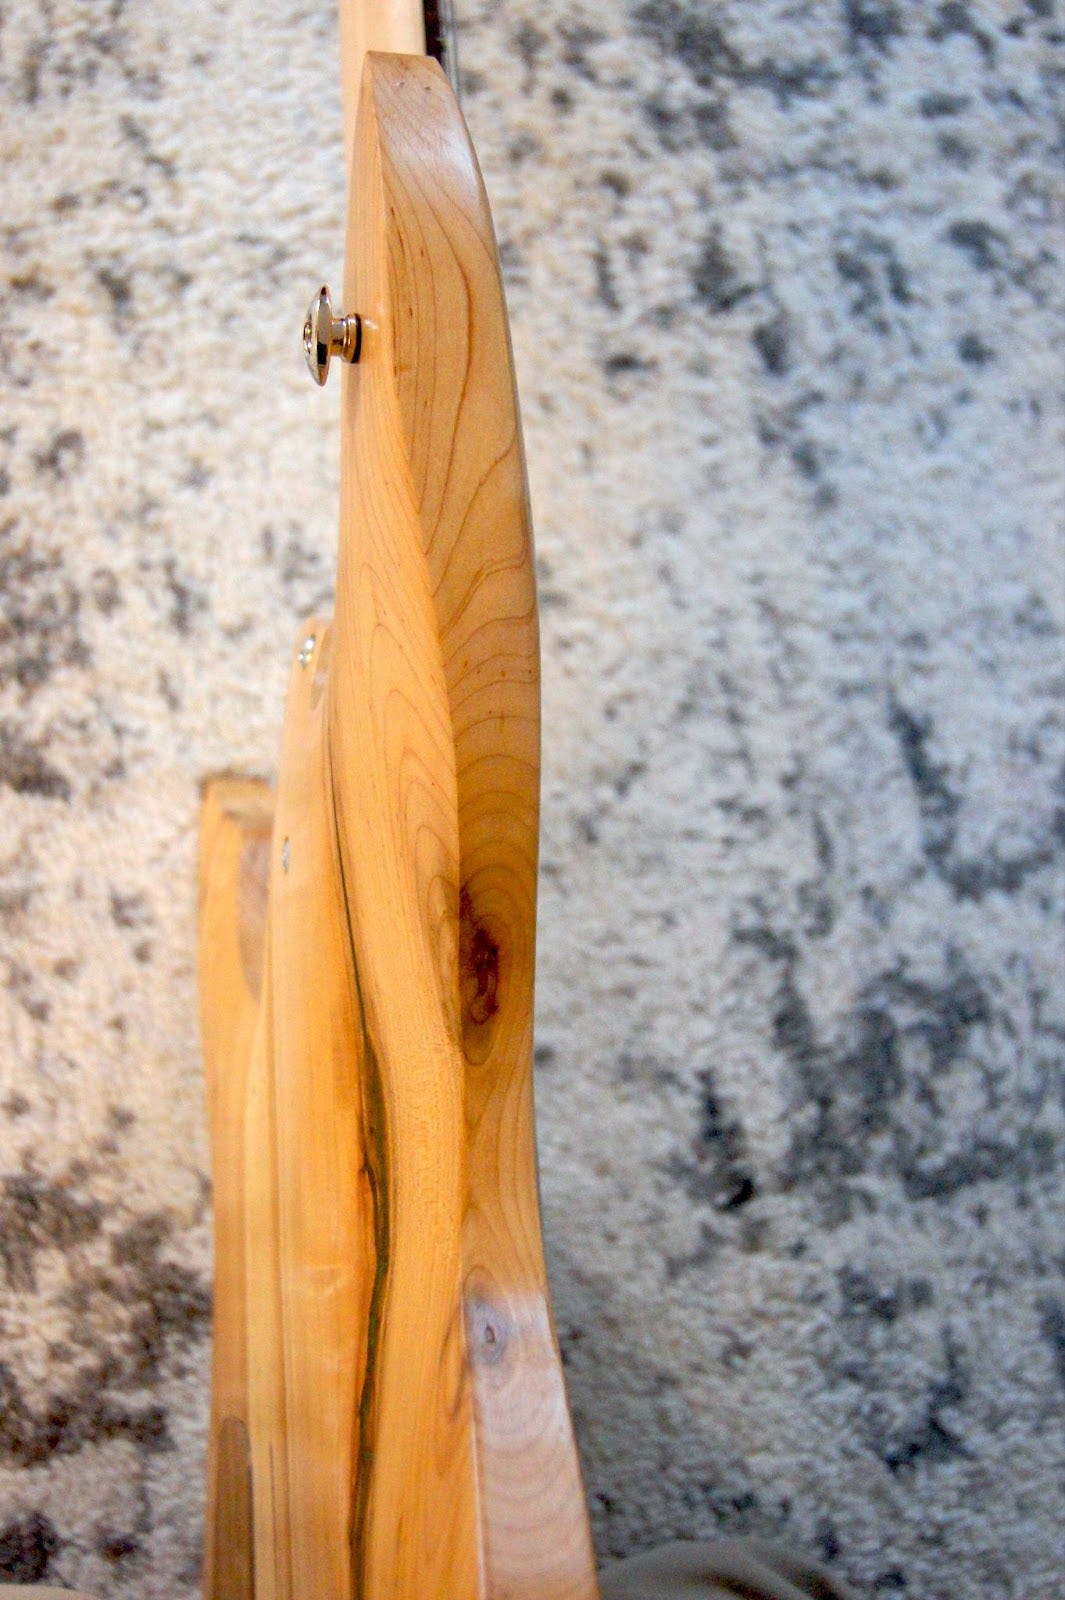
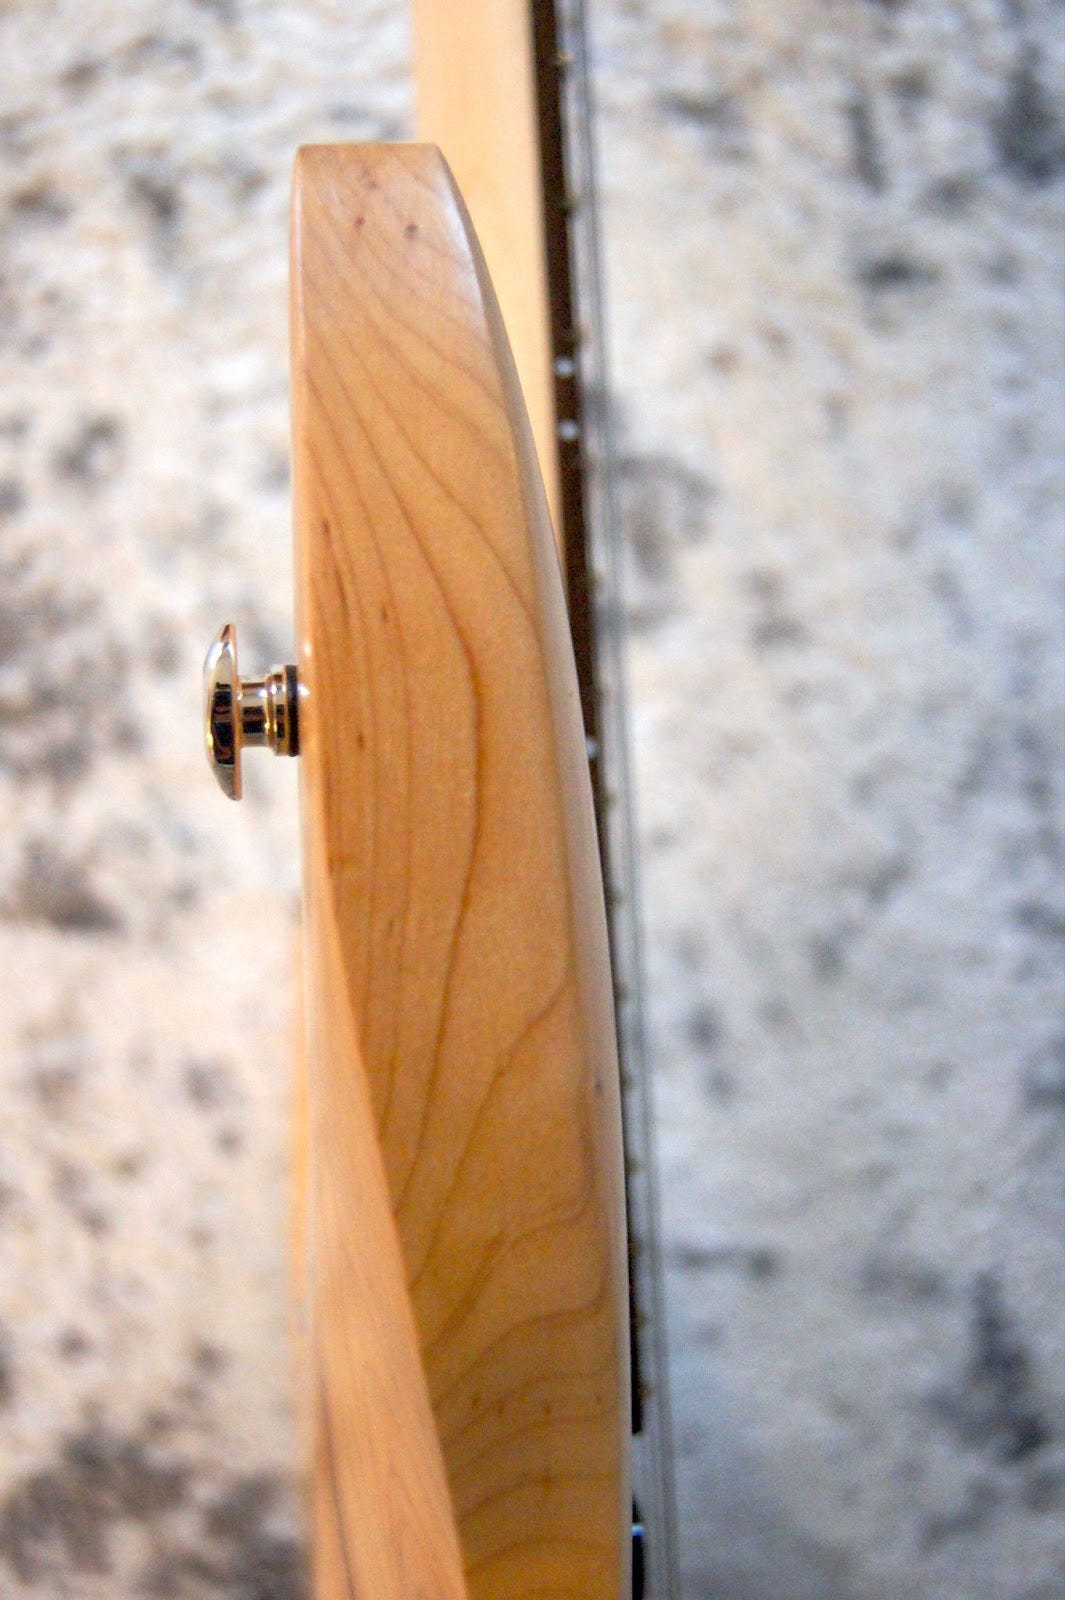
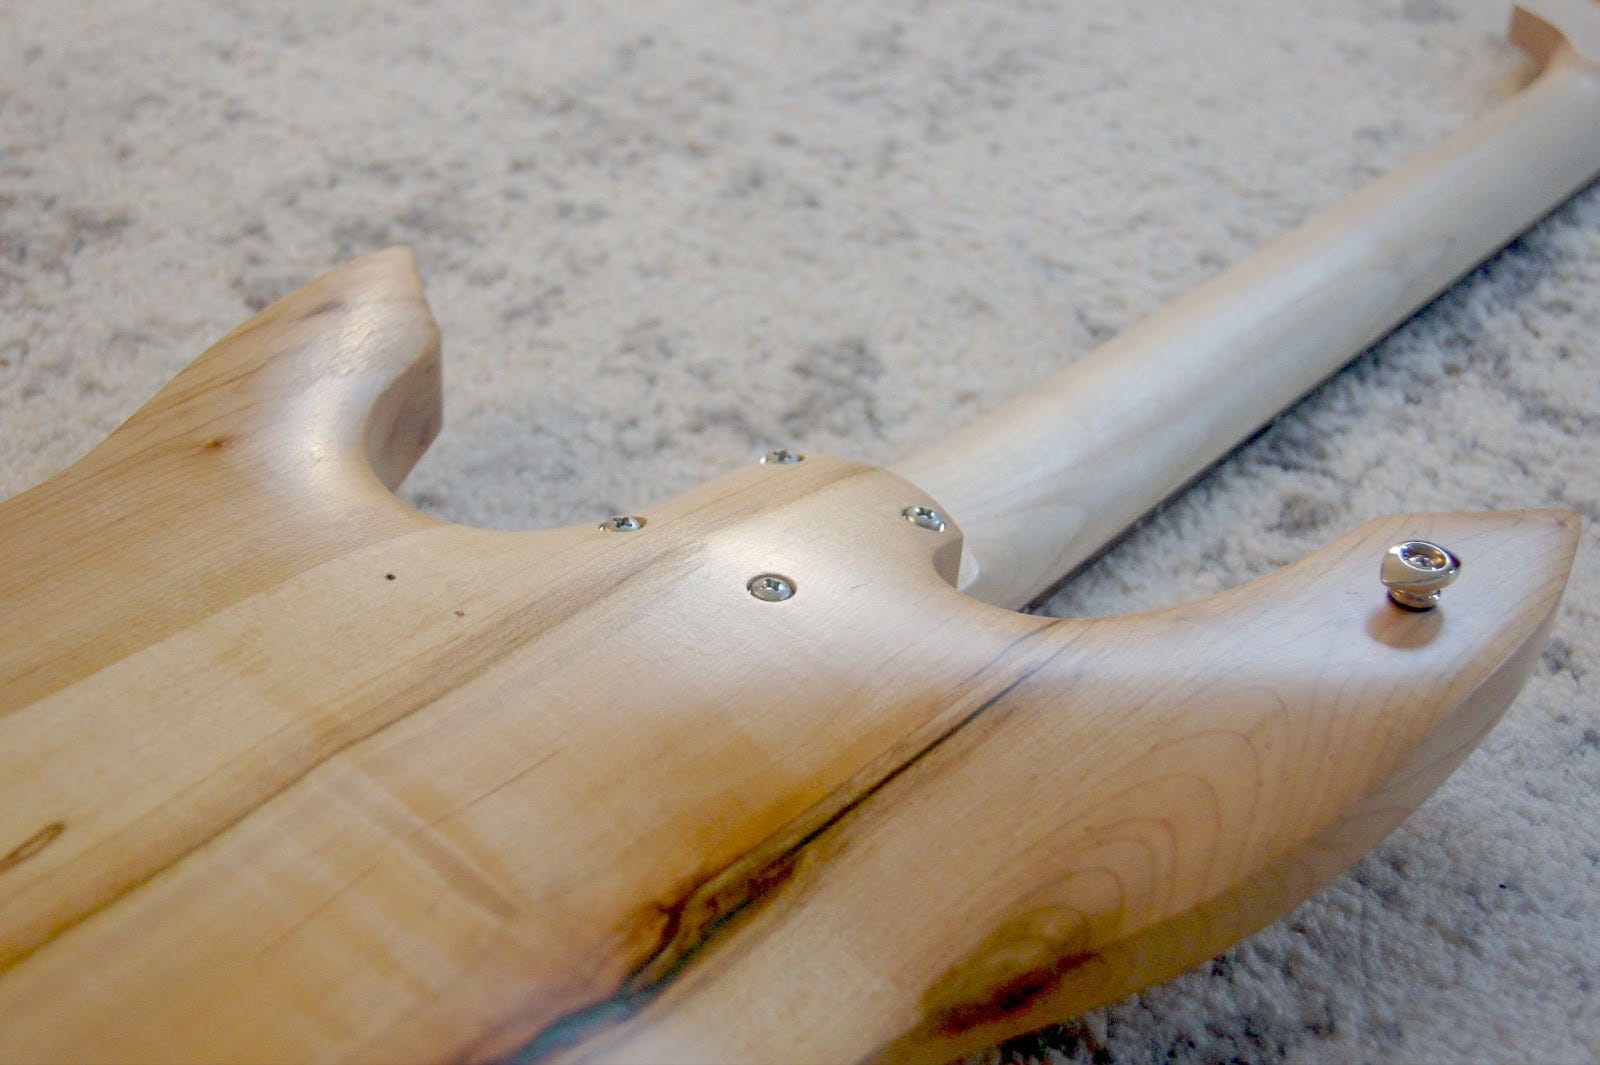
I slightly enlarged and smoothed out my belly cut, and decided to ditch the neck plate in favor of a rounded-over shape behind the neck joint, which would allow my left hand better access to the high frets. I therefore would need to drill little flat spots for each of the neck screws, and buy a few new screws of different shorter lengths, with appropriately-sized washers, but that would be worth it.

Ed helped me fill bubbles in the epoxy and then, using various sanding tools, I stepped up through grits until I’d brought the outer surface of the guitar to a smooth satin-like texture. I was then ready to drill the rest of the holes.
The pickup and ground wire holes went in without a problem. The wells for the cavity cover magnets proved somewhat difficult: Ed did not have the right sized forstner bit so I had to use a smaller bit and then enlarge the hole sideways in a somewhat haphazard way. A handheld router with a cove bit was used to create a dimple for the jack plate to sit in, and I manually thinned that area of the sidewall from the inside with a chisel so the jack’s threading could protrude with sufficient room to be fastened on the other side.
It’s worth noting here that testing the fit of the output jack required dismantling the dummy guitar, so from that point onward I had only my ToS guitar if I wanted to play. By then I’d begun writing material for a new album, so I was playing a lot. Having only the SoT was frustrating, but served as an additional prod to keep things moving with this build.
Cutting the slot for the pickup selector switch was tricky, and after experimenting with several methods I chose to use a handheld rotary tool, sort of like a dentist drill, that Ed had recently acquired. I attached a 1⁄8” bit to it and carefully traced a line into the front of my guitar, pass after smoking pass, until the slot was cut.

One of the things I’d learned from playing guitar with the dummy body was that I didn’t use the knob on the Powerchip much; I basically always turned it all the way up if I wanted the piezo sound. Turning it down was equivalent to just turning my (planned) blend knob toward the magnetic signal, which had its own volume control that I did find myself using. So for the sake of simplicity I decided I’d leave the Powerchip entirely inside the control cavity. Later if I changed my mind I could drill a hole and have its shaft poke out the front, but for now this reduced the number of holes (and thus, knobs) on the front of the guitar from four to three.
With all the holes finally drilled, I was ready to give the body one last sanding and then apply a finish.
Chapter eight: Finishing, closing, setup
The end was in sight, so I had to resist harder than ever the temptation to do what I always do and rush. The sanded wood was already quite pretty, with some iridescent passages and intricate patterns, some cool jagged lines of spalt, and of course its beautiful organic nature to start with, but I took the time to brush a few clear coats of some water-based poly-something-or- other (recommended by Ed), and sand between coats–in the end it was four coats on the front, three on the back and sides. This enriched all the colors (including the epoxy), brought the 3D shine out of the wood grain, and most importantly, offered some protection–more than none, anyway–against dings and scratches. I applied a few coats to the headstock too.
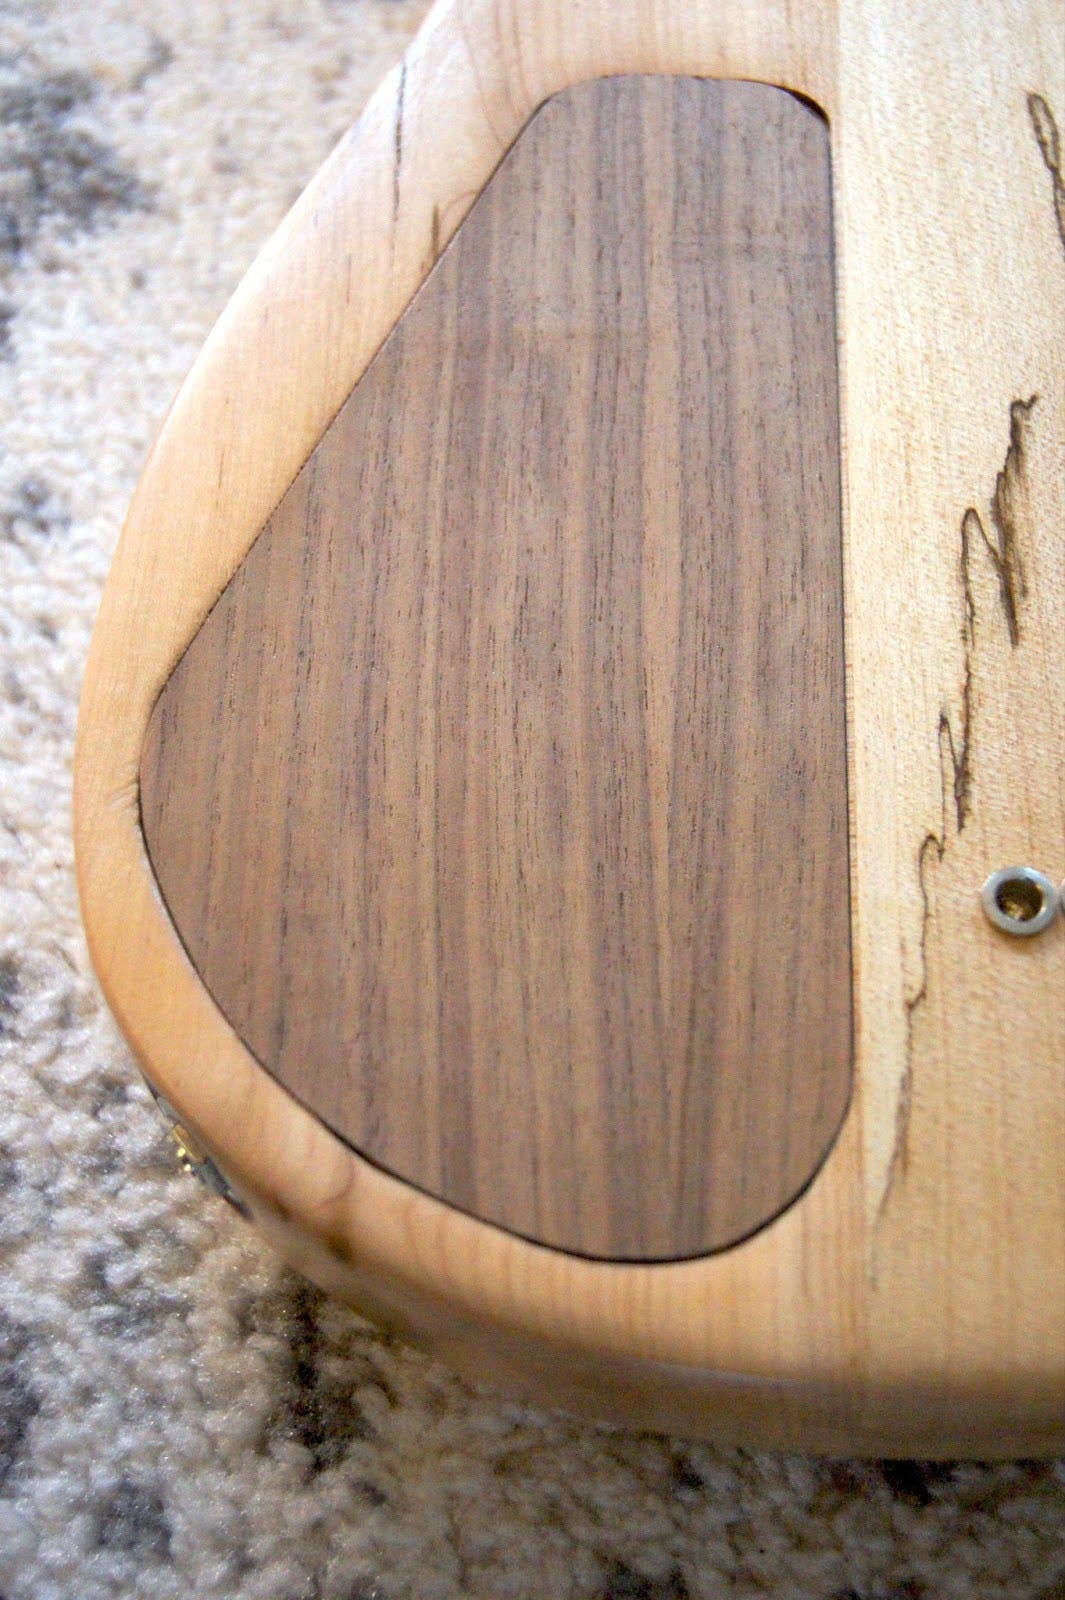
Originally I’d planned to use a piece of clear plexiglass for the cavity cover, thinking there’d be some cool-looking wood grain to see in there, but changed my mind after routing the cavity and determining it wasn’t actually very impressive, especially with all the electronics staged inside.
So instead of plexi, I decided to make the cover out of wood and metal. I took a thin oak veneer (courtesy of Ed; he had a tub of the stuff in his basement) and stuck it onto both sides of a cutout from an old baking pan, then filed the edges to an exact fit for the control cavity. Probably the best part of doing it this way was I didn’t need to line up and embed metal pieces into plexi to adhere to the magnets in the guitar.
I filed the underside of a corner at a shallow angle so the cover could be opened with a fingernail.
Because I’d bought new volume and tone pots, and added the selector switch and blend knob, I couldn’t simply insert the already-connected cluster of components I’d used in the dummy guitar. Instead, a new wiring scheme integrating all my parts had to be devised and then executed.
During this time Ed was often unavailable–I think he got busy with work or something–and in any event, after leaning on him so heavily recently (I haven’t detailed in this essay the various mistakes I made during the hole-drilling process, but there were several and I’d been very dependent on his help fixing them) I felt it was important for me to get the remainder of the steps done without bothering him so much all the time.
Still, I had very little idea how the electronics should be connected. Hybrid electric guitars– containing both magnetic and piezo pickup systems–are uncommon, and I’d opted for a configuration of those systems that was even more uncommon, so there were not a lot of people, even on dedicated guitar forums, who could advise me from their own experience.
After a week of getting nowhere looking for advice online I got impatient to pick up the guitar and play it, so I attached the neck and installed strings even though this would make the wiring part slightly harder later. But for now I could play the instrument at least, and I was relieved that it held its tuning and felt great under my fingers just like the dummy guitar had.
Eventually advice started to trickle in, and after a lot of clarifying questions and back and forth, followed by a few late-night soldering sessions, I managed to get everything connected. It was not pretty, but it was adequate.
Setting up the guitar consisted of several steps that I won’t detail here, but it was straightforward and relatively little was needed. After that, the guitar was officially “done”. It sounds a bit anticlimactic to put it like that–and to be honest it felt anticlimactic as well–but that’s the way it goes when you work out kinks along the way I guess.
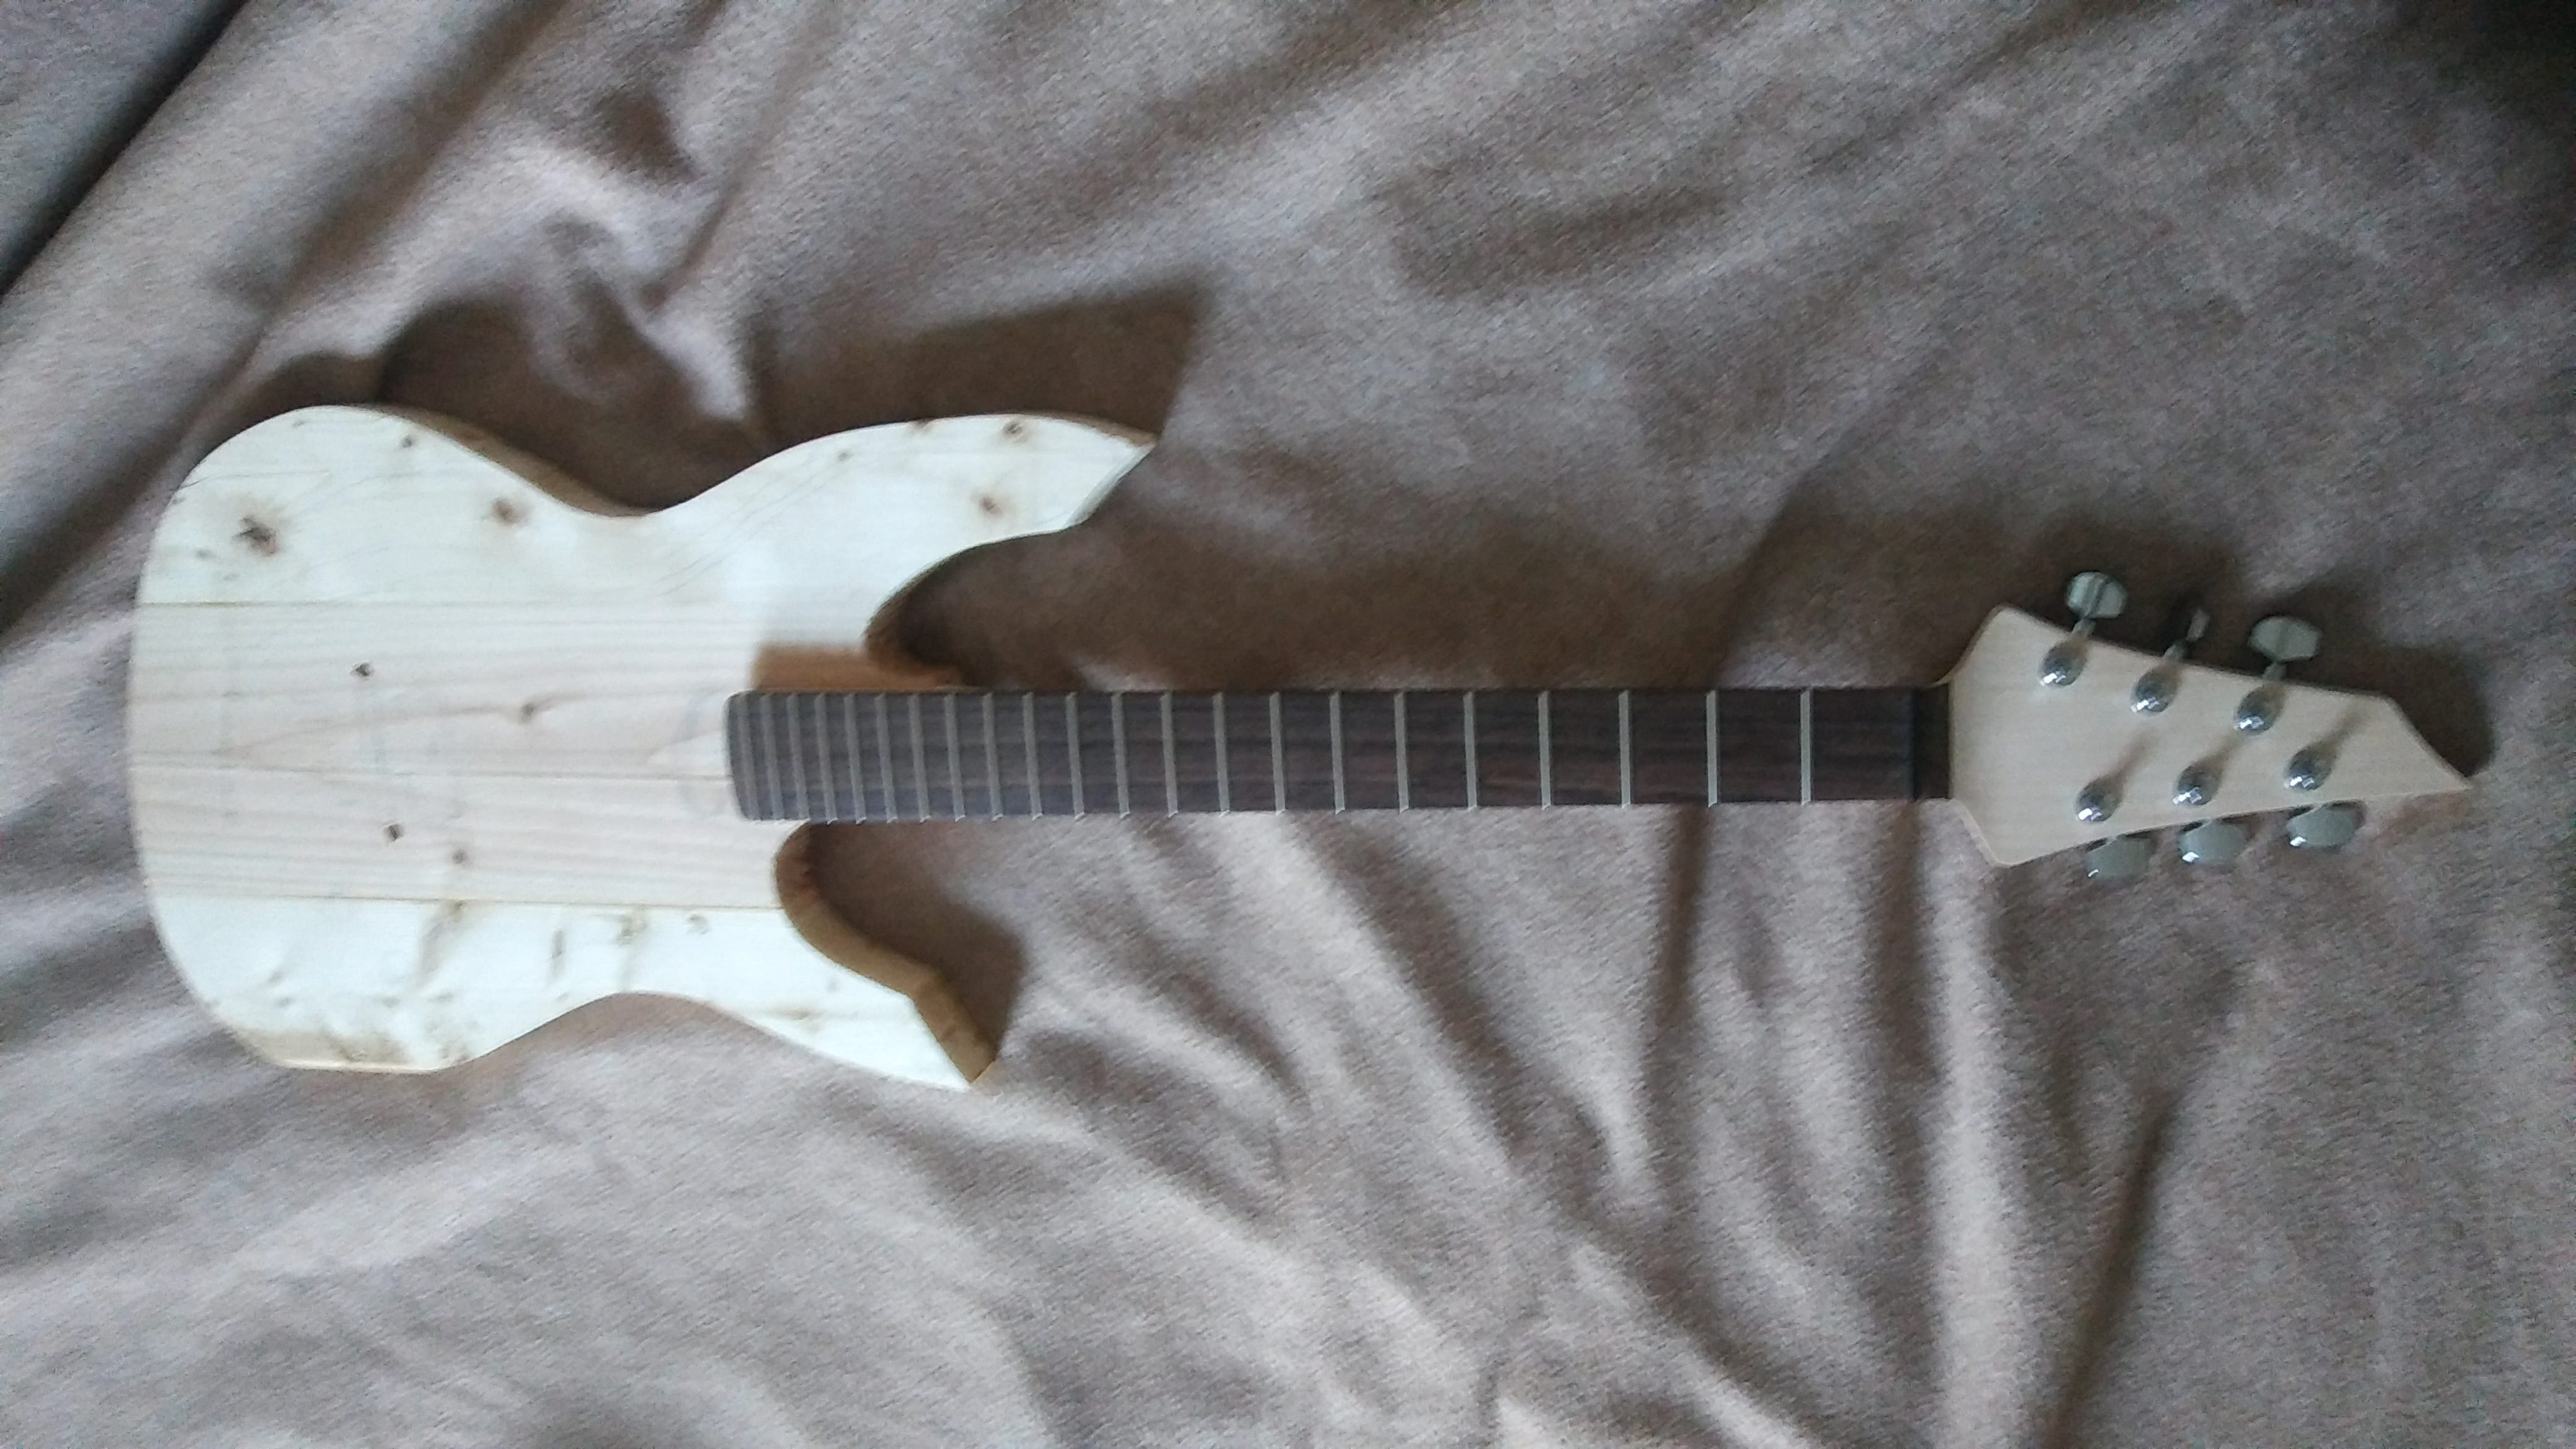
Anyway, I took some pictures of the finished guitar.
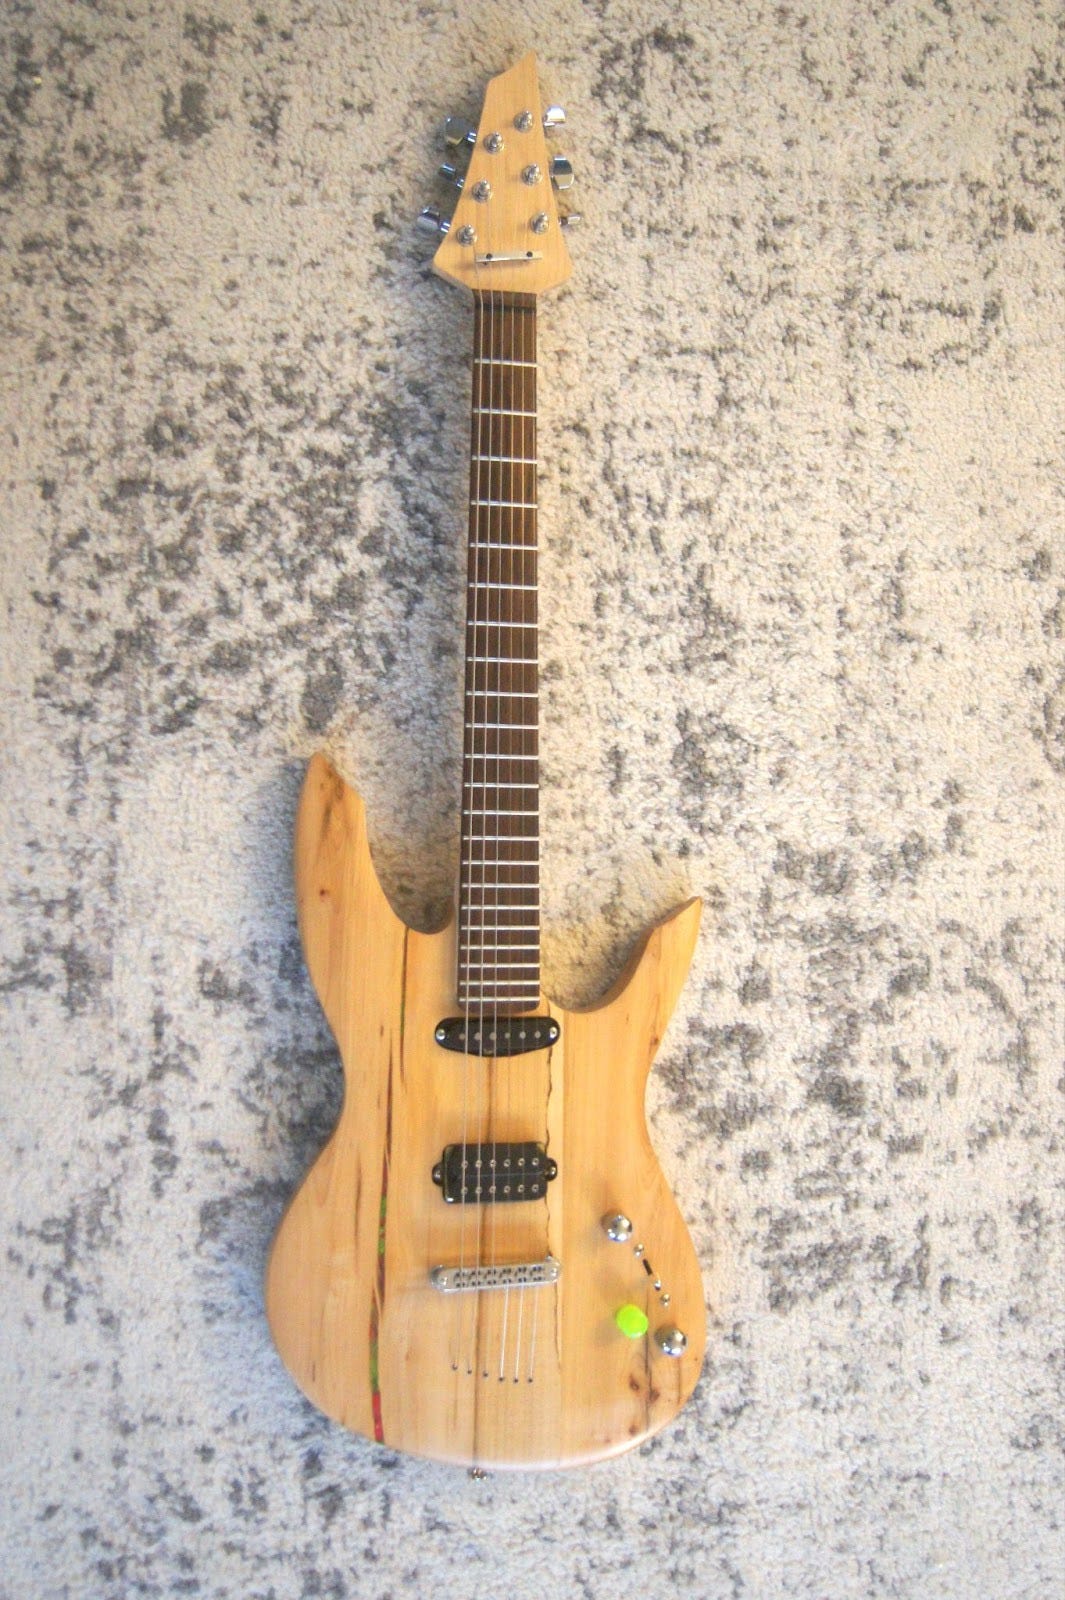
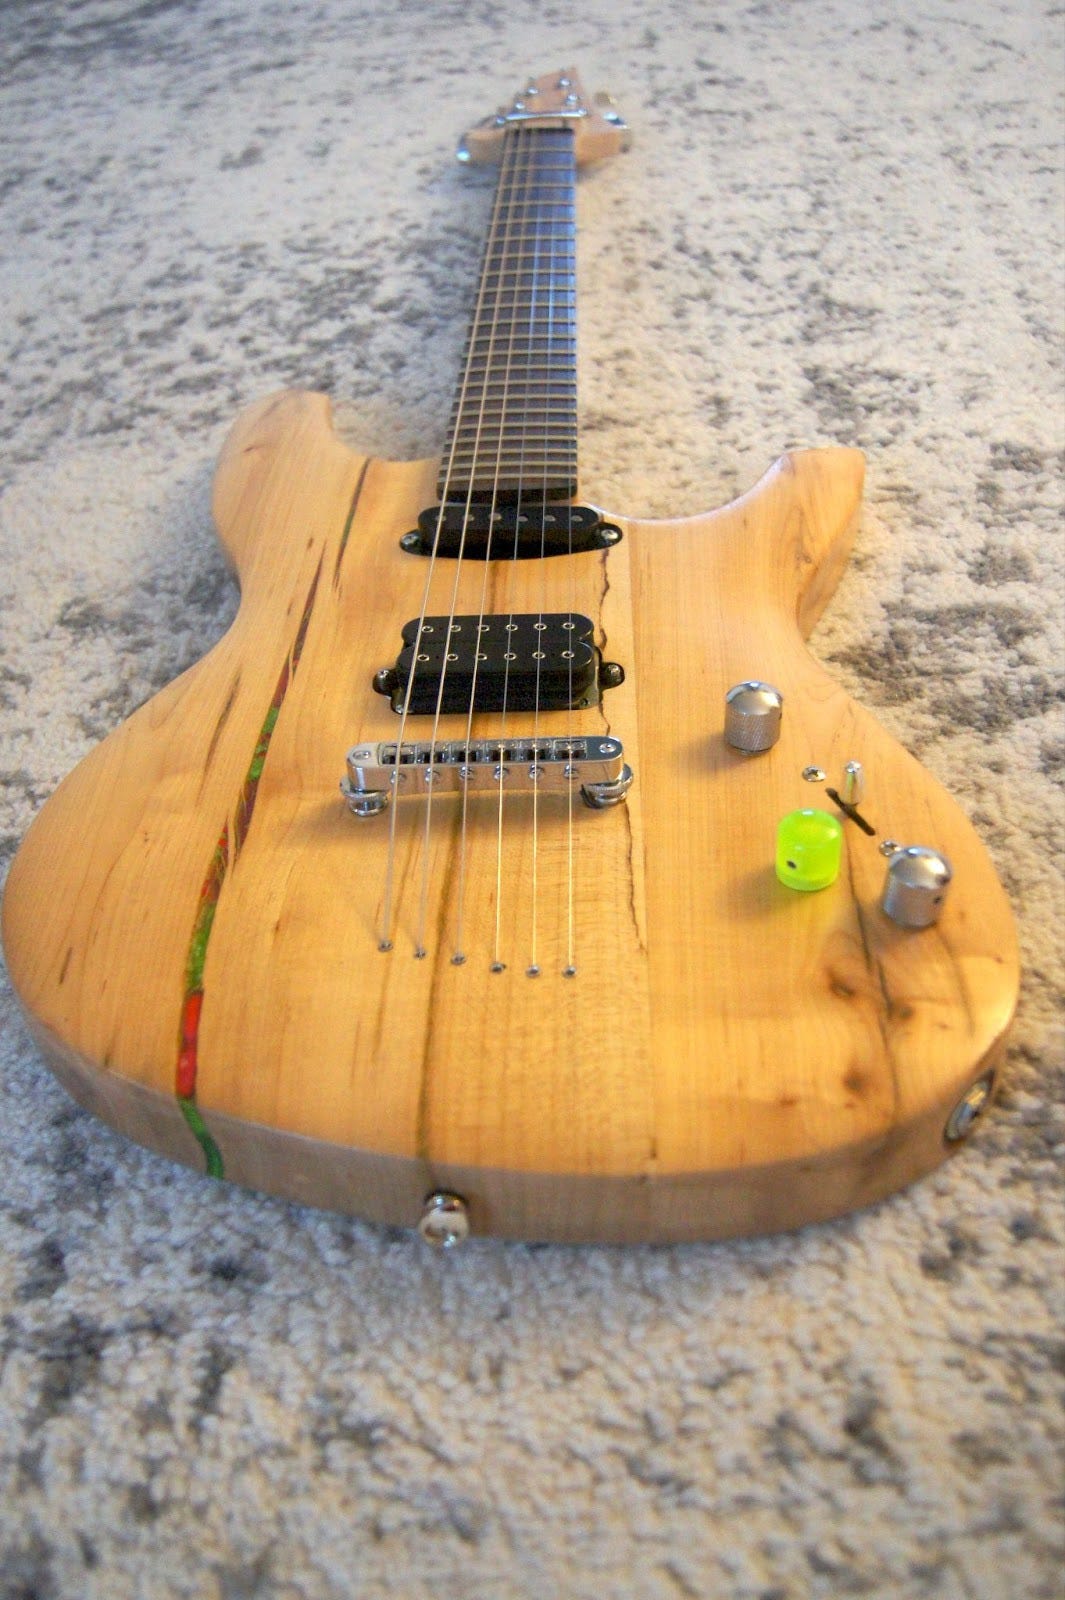
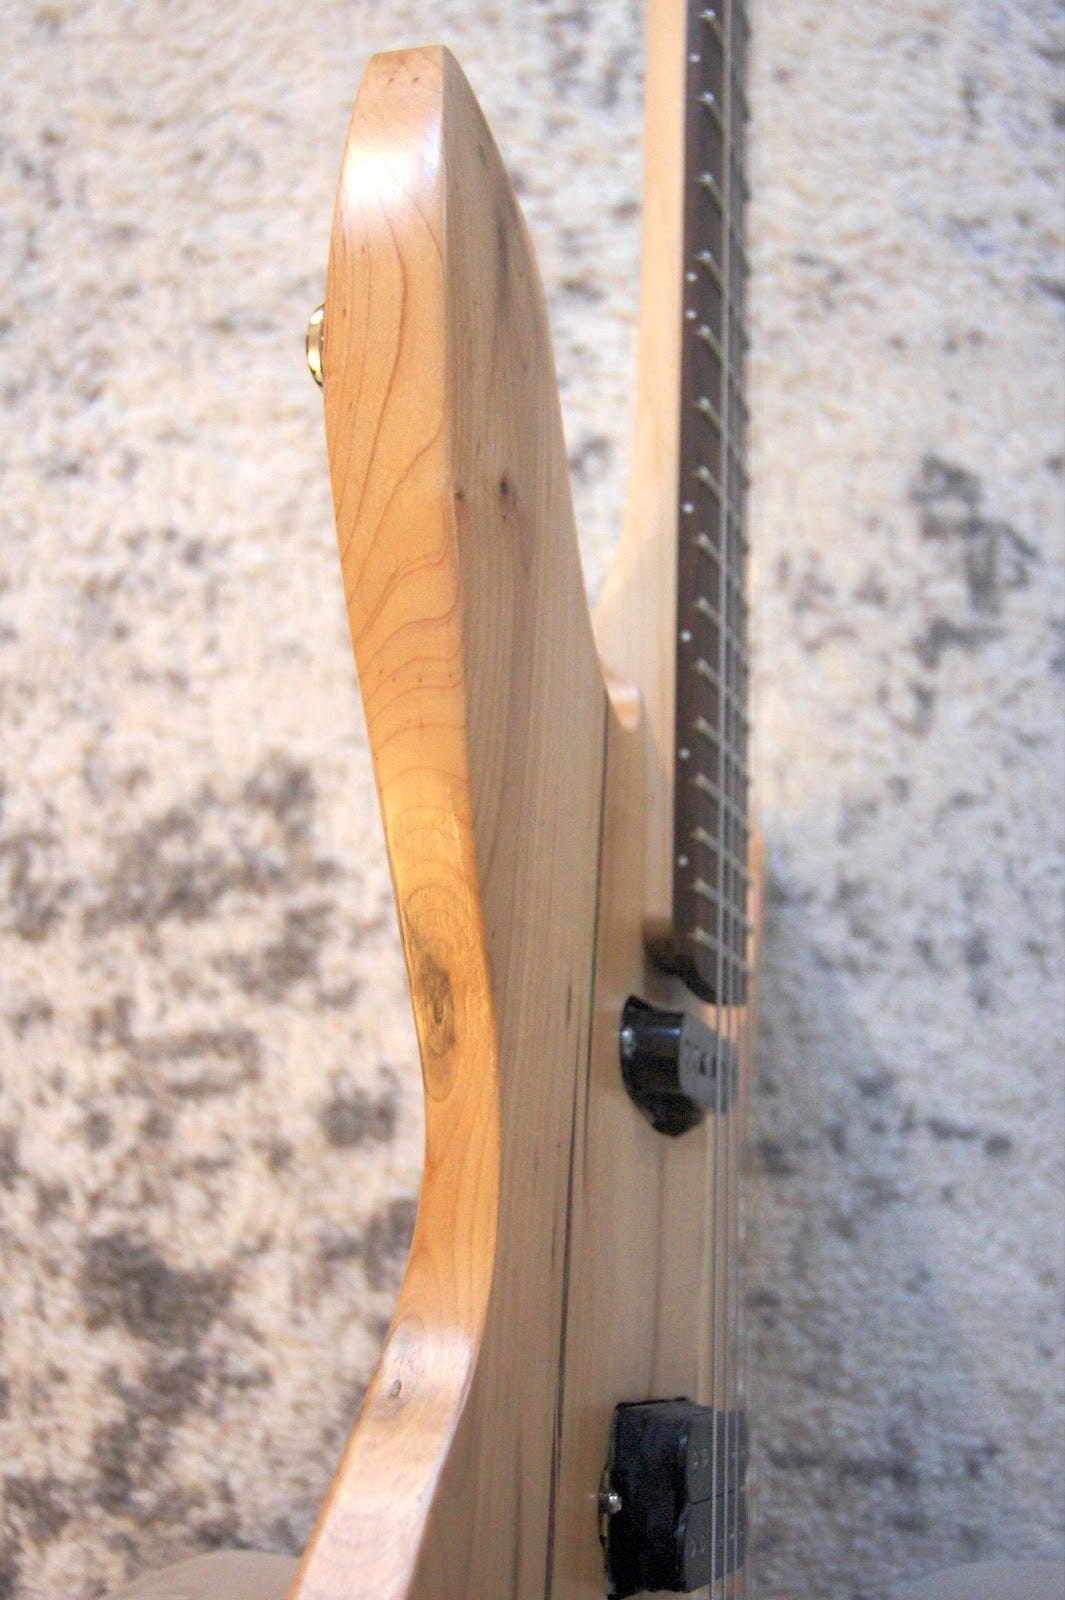
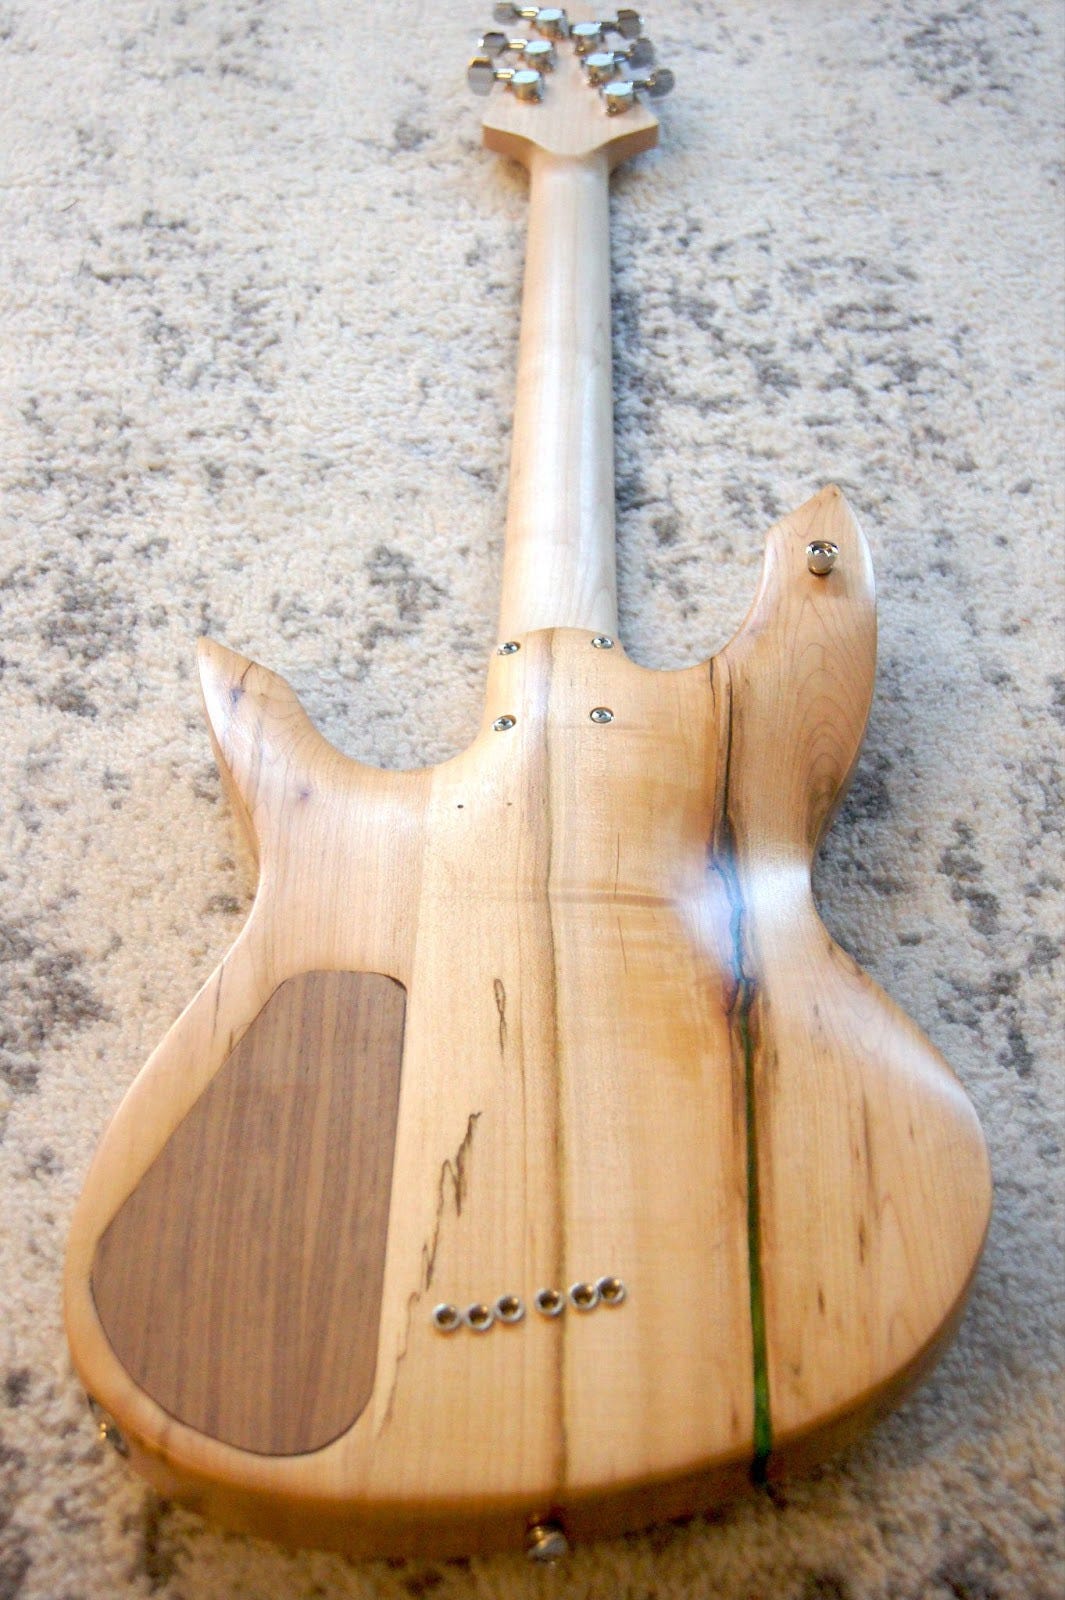
Chapter nine: Y’heard
I’ve told you how the guitar was built and showed you how it looks, but most important is how it sounds. I am still discovering new tones I can get out of this guitar, and if you go to the right place online you can find a demonstration I recorded showcasing a handful of its voices, but here is a quick description of what it can do.
The piezo setting doesn’t sound indistinguishable from a mic’ed acoustic guitar, but it has a definite “acoustic” tone that you can’t get from magnetic pickups. The bridge magnetic pickup delivers on round, non-nasally-ness when clean, while still providing screaming oomph when distorted. The neck pickup has exactly that cool crispness I was looking for. Turning down the tone gives me a nice warm jazzy sound no matter which of the magnetic pickups I’m switched to. The sustain in general is terrific, and invites legato playing (this is a method of playing that mostly uses the left hand to both fret each note and cause the string to vibrate, thus allowing very fast runs of notes that flow one to the next without much punctuation). In the upper register especially you can hear the shimmering sympathetic chimes resulting from the string-through design, accentuated even further by the piezo.
Second most important from how the guitar sounds is how I feel playing it. This is even harder to describe in words than the sound, but to give you some idea, it took me nearly a month to sand and applied finish to the guitar after the cover place was on it. Not because I didn’t want to finish it, but because if I had free time with the guitar at hand, I wasn’t been able to resist playing it instead of working on it.
Conclusion: What was building my own guitar
actually like, how did a cheapskate like me
afford it, and how did it change me?
From reading this you might get the impression that I just started building the guitar and things kept moving at a consistent pace until I was done, but if that’s what you think then I have failed to convey what the experience was actually like. It was built in fits and spurts, sometimes with weeks of inactivity between build sessions (each of which lasted anywhere between a few minutes to half a day), in which advancement–sometimes minuscule, sometimes momentous– was made.
From picking out the slab of maple in Ed’s garage to having the finished guitar in my hands took a little over a year, but actual man-hours, not counting learning or planning, was probably somewhere in the range of 80-100. In late May 2023 I started tracking how many minutes per day (rounded to the nearest 15) I was devoting to building the guitar, so that might give you some idea. Below is an excerpt from that graph:
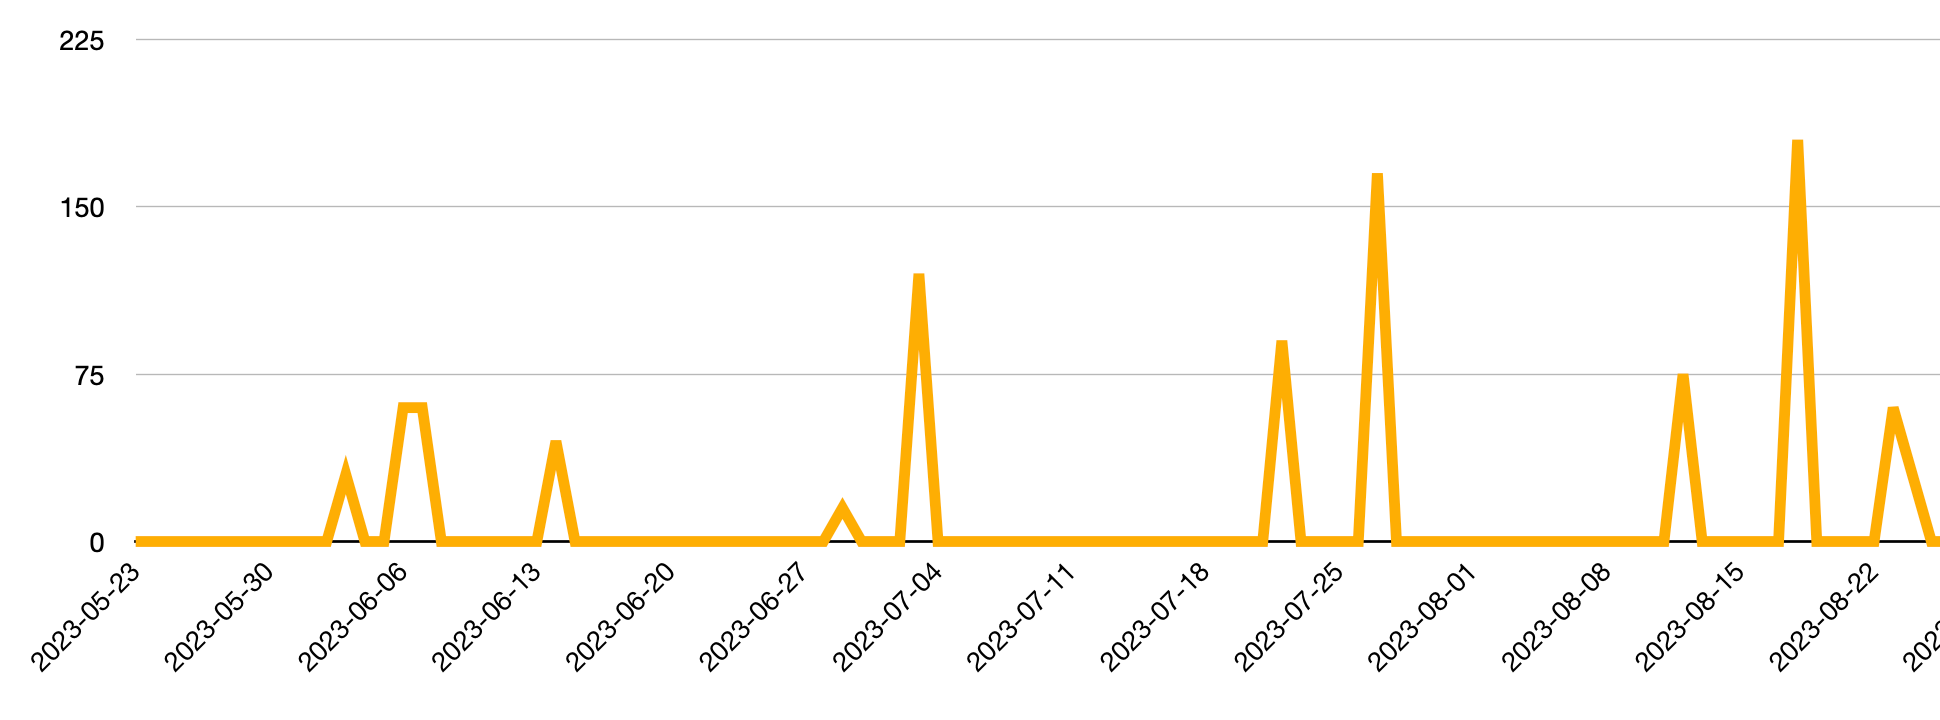
During the “downtime” periods between sessions I was often learning about this or that niche topic in guitar-building, usually associated with whatever step I was going to be on next or a few down the line. Then I’d think obsessively about that aspect of the guitar, and often it was the overwhelmingness of the intrusive thoughts that spurred me to put my foot down and carve out time for the next building session. Ed and I both have jobs, kids, wives, houses, and lots of other stuff going on in our lives, so it was easy for this project to fall through the cracks if I let it.
The guitar was built in fits and spurts as I said, but to make matters worse, I was somewhat dependent on Ed’s woodworking equipment, and often his expertise. My own router was weak and unreliable, I sold my bandsaw two houses ago, and I don’t own a drill press, a scroll saw, or a spindle sander–all tools that Ed had quality versions of in his shop and could offer expert coaching on how to use, which made the build go way easier. I did some things on my own, but probably >75% of the actual woodworking got done in his basement shop. (I jokingly referred to these sessions sometimes as “Shop Class With [Ed’s real name]”.)
Several people have asked me what skill level is needed to build a guitar. I think the answer depends on the guitar you’re building. I could have bought a kit that comes with all the parts and instructions on how to assemble them, in which case all I’d need to know is how to read, and how to operate a screwdriver. I could have bought a neck with a pre-cut headstock. I could have used a bridge that sits flush against the guitar, like on a Fender Stratocaster, and thus avoided having to angle my neck. I could have not included a piezo bridge, or even not included more than one pickup. I could have not carved the guitar. I could have planned my guitar with a pickguard that would conceal electronic components (which I could then have bought as one premade unit), rather than having to hide them cleverly inside a smooth uninterrupted exterior and solder them all together myself. Any of these alternatives, and many others I did not choose, would have simplified the build and required less skill, though in retrospect I don’t think it was skill so much as a willingness to learn, plan, and ask for help–and to take the time to do things properly–that allowed me to build the guitar I did.
There were some things I was able to do on my own at home–for example, much of the routing on the dummy body, some of the planing, most of the sanding, and most of the electronics work. For just about everything else, on days when Ed and I both had overlapping free time and managed to arrange a session, we’d head down to his basement shop where either he’d make himself available “just in case” while working on his own projects nearby, or supervise, or sometimes actively assist me in various tasks. On very rare occasions Ed would offer to put fine touches on a template edge or redo a solder for me or something like that and if I was feeling particularly shaky-handed that day I’d consent, but I am pleased to be able to confidently say this guitar was truly built by me.
Which isn’t to say I did great at it. Although I detailed a couple of the annoying hangups and mistakes and slip-ups and laborious corrections, there were more than I had energy to include in this essay. For example, a big one involved the holes I’d drilled in the body (the real, final one) for the neck screws. I’ve lost enough sleep over it that I don’t want to rehash it any more, but suffice it to say that it was an ordeal, a slow-motion trainwreck that caused me to wonder whether I’d be better off starting with a new body entirely.
Aside from the whir of machines, it was often quiet in Ed’s shop as I explained (based on my obsessive reading and planning) what we needed to do next, and we calmly discussed how to approach it or how it might be done easier or more reliably or with greater precision. And then at the end of each session there was giddiness as pictures were taken and I gathered my stuff and rushed back across our yards before I had to pick up kids or cook dinner or whatever. I am massively indebted to Ed for all his help and guidance, and the case or two of beer I surprised him with along the way don’t feel like anything close to making it up to him.
***
The total cost of parts and materials was somewhere close to $700. I’m proud that, as was my goal, I didn’t dip much into my bank account to pay for it.
If you were to create a pie graph representing where the money for my guitar came from, about a third of the total cost would be labeled “bank account: fun budget”, my personal portion of which I’d massively underutilized over the previous years anyway. The other Pacman-shaped part of the graph would be labeled “participating in medical experiments”.
Now, this wasn’t the cartoon version of medical experiments where I show up at a lab and get injected with strange new drugs that turn me different colors and produce growths on my skin, though that would be funny. The boring reality is this was mostly answering online surveys, participating in some computer-based activities that evaluate things like short-term memory, and occasionally being interviewed over the phone by grad students. One time I did actually go to a lab where they drew a few tablespoons of blood.
I found most of these opportunities through Researchmatch.com. Most of the opportunities pay nothing and so I skip them, but occasionally one pays $5 here, another pays $15 there, and once I hit the jackpot and passed the screening for a longitudinal study that paid $60 for each repeating 40-minute session plus another $75 for the 1-hour onboarding interview. Cha-ching!
Aside from not going over my “fun budget”, there was a certain satisfaction in knowing that building this guitar made no noticeable impact on my bank account, allowing me to remain a spendthrift while still getting a quality thing of considerable value. (For comparison: a couple guitars with similar specs as mine, the Godin Flat Five and the Schecter C1 E/A, cost on average about $1100 and $800 used, respectively, according to a popular musical instrument retail website.) Plus I gained some new skills along the way.
***
The most personally significant aspect of the build, and what most moved me to write about it, was how it crystallized some of my own values with respect to things like creativity, self- expression, and consumerism.
Inevitably we derive some of our sense of identity from the objects we own and use, as well as from comparing these to objects owned and used by other people. In an age of mass production, in which even beautiful personal objects can also be commodities, it is easy for this object-to-identity phenomenon to bleed into group membership and even tribal affiliations. Perhaps this is inevitable to some degree, but commodification accelerates it. Devotees of one brand or variation of an object will sometimes jokingly disparage devotees of a competitor or alternative object, but deep down the disparagement is an artifact of real feelings, and sometimes it’s no joke at all. I assure you that somewhere, at some point, a Coke drinker and a Pepsi drinker have, while both of them were cold sober, gotten into a fistfight about their respective choices of soft drink.
I was never too interested in participating in that kind of thinking and over recent years I’ve developed a sensitivity and aversion to it. Mass-produced cars, houses, home appliances, electronic devices, ideologies, and even mass-produced food are somewhat unavoidable features of American life, but to the extent it is feasible to steer clear from them, I am increasingly eager to put in the effort to do so.
Thus the activity of building my own guitar, which started from a place of fun- and novelty- seeking, skill-building, and thrift, ended up as an expression of my desire to break further away
from purchased and prefabricated identity. I was keenly aware, for example, that if I were to play my new guitar onstage, audience members–especially those familiar with guitars–would notice that my instrument was not interchangeable with any they’d seen, bore no logo or name on its headstock, and was quite clearly handmade: one of one, unaffiliated, and outside of genre. According to my personally considered tastes, requirements, and vision. It’s the same way I try to write songs.
Epilogue
One more thing I learned about myself during this guitar-building process was that I do not suffer from G.A.S. (Gear Acquisition Syndrome), a common affliction among musicians and, it seems, guitarists in particular. In fact, whenever there’s a piece of gear I’m interested in, I tend to look for at least one thing I can get rid of. The guitar I built had always been intended to replace rather than complement my cheap Ibanez, as indeed it did well before it was even finished.
However, during the build I also started mentally juxtaposing the new guitar with my SoT guitar. I began to notice the SoT’s relative heaviness, for instance, and its somewhat intractable quality problems became harder to ignore: while I’d done some work on the frets since receiving the guitar from China, it still had a couple “dead frets” that would sound buzzy and non-musical when played; and the tremolo bridge never quite operated smoothly, failing to return to its “home” position the way it should.
Around the same time, my feelings about headless guitars changed rather suddenly from “they’re dorky and gimmicky” to “they’re striking and elegant”. It helped that over the winter of 2022-23 I’d gotten into the music of Allan Holdsworth, one of the most legendary users of headless guitars; his playing is exquisite, explosive, and otherworldly – if I could pepper in a few more adjectives they would be astonishing, alien, and advanced – and he definitely had a big part in making headless guitars feel cool to me. A few other musicians like Susanna Risberg and even Jacob Collier dropped kindling on the “headless is cool” twigs as they smoldered.
I came to associate headless guitars with the same convention- and nostalgia-defying ethos I’d been guided by when building this guitar, and by the time the guitar was finished I’d gotten it in my mind that at some point I’d like to replace my SoT with a headless–an instrument I expect to also build myself. Right now my opinion is that Strandberg makes the most gorgeous guitars in production, headless or otherwise, and if I were to start building a new one today I’d probably steal borrow a few of Strandberg’s design elements, maybe even just straight-up buy a Strandberg neck and hardware.
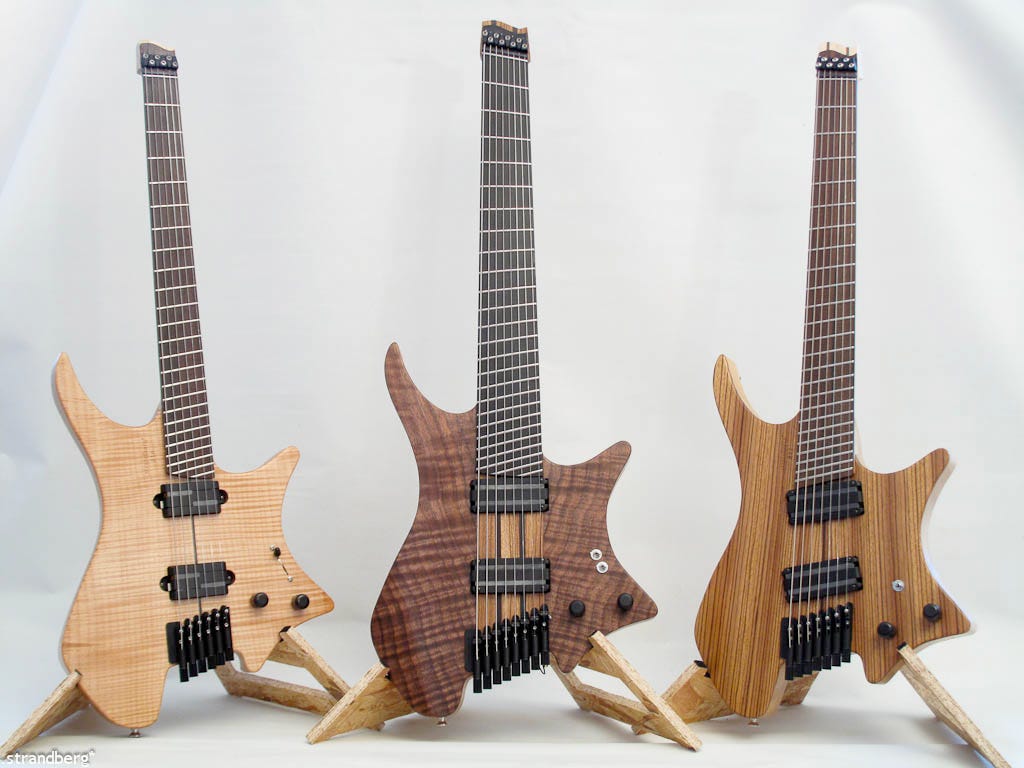
Credit: https://ctm.parsons.edu/wp-content/uploads/2013/09/strandberg.jpg
When the time comes, I am somewhat sure my next guitar will be faster and easier to build. Aside from headless bridges and string anchors, there aren’t any bits and pieces I won’t have encountered before, and I won’t have to carve another headstock!